
Garden Basics with Farmer Fred
Tips for beginning and experienced gardeners. New episodes arrive every Friday. Fred Hoffman has been a U.C. Certified Master Gardener since 1982 and writes a weekly garden column for the Lodi News-Sentinel in Lodi, CA. A four-decade fixture in Sacramento radio, he hosted three radio shows for Northern California gardeners and farmers: The KFBK Garden Show, Get Growing with Farmer Fred, and the KSTE Farm Hour. Episode Website: https://gardenbasics.net
Garden Basics with Farmer Fred
201 Garden Basics Greatest Hits, Vol. 2
Use Left/Right to seek, Home/End to jump to start or end. Hold shift to jump forward or backward.
Welcome to Garden Basics Greatest Hits, Volume 2. This episode features the Top 7 most listened to segments of the last 100 episodes, from Episode 100 to Episode199, as determined by you, the listeners, my garden-loving friends. Topics include tomatoes (of course), berries, garden design, composting, soils, and the benefits of mulch.
Time flies when you’re having fun, and we are having a blast, bringing you great gardening advice and information (and maybe a chuckle or two) twice a week, since April of 2021.
So, Thank you so much for hitting the play button, week after week.
We’re podcasting from Barking Dog Studios here in the beautiful Abutilon Jungle in Suburban Purgatory. It’s the Garden Basics with Farmer Fred podcast, brought to you today, as always, by two garden companies who have stuck by me throughout all these gardening broadcast and podcast adventures, Smart Pots and Dave Wilson Nursery. And since this is a rather special episode,we will attempt to do it all in under 60 minutes. Let’s go!
Live links, product information, transcripts, and chapters available at the new home site for Garden Basics with Farmer Fred, GardenBasics.net.
Links:
Subscribe to the free, Garden Basics with Farmer Fred Newsletter , “Beyond the Basics”
Smart Pots https://smartpots.com/fred/
Dave Wilson Nursery https://www.davewilson.com/home-garden/
Listen to the full podcasts from today’s compilation of greatest hits of Episodes 100-199:
174 Spring Garden Tips, Live!
191 Prune Tomato Flowers? Tips for a Sustainable Food Garden
183 First Garden? A Checklist.
182 Growing Raspberries, Boysenberries, Blackberries
177 Best Tomatoes for Containers. The Call Garden.
185 What’s Lasagna Gardening? Potato Planting. Fruit Trees vs. Lawns
157 Composting Tips. The Cyclamen.
Book: Grow Now by Emily Murphy
As an Amazon Associate, I earn from qualifying purchases from possible links mentioned here. And thank you for listening.
Thank you for listening, subscribing and commenting on the Garden Basics with Farmer Fred podcast and the Beyond the Garden Basics Newsletter.
GB 201 Garden Basics Greatest Hits, Vol. 2, TRANSCRIPT
Farmer Fred
Garden Basics with Farmer Fred is brought to you by Smart Pots, the original lightweight, long lasting fabric plant container. it's made in the USA. Visit SmartPots.com slash Fred for more information and a special discount, that's SmartPots.com/Fred. Welcome to the Garden Basics with Farmer Fred podcast. If you're just a beginning gardener or you want good gardening information, you've come to the right spot.
Farmer Fred
Welcome to Garden Basics Greatest Hits, Volume 2. Time flies when you’re having fun, and we are having a blast, bringing you great gardening advice and information twice a week, since April of 2021. This episode features the Top 7 most listened to segments of the last 100 episodes, from Episode 100 to Episode199, as determined by you, the listeners, my garden-loving friends. Thank you so much for hitting the play button week after week.
Over the last 40 years of doing garden shows on Northern California radio stations as well as the Garden Basics podcast since the great Covid lockdown, I have enjoyed talking to some of the most knowledgeable garden experts in the country, especially my local gardening friends, people like our favorite retired college horticulture professor, Debbie Flower, nursery owners Don Shor, Chris Aycock, Juliet Voightlander, and Julia Oldfield, soils expert Steve Zien, Master Gardeners Pam Bone, Gail Pothour, Lori Ann Asmus and Quentyn Young, fruit tree experts Phil Pursel, Tom Spellman and Ed Laivo, UC Davis Arboretum Superintendent Emeritus Warren Roberts, Master Rosarians Charlotte Owendyk and Debbie Arrington, our favorite rose expert slash bug expert, Baldo Villegas, outdoor power equipment shop owner Brad Gay, fellow garden podcaster Marlene Simon and so many more, friends who I’ve just ticked off because I forgot them.
(barking dogs) Oh, yeah, let’s not forget the yappy mascots of Barking Dog Studios, the household rescue pups, the brother and sister snack seeking team of Salty and Pepper. And just like on the big award shows, I would like to thank my accountant, who has been with me since the Carter administration, who happens to also be my wife, Jeanne.
We’re podcasting from Barking Dog Studios here in the beautiful Abutilon Jungle in Suburban Purgatory. It’s the Garden Basics with Farmer Fred podcast, brought to you today, as always, by two garden companies who have stuck by me throughout all these gardening broadcast and podcast adventures, Smart Pots and Dave Wilson Nursery. And since this is a rather special episode, featuring very popular chats about tomatoes, berries, garden design, composting, soils, and of course, mulch, we will attempt to do it all in under 60 minutes. Let’s go!
=================================
From Ep. 174: Spring Garden Tips, Live!
Farmer Fred
It's Garden Basics, The Greatest Hits Part Two, the most listened to segments between episodes 101 and 199. No surprise that on several of the segments that we'll be playing for you today, they feature America's favorite retired college horticultural Professor, Debbie Flower. Debbie is here to talk a little bit about each of these outstanding episodes that got listened to by you. And thank you so much for listening. And by the way, if you care about statistics, it's all about downloads, unique listeners and time consumed listening. So thank you for that again. Debbie, one of the episodes that got a lot of listeners was the episode that we recorded live at the Folsom Garden Club a few months back. And that was quite the experience.
Debbie Flower
That was fun. It was fun. It's fun to be in front of a live audience.
Farmer Fred
And they had questions, we answered their questions and we prattled on about spring garden tips. Yes. And I wonder which one stuck with them?
Debbie Flower
We don't know a good question. Yeah.
Farmer Fred
What would you say would be the one spring garden tip that you would want them to remember?
Debbie Flower
I want to say mulch. Mulch to conserve water. Mulch to improve your soil. Mulch to keep your weeds down. It's so useful unless you're growing a cactus garden or Alpine garden. It's so useful. It does so many wonderful things for the garden. In spring, when it's still comfortable outside. Temperature wise, humidity wise, whatever, in your part of the country, is a good time to apply that mulch.
Farmer Fred
Spring garden tips live. Let's give a listen.
Farmer Fred
All right, that brings up a very good point about a spring garden chore that you all should be doing to preserve more soil moisture because who knows where the next step in water restrictions is going to be. Probably going from two days a week to one day a week would be my guess. But you can train your soil to retain more water and so it will be happy with one irrigation a week, maybe even less. And that's by a combination of adding compost to your soil and then mulching the top with several inches of an organic mulch. What are some of your favorite mulches?
Debbie Flower
I chase down arborists. I woke up one morning and heard a saw. "Okay, that's a saw." Heard it again. "Yeah, that's a chainsaw." Then I heard the chipper go, I jumped out of bed, made myself presentable, got in the car and drove around the neighborhood till I found the arborist and said, "can I have those chips?" and I have a place in my yard where they're piled. I have a pile right now and I move them around. I've done this for many years, there are certain plants I cannot grow because my soil is so water retentive. So that's something to consider,
Farmer Fred
You came to brag.
Debbie Flower
And I lost some things to it's called Phytophthora. It's a disease that builds up in moisture, it's a disease in the soil that enters the plant, when moisture is around like the trunk of the plant, I lost some California, wax Myrtles. To fight off throw because of my mulching practice, mounds would help that if you have things that you want to. I have a Ceanothus, but it's on a mound. So it's doesn't get the mulch around it. So you have to think a little bit differently. But I spread it every year and weeding, take those weeds out, take those things out that are sucking up the water, did a lot of that this weekend, and then put the mulch down. If you are a pre emergent user, this month is the month to use to apply the spring preemergent, I would put that on first and then the mulch on top of it.
Fred
My neighbors love me, because every fall November, December, I knock on their door and I say can I rake up your oak leaves for you? And they go, why are you crazy? Yeah, go ahead. Sure. Well, I do I gather up all the oak leaves in the neighborhood. I put them in a metal trashcan. Remember the metal 32 Gallon Trash cans, they're still for sale, and I will fill it halfway. Then I will stick my string trimmer down there and grind up the leaves. Or I'll take my mulching mower and run over those leaves making them more fine particles. And that's my mulch. I will put that six, eight inches deep on top of all my raised beds and let it stay there all winter. It feeds the soil as it breaks down. It keeps the soil warmer, it does a whole host of good.
Debbie Flower
When rain comes down on bare soil, it's so powerful that it can cause soil compaction. So if you cover it with something, you don't get that soil compaction
Farmer Fred
and it's building up better soil biology to all the little critters in the soil that are actually feeding your plants. I think this is one reality that more and more people are coming to see, is that you don't feed your plants. You feed the soil. and then the soil feeds the plants. there's a lot of mycorrhizal activity down below the root level where these critters are taking the nutrients from the soil, converting it into a way that the plant roots can assimilate. And by encouraging more mycorrhizal soil activity by feeding your soil on a slow, regular basis with something like a mulch. you're improving your soil 100%.
Debbie Flower
And then if you go dig in it, if you've done the mulch and you dig in it and you turn it over and there's white stuff. That's the beneficial fungus. Don't freak out. That's good stuff.
=================================
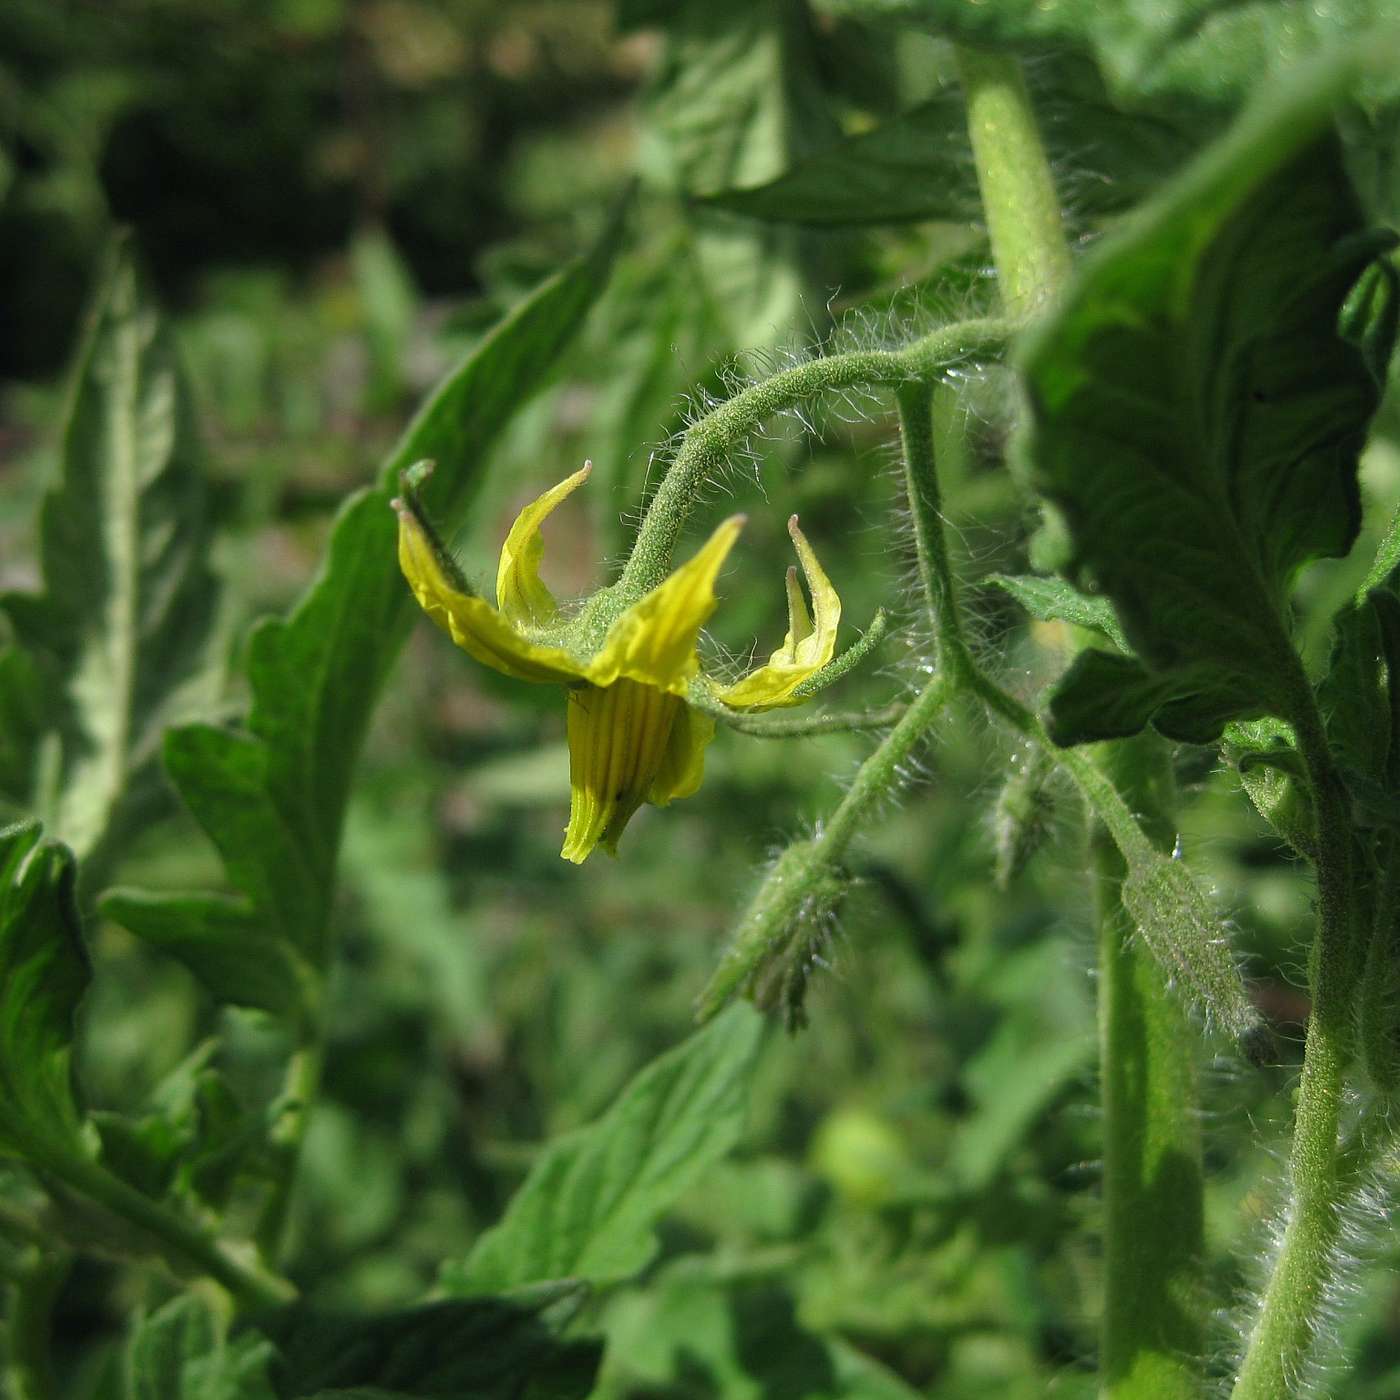
From Ep. 191: Prune Tomato Flowers?
Farmer Fred
To no one’s surprise, many of the top-listened to segments over the last 100 episodes had to do with tomatoes. In many situations, the tomato questions we get here require us to dispel some popular myths that circulate through social media and the internet every spring. And the myth that seems to circulate the most in the spring regarding tomatoes, has to do with the alleged benefits of pruning tomato plants, soon after planting time. Should you be picking off tomato flowers in spring, should you be pruning back the plant in order to get a bigger crop down the line or to get tomatoes sooner? One of our favorite myth busters on the podcast is Sacramento County Master Gardener and vegetable expert Gail Pothour. Her answer? A rousing, it depends.
Farmer Fred
George writes in to Fred at farmerfred.com and asks, "Does picking off the immature flowers encourage or discourage future crop production of tomatoes? The tomato plants are six inches tall." We get this question every spring. People read somewhere, usually it's online, that picking off the early flowers on a tomato plant will give you more tomatoes later on. True or false?
Gail Pothour
It depends. If you're growing a determinate tomato and you start picking off the flowers, you're going to be reducing your yield because determinate tomato varieties only have a certain number of flowers that they produce. It depends. I personally would pick off flowers on a small plant like that. But once they're transplanted in the garden, I would not pick off flowers at all. Indeterminate varieties are going to grow until frost kills them or disease kills them. And so you're going to have a plethora of flowers and fruit anyway, so I don't think there's any reason to pick them off. If the plant is small, like if you started from seed, and it's now in a four inch pot, in order to encourage the root system to really grow, and it has flowers on it, I would take them off. But generally a plant that small won't have flowers yet, and they're going to have to be a little bit taller before they start getting to the flower production stage.
Farmer Fred
I have heard and seen on the internet, people who talk about pruning the flowers off tomatoes, for staking purposes, if they're tying it to a single stake, but everything I've read about that seems to imply that way you'll get earlier tomatoes, not necessarily more tomatoes, and you look at the research from places like Cornell University, and they just say, Well, if you cut off the flowers, you're gonna have fewer tomatoes.
Gail Pothour
Right. Typically what I have read on the internet about pruning tomato plants is more of pruning the foliage. If you're growing on a stake or something like that, you don't want to have this huge, robust indeterminate plant that would take over your yard supported by a single stake. And so you start pruning some of the branches. We have not done that out here, we prefer to grow them in a tomato cage, and let them just grow rampant. The only time we do any pruning of foliage is anything that's touching the ground. So we'll prune off any leaves or branches that are down touching the ground. And if we have a variety that is super dense, and you can hardly get inside to get the fruit, we might do a little bit of pruning that way. Towards the end of the season, in August or so, we'll start pruning the tops of the plants. We don't want it to set more fruit, if it's August pushing into September. We want all the energy going into ripening the fruit that's already on there. So we'll give them a hair cut along the top. Our plants won't stay in much past September, early October anyway.
Farmer Fred
Again, that's pruning off stems in order to halt new production in late summer. The other thing about removing foliage too, you don't want your tomatoes exposed to the full sun, especially here in California, especially if they are South facing or west facing sides of the tomato. They can take a beating if there's no foliage to protect them.
Gail Pothour
That's absolutely correct. A lot of the information that I find on the internet even if it's from university sites, are based on the East Coast where they don't have the intense sun that we have. So in the Sacramento area, because our summer afternoon sun is so intense and we have a lot of heat, we need as much foliage as we can to protect the fruit. A lot of the fruit will be outside the cages, so it's good to have the extra foliage. I have even provided shade cloth occasionally.
Farmer Fred
So George, there you go. Don't cut off those flowers, put those shears away.
==============
Smart Pots!
Farmer Fred
You’ve heard me talk about the benefits of Smart Pots, the original, award winning fabric container. Smart pots are sold around the world and are proudly made, 100%, here in the USA. Smart Pots is the oldest, and still the best, of all the fabric plant containers that you might find. Many of these imitators are selling cheaply made fabric pots that fall apart quickly. Not Smart Pots. There are satisfied Smart Pot owners who have been using the same Smart Pots for over a decade, actually approaching 20 years. When you choose Smart Pot fabric containers, you know you’ll be having a superior growing experience with the best product on the market. And your plants will appreciate Smart Pots, too. Because of the one million microscopic holes in Smart Pots, your soil will have better drainage, and the roots will be healthier. They won’t be going round and round on the outside of the soil ball, like you see in so many plastic pots. The air pruning qualities of Smart Pots create more branching of the roots, filling more of the usable soil in the Smart Pot. Smart Pots are available at independent garden centers and select Ace and True Value hardware stores nationwide. To find a store near you, or to buy online, visit smart pots dot com slash fred. And don’t forget that slash Fred part. On that page are details about how, for a limited time, you can get 10 percent off your Smart Pot order by using the coupon code, fred. f-r-e-d, at checkout from the Smart Pot Store. Visit smartpots.com slash fred for more information about the complete line of Smart pots lightweight, colorful, award winning fabric containers and don’t forget that special Farmer Fred 10 percent discount. Smart Pots - the original, award winning fabric planter. Go to smart pots dot com slash fred.
======================
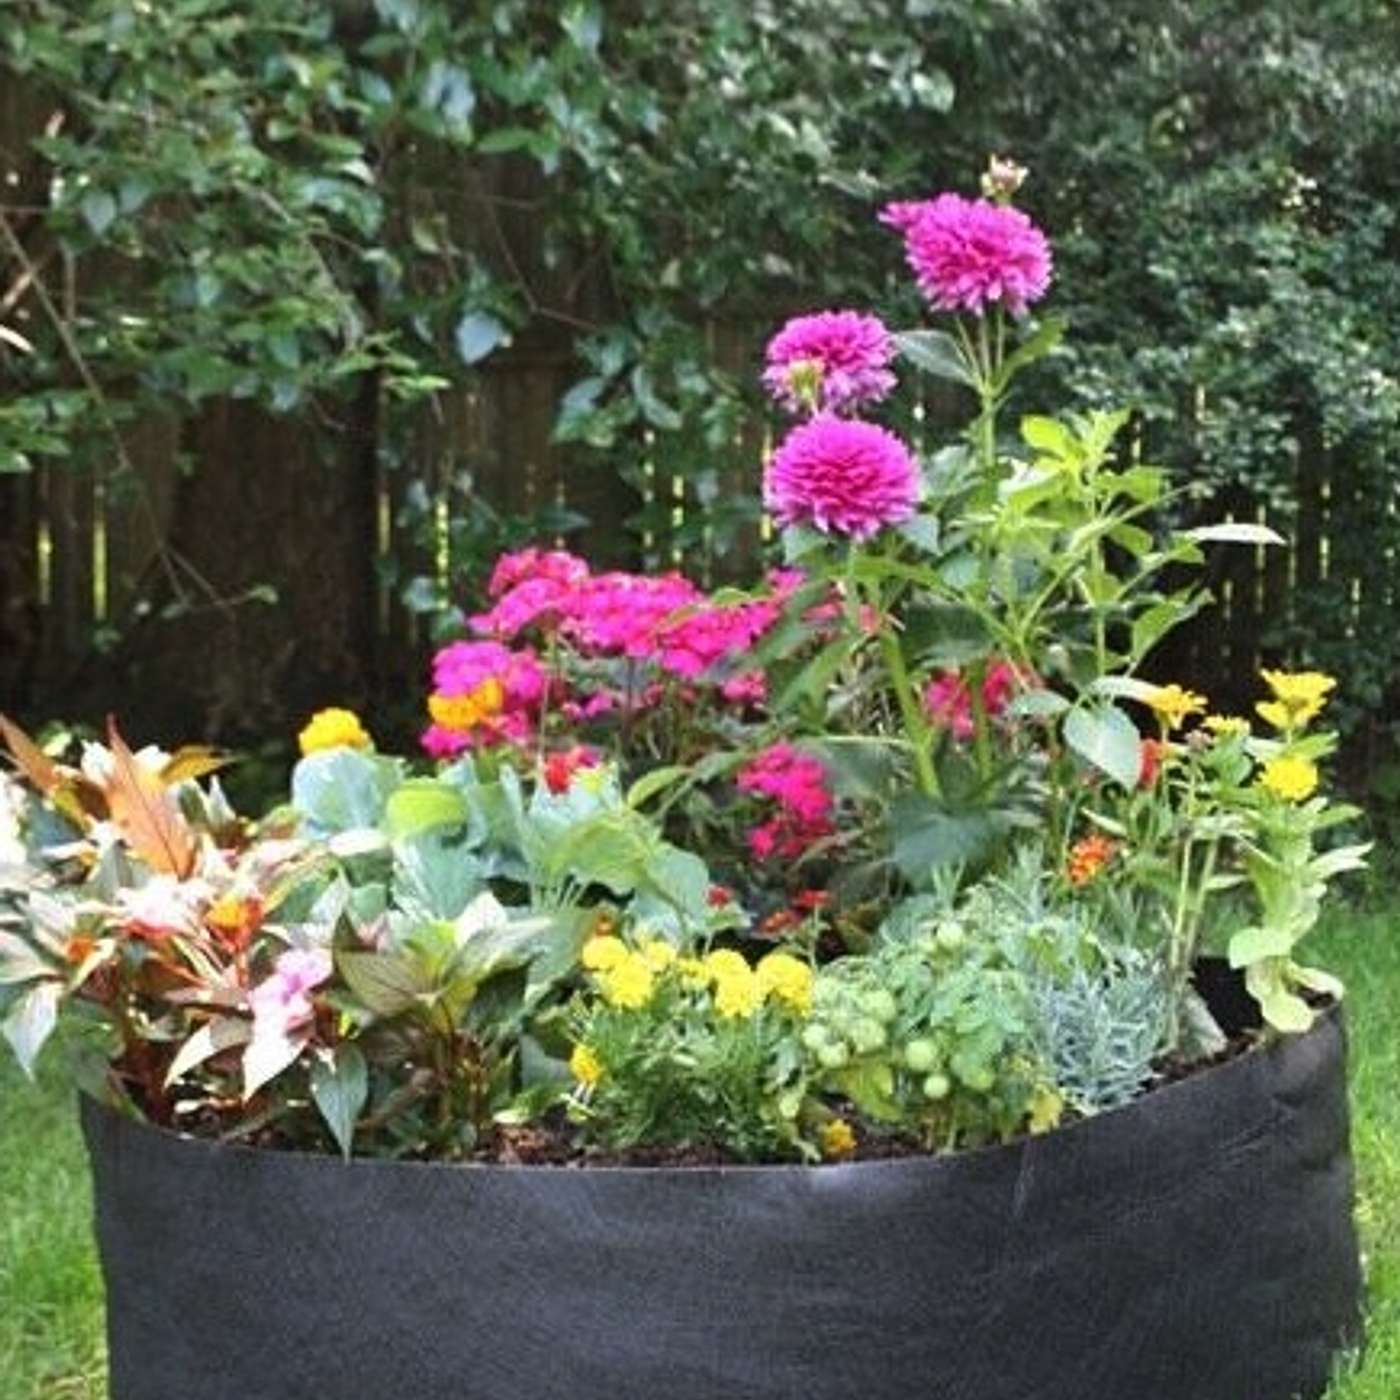
From Ep. 183: First Garden? A Checklist
Farmer Fred
You're listening to the Garden Basics with Farmer Fred podcast. And this is Greatest Hits Volume Two, where we take a look at the most listened to segments that occurred on episode 100 through 199. And don't worry, the podcast will be over before you have to go to bed. We hope. One of the segments featured, of course, Debbie Flower, America's favorite retired college horticultural professor. And true to the name Garden Basics, the topic for this conversation, Debbie, was starting your first garden, some pointers on that, right? If I could grab a beginning gardener and tell them anything, it would be: don't let your eyes get bigger than your tummy, right?
Debbie Flower
Start small. Start with a few things and observe the size of the mature plant. I've seen so many people who want a garden and they start a garden they go, they're very enthusiastic, it's wonderful to see and they bring home the tomato and the pepper and the squash and they put them all in about a square foot space. Well, in no time, they're going to overgrow each other. So know how big the plant is going to become when it is mature. And if you only get a height, assuming it will get equally as wide, and then space them so that they can have good airflow. So if they touch each other, it's just barely.
Farmer Fred
The other concept, And this is a radical concept, I realize: read the seed packet, or read the tag that comes with the plant, it'll tell you how far to space them apart.
Debbie Flower
It will it will at least tell you on a seed packet to plant the seeds a certain distance apart and then thin to a bigger distance apart. And that's how far apart they think the plants should be for good growth. Most gardens with summer plants need full sun. And make sure you have a good source of water.
Farmer Fred
The first garden. Let’s give a listen:
Debbie Flower
And if you're looking at landscape plants, rather than annuals, which are things you're going to grow from seed, you need to look at the size the plant is going to be when it's mature, that's typically on the tag. If not, you're gonna have to look the plant up and and find out how tall and wide it's going to become. Sometimes you only learn how tall it's going to become, then you assume it will be equally as wide, and then space them in the garden so that they will, at maturity, not run into each other. Maybe they'll touch. Then you have to decide, where is your path is going to be? Where do you want to be able to walk between the plants? Where can the plants touch, but you need to give them enough space to get big enough. A friend of mine is a landscape architect. And I asked her when I was teaching what, if there was one thing she could say to people when they are planting their gardens or yards, what would it be? And her number one thing was space the plants far enough apart. More problems are created by them being too close together than anything else. And I'm guilty of that as well, planting too close together. Because it's so easy to do. When you buy them they're so small and cute, and they look so pretty together. And having these wide spaces between them doesn't make a lot of sense, but space them for their health and for the future of your garden.
Farmer Fred
And not only is it healthier for the plant, it also can keep bad pests and diseases away, as well. Because when you cut down air circulation by planting too close together, especially if you live in an area of high humidity, you can have all sorts of disease issues that can be mitigated by allowing air to circulate freely through those plants.
Debbie Flower
Absolutely true. Yes.
Farmer Fred
And when you're walking around your yard, figuring out what you want to plant and where you want to put it. Go inside the house and look out the windows. And think about where you spend most of your time indoors, and which windows you're going to be looking out. And think about what you want to stare at for the rest of your life out those windows. And especially if you have a kitchen window, the vegetable garden, the fruit trees, the food products should be with an easy view of that kitchen window.
Debbie Flower
Yes, when I initially laid the hardscape in this landscape we're sitting in right now, the landscaper suggested putting the vegetable garden in a place I would not see it from the patio or any window and I said no, I have to be able to see it on a regular basis. So I tended to keep that in mind, too.
Farmer Fred
When you're planning the garden, do some sitting inside and look out and think about what you want to see that's out there. And remember that taller plants closer to your window may block the view of whatever's behind it. So if you want a complete view of the yard, if you're going to put in those trees or those shrubs, you may want to stick those further out so you can see the rest of your garden. Or, if you're trying to create some privacy, then you would want those taller plants closer to the window.
Debbie Flower
Or you can create outdoor garden "rooms". It makes your landscape feel bigger if you create where you can only see a small area, and then you have to walk around a plant to see the next area in your garden. Lots of different ways. I love the looking out the window idea as a way to design the garden. I don't necessarily want to see my neighbor's house when I look outside the window. And so I've done lots of view-blocking by planting trees and evergreen shrubs in places that will block those views.
Farmer Fred
When you're planning your garden, one thing to keep in mind is: "Where's the water faucet?" How big of a chore is it going to be to water that garden? And this is where planning may require some pencil and paper because you may want to lay out an irrigation system, perhaps even a drip irrigation system.
Debbie Flower
You may want that and in our dry California climate, that's almost a must. But I've lived in places that get rain year round, and in that case, we just needed to be near a hose bib. We still needed to be near that hose bib, instead of dragging it, you know, 50 feet across from the back of the garage over to the vegetable garden. So having that in place is critical.
=====================================
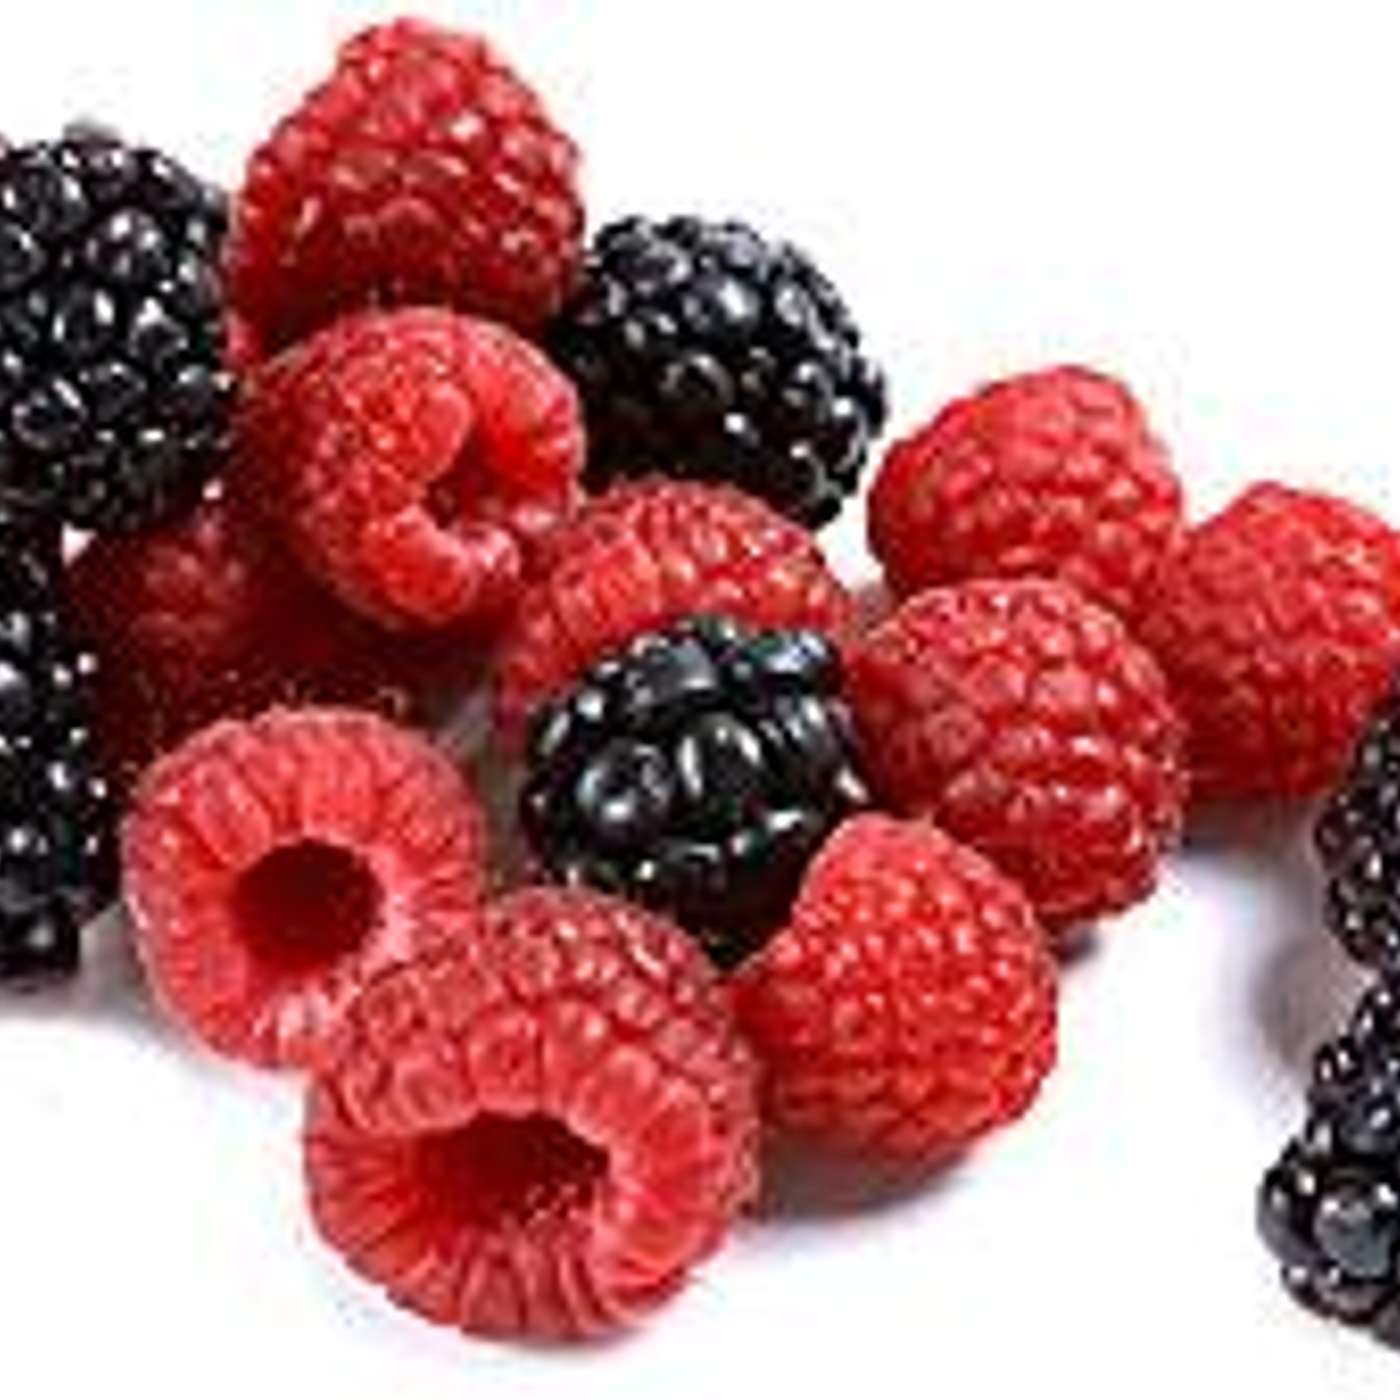
From Episode 182: Growing Raspberries, Blackberries, Boysenberries
Farmer Fred
Looking to grow a naturally sweet treat, a family of fruits that are also one of the healthiest to snack on. It’s berries, such as blackberries, blueberries, boysenberries and raspberries. No wonder that one of the most listened to episodes in the recent past is Episode 182 of the Garden Basics podcast, All About Berries. Sacramento County Master Gardener and long time berry grower Pam Bone took us on a tour of her backyard berry patch, where we lingered among the raspberries.
Farmer Fred
How adaptable are raspberries to the United States? Are there zone limitations?
Pam Bone
Well, some people would tell you that they can't grow raspberries in Sacramento that they have a really horrible time. We've been growing raspberries here at our house for practically the whole time we've lived here, which is nearly 42 years and there are certain varieties for certain locations. So you have to know what will do well here. You also have to know the location they require, how much sun can they take. You have to have sun in order to produce the berry itself. But here in our area, we have been planting Heritage and Oregon 1030. And those are varieties that are adapted to the heat. And the Heritage variety is still available everywhere. My daughter grows Heritage in Washington in Pullman, Washington. So these are what we call the fall bearers or everbearers. And they are a little bit different variety than the kind that you put up on a trellis and all. Actually they're much easier to prune, just go to your local Cooperative Extension or your nursery and find out what varieties are adapted to your area and what are their growth habits. And do you want that kind of growth habit? How much work are you willing to do with training them and pruning them and everything? So we've adapted very well here and produce huge crops of berries.
Farmer Fred
Raspberries, Harvest time is when? And how do you harvest them? And how long can you store them?
Pam Bone
Well, the berries, this particular variety, remember, these are the two-crop variety, and a lot of people may grow raspberries that only produce a spring crop. This one also produces the fall crop, Heritage. Heritage is the one that you can find in the nurseries now. And it's it's pretty much everywhere. I think they sell it all over the United States, that particular variety. Then we'll start bearing a crop in late May, early June. And we'll get a pretty good crop then. In fact, actually, it might even be mid-May this year, it looks like some of the flowers are getting pretty well developed already at the ends. Now this is a flower-fruiting cycle, where these are the old canes from last year that were cut down. And then the new growth that you see here is all from last year, as soon as these bear here in about another month or month and a half or so, then they are going to die back and then all the new canes arising from below that are going to come up. They're going to produce then a fall crop. And I will say that it's kind of unpredictable, but most of the time are, quote fall crop and I should say fall with quotes around it because really the crop starts in August. And it'll go till Thanksgiving easily in our area unless we get a really cold snap.
Farmer Fred
So when that stem has produced berries, that stem should be removed?
Pam Bone
We usually wait until it starts to look like it's not productive at all. And then we cut it out. And the reason is, we used to just leave them but we found out that we had that mite problem when we had a little bit of drought stress. And we found that if it's too crowded, you don't get the air circulation, the leaves get dusty and dry. And mites love that. And we just found that it was easier just to remove it, open it up and get rid of it. And then it left a lot of opportunity for the rest of the canes to come up and grow. And then those come up, then they fruit and we get a great crop. I say the heaviest crop is mid August to the end of September, a great crop. And I put up a lot of jam. So my husband has to pick, he does all the picking. I do all the putting up. My husband calls himself the gardener. I'm the horticulturist, we used to work together on a lot of this stuff. But now he's got me in the kitchen, you know, putting all this stuff up, he then will harvest about every five days. Because if you don't, two things will happen, the fruit will get soft and mushy, and then they will stop producing. But the soft and mushy attracts a fruit fly that goes to our cherry trees, as well, here, and we haven't had a real problem the last few years if you're really careful with keeping it up. But sometimes if you let that particular fruit fly go wild here, it will infest the fruit with unknown little white maggots until you're making your jam and all of a sudden there they are. Especially the fall crops. So you have to be really careful and really religious about getting rid of any fruit that's too soft or decayed or whatever.
Farmer Fred
Picking the raspberries. Can you pluck them or do you have to cut them?
Pam Bone
These you just pull right off. They pull off very easily and are not a problem at all. And in fact when we get down to the boysenberries, it's the same thing, you can just pull them right right off. You don't have to cut anything. They're very easy to pick. They're a little bit thorny, a little bit of prickles on them, but not too bad.
Farmer Fred
What does Mike the gardener use to a store the raspberries as he's picking them? Does he have a big bag? Or is he just carrying a bucket?
Pam Bone
I like them to be in a colander, and so I have a lot of large metal colandars and some plastic colenders. That way, there's more broad surface area, he brings them into the house then. And I kind of make sure that they are well distributed because I put them in the refrigerator. And actually raspberries have a very, very long refrigerator life, they can easily stay in a refrigerator and without having to put them up or do anything with them for five to seven days, and not see any decay or anything as long as you've picked them without already having a problem with a soft fruit. I try to get to them though and put them up if I can within about two to three days. But if something happens, and I get a little behind, it's really producing heavily, I can leave some of them in there, it works out really well.
Farmer Fred
Anything else you want to mention about raspberries?
Pam Bone
Well, I think raspberries are pretty easy to grow. And they're easy to prune and take care of. They produce a beautiful crop and make fabulous jam, you just have to be careful to attention for making sure you mulch, making sure that they don't ever suffer any kind of a drought. Keep them irrigated evenly without too much water, they are sensitive to root rot. Our soil is a heavy clay soil. And we do have a type of Phytophthora in our soil that does infect our raspberries occasionally. I've had it actually identified at a state lab to make sure. So what we do is we just make sure that we pull those out occasionally and then I really watch the irrigation, to make sure that we're not keeping it too wet or whatever. But we're still going to get a little bit of it because it's in our soil, and you've got a heavy clay soil and even just normal spring or winter rains or whatever keeps the soil wet. And as soon as that fungus gets active, then you have to be careful not to keep it too wet. And so it's kind of walking a little bit of a fine line there with the irrigation but otherwise they're pretty carefree. Once a year fertilization is it. And the pruning doesn't take much time and I highly recommend raspberries, they're, they're fabulous, and they taste really good.
=====================================
Dave Wilson Nursery
Farmer Fred
You want to start the backyard fruit and nut orchard of your dreams? But you don’t know where to begin? Or, maybe you’re currently growing fruit and nut trees, and you have a million questions… such as what are the tastiest fruits to grow, where can I go to buy some of these delectable fruits and nuts you’ve been reading about…and, how do I care for all these fruit and nut trees, including planting, pruning and harvesting? I have one online stop in mind, where all these questions you might have will get answered: It’s dave wilson dot com, That's Dave Wilson Nursery, the nation's largest wholesale grower of fruit and nut trees for the backyard garden. They have planting tips, taste test results, and links to nurseries in your area that carry Dave Wilson fruit trees. Click on the Home Garden tab at dave wilson dot com for all these links, including a link to their years of informative videos about growing fruit and nut trees that they’ve posted on the Dave Wilson Nursery You Tube Channel. Start the backyard orchard of your dreams at Dave Wilson Dot Com!
=============================
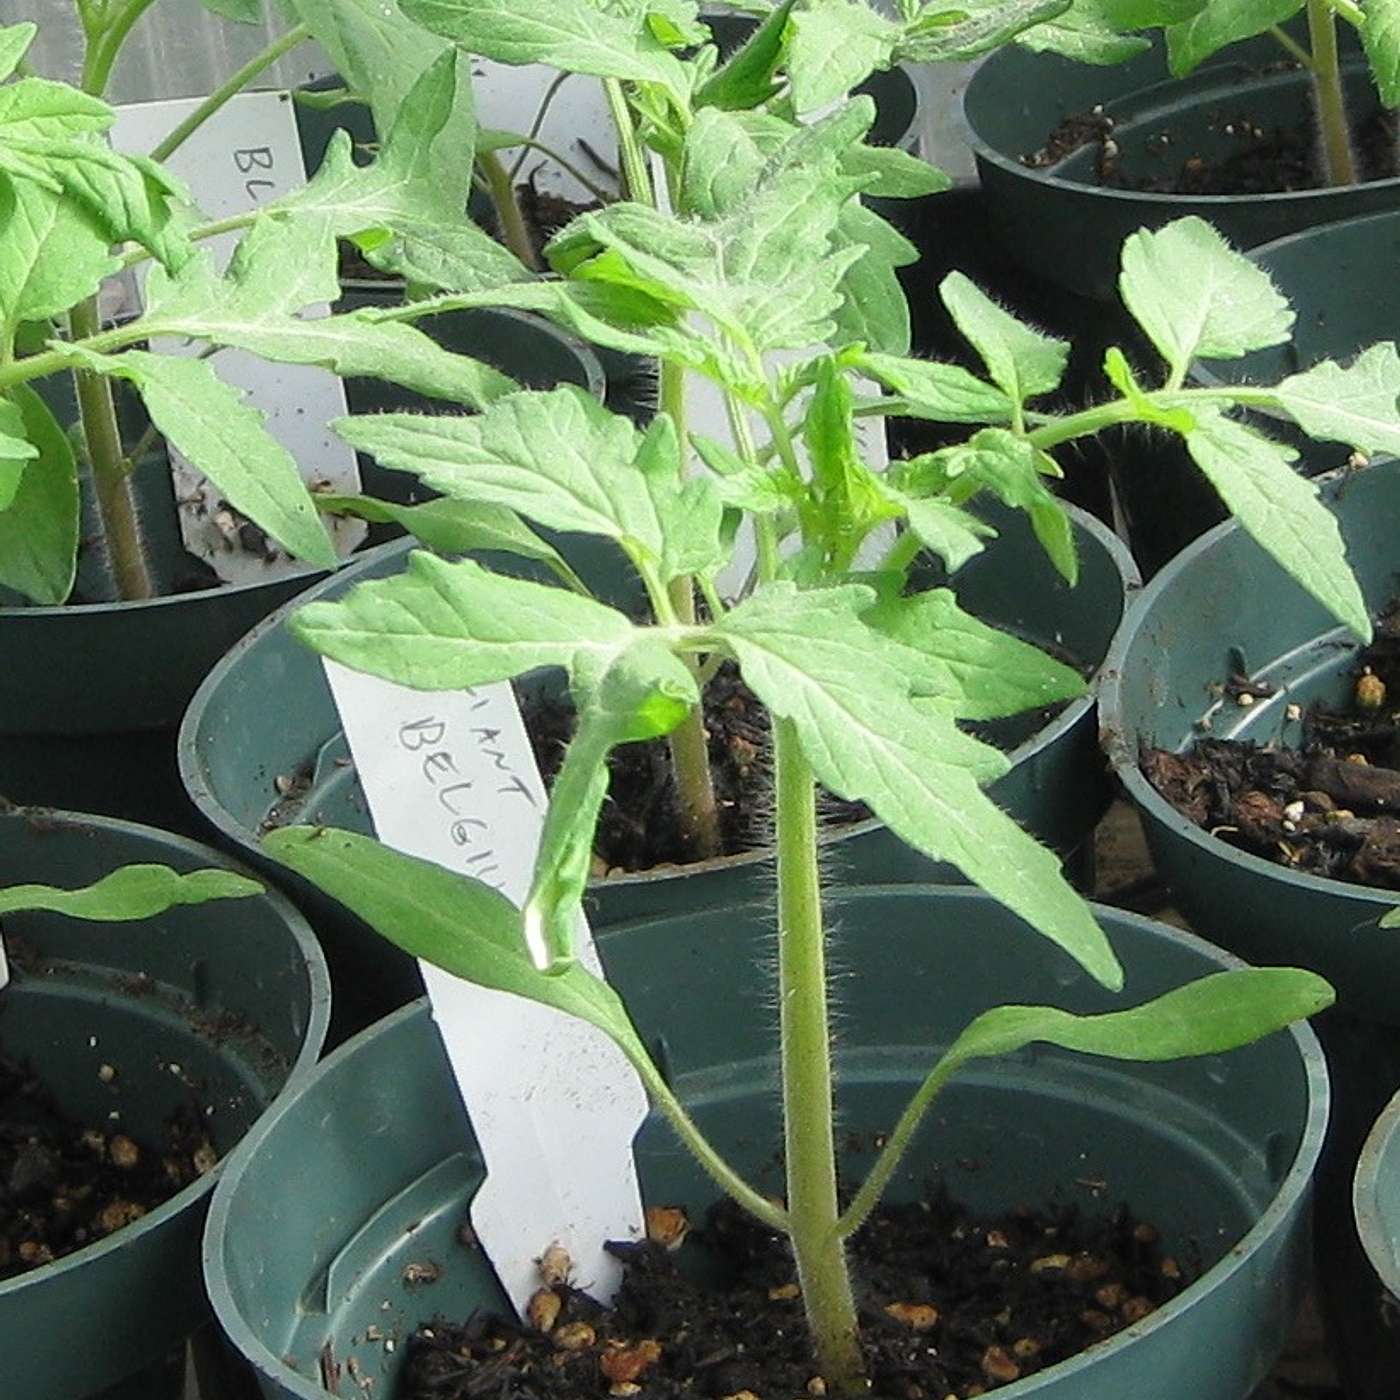
From Episode 177: Best Tomatoes for Containers
Farmer Fred
Another segment that made the Greatest Hits, Part Two, had to do with the best tomatoes for containers. And that again was a subject Debbie Flower and I discussed a while back. Probably the best tomatoes for containers are those tomatoes that probably don't get very big, Debbie.
Debbie Flower
Right. There are tomatoes that only get to about three feet tall and two feet wide, maybe three feet wide. They shouldn't be caged. I have them in the ground right now. And they're not caged yet, because I don't have the cages yet. But they should be caged, they can flop over as well. There's something called the Dwarf Tomato Project. And you can Google that. And you can get seeds from those people. And they are growing tomatoes that stay small, they still produce decent sized fruit, not giant fruit, but decent sized fruit that tastes good. And they've been bred for flavor, as well as for small plant size. And so there's a whole bunch of tomatoes in that project.
Farmer Fred
It's the dwarf tomato project, a subsidiary of Snow White industries. So go check that out. But listen to what we had to say about the best tomatoes for containers that attracted such a big audience:
Farmer Fred
This question comes from the Get Growing with Farmer Fred Facebook page, where I was talking about the best tomatoes to plant in your garden, and a reader had the question, what are the best container tomatoes? That's a good question. Oh, Debbie Flower is here. Our favorite retired college horticultural professor, Debbie, maybe some general guidelines for tomatoes in containers, I would think they need to be small.
Debbie Flower
That would be the number one criteria. They're not going to get too big, some tomatoes can get 12-15 feet tall, and spread four or five feet wide. And that's not the tomato that you want to grow in the container. Use a big container, a 15 Gallon Container. You'll read, in some places, they say you can do it in smaller and you can for a while, and then your tomato will peter out. So if you want a good, long season out of that tomato, use a 15 gallon. A half barrel would be really good. Make sure there are drainage holes in the bottom. And then you pick the tomato. And in your tomato list, Fred, you put a tomato vocabulary. And that's a very useful thing to have. Because one word you in particular want to look for is determinate. Determinate means the tomato will stop growing at a certain size. They're often used in the canning industry grown in the field. They don't always need to be caged or staked, and they produce a lot of fruit all at once. But they do continue to produce. So it isn't a once and done kind of plant. So you will have a long season of growing, you'll just have a whole bunch of tomatoes right at the beginning. And then you'll have continuous production after that, a little bit slower production. a little bit slower.
So determinate is one word we're going to look for. Another is Bush. Bush tomato plants are typically determinate. But they're often the small end of the determinate scale. There are some determinate plants that can get very large.
Farmer Fred
Most of the bush tomatoes are probably around two or three feet tall.
Debbie Flower
Using those terms, you've got the Bush all star, the Bush champion, the early girl Bush. There are some plants that are even named things like patio tomato. So that gives you a hint that the plant is really meant to be in a container. For a sauce plant, if you want tomatoes for sauce, really meaty tomatoes. The Roma is an old reliable determinate plant. And so if you're going to Google, use these terms, use "determinate Bush", look for those other names that indicate that it would be kind of small, like a patio, you can get some really small tomatoes, ones that only grow about a foot by a foot.
Fred
The plants, not the fruit.
Debbie
The plants, yes, not the fruit. yes.
Farmer Fred
if you remember blogs... Remember when blogs were popular? Mine still exist out there in the blogosphere, the "Farmer Fred Rant" blog page, and one of the more popular posts is called "Fall and winter tomatoes from your greenhouse". I spent a couple of years attempting to grow tomatoes in a greenhouse during the winter. And you obviously have limited space in hobby greenhouses. So I was growing them in five and 15 gallon containers. And I was choosing determinate varieties that would ripen fairly quickly, usually within 55 to 65 days, which for tomato is pretty darn quick.
Debbie Flower
It is very quick.
Farmer Fred
But there are plenty of varieties available. Among the ones that I planted that I had success with, as you mentioned, Bush early girl, the Bush beef steak and some heirloom tomatoes like Grushovka, Manitoba. Others like Oregon Spring, Pilgrim. Two of the ones of the smaller tomatoes, that actually really did quite well, Polar Baby and Prairie Fire. One more, the 506 Bush also did did quite well. Now, the problem with growing tomatoes in the greenhouse in the wintertime in a greenhouse that you keep above 60 degrees or so: you got the energy bill to think about. The taste? It's a notch above supermarket level. do you want to do that much work?
Debbie Flower
That's a lot of work.
Farmer Fred
...to get something that's just slightly better than a supermarket tomato, but the thing is, you grew it yourself. Right? And the other thing is, you're gonna get white flies.
Debbie Flower
Well, yes, yeah. I was gonna ask you about that. Notice that a lot of the names of the tomatoes you mentioned, not all of them, but indicate coldness. Manitoba, Polar Baby, Siletz,, which is a place in Oregon and Siberia. There's another term I don't know, didn't check if it was on your list. Parthenocarpic. Parthenocarpic means producing without pollination. It's like a navel orange, never gets pollinated. It just produces fruit. It's like a false pregnancy.
Farmer Fred
So it's a perfect flower?
Debbie Flower
They do flower, navel oranges, but they don't get pollinated. They just produce a fruit. It's like a false pregnancy. And there are parthenocarpic tomatoes or parthenocarpic. Cucumbers. They won't have seeds in them. And they don't need to be pollinated. So, so you don't have to have bees in your greenhouse to produce the fruit.
Farmer Fred
I had a fan to move it around.
Debbie Flower
Shook the table? Yeah. Tomatoes can be self pollinating, meaning that if temperatures and growing conditions are right, the pistil and stamen will pass each other at just the right time to transfer pollen and cause fruit to form.
Farmer Fred
I used to use old battery operated bedroom toys for pollination purposes. and it works. You can actually see the pollen move around.
Debbie Flower
Electric toothbrushes, those things?
Farmer Fred
Yeah, sure. But yes, there are a lot of good container tomatoes of a good size. You just got to shop carefully.
Debbie
It’s so hard you have to read the seed packets or read the description in the catalog
========================
From Episode 185: Lasagna Gardening
Farmer Fred
It’s Garden Basics Greatest Hits, Volume 2, the most listened to segments from the last 100 podcasts. One of the most popular episodes featured Emily Murphy, author of the book, "Grow Now". Among the topics we covered included, healthy soil leads to healthier plants. And one technique to improve the health of your soil is to forgo rototilling, which does more damage than good to the underground biology of your soil. It’s called no-till, a practice that has taken hold in the world of agriculture, especially among producers of organic crops. But the practice of No-Till isn’t just for your bare ground. In this chat with Emily Murphy, she explains how keeping your soil undisturbed as much as possible can be applied to your raised beds and container plants. She calls it, no-dig. And she talks about a way to build your soil without having to purchase bags or yards of potting mix. It’s called lasagna gardening.
Emily Murphy
And the other way to tackle no-dig is is not just by growing in the ground, but it's also to use no-dig techniques in raised beds and containers. The idea is that instead of sourcing soil for a raised bed, a larger bed, the typical rule of thumb is to use 50-50 compost to topsoil, that's kind of a general rule of thumb for filling raised beds, that's fine. Oftentimes, soil is sourced from places that have been excavated for building sites and whatnot. So it's already getting moved. But you know, when you think about it, soil does have to come from somewhere, and it's disturbing soil somewhere else, when it's excavated, it releases carbon to the atmosphere, disturbs that soil ecosystem, which is valuable to wherever that soil came from. Instead of moving soil from one place to another which also takes a lot of fossil fuels to move a heavy load of soil. Instead, we can compost in place and use lasagna gardening or "hugelkultur", which is a German word for layering organic matter in place, sort of in situ and planting in that. And I show how to do that in "grow now". It's a really simple technique. It's the same technique I use to fill my raised beds. If anyone follows me on social media, you'll see the garden that I built a year ago this month and I filled them with this lasagna gardening technique and it's composting sticks and twigs on the bottom, followed by a layer of brown material, a layer of green material, then a layer browns, etc. Then I save the fine compost for the top. I did have to bring in compost because it was a new yard, a new garden. And I didn't have time to make any, but I sourced it locally. I'm really lucky I have West Marin compost, not far from here, it's about a mile away. I save that fine compost for the soil surface and planted in it. And three months later I had this incredible start of a summer garden and you can plant intensively and it's so so simple and so empowering. Wow. What a gift to be given to these techniques, to make it so easy and immediately get you off on the right foot towards success in those raised beds.
Farmer Fred
Do you even have to fertilize the plants?
Emily Murphy
You know, I didn't. The only thing I do is I add compost to a few places. Otherwise I put in a cover crop of fava beans where I wasn't growing greens, I will add a layer of compost with manures in it this spring and I'm in the process of doing that. I'm a little behind because of the release of the book, Grow Now, which came out February 1. And as you can imagine, it's been a wild ride with the bookmaking and with anything in your garden, you have to prioritize, you don't have time for everything. And I've decided to focus on since I have the garden, the veggie garden in place, I decided to put most of my attention towards the rewilding project out front, knowing that I can get to the veggie garden with time because I'm in California and the growing season so long.
Farmer Fred
So I would imagine, since you talked about lasagna gardening, that this compost layer goes on top of your soil and then you're covering that with some sort of mulch in order to keep flying weed seeds from germinating in that very fine compost.
Emily Murphy
Absolutely. And the type of mulch you use depends upon what you plan to grow. So we were talking about rules of thumb earlier, the typical rule of thumb with the mulch you choose is based upon what it is you're growing. So,if you're growing trees and shrubs, particularly native trees and shrubs, the idea is to mulch with materials that are similar to that or mulch that's made up of materials that are similar to the plants you're growing. And so it can be more woody debris, such as leaves, as the primary source of of compost making or mulch making. But with a veggie garden, you want to use a compost that is more for a veggie garden. When you're prepping for a veggie garden, you want to use a compost that is more in keeping with the plants you're going to grow again. So a compost that's been made out of kitchen scraps, for instance, or kitchen scraps and leaves and other organic materials, a compost that has been fed kitchen scraps. And I think that's a pretty easy parallel to follow when you're considering, "well which type of mulch should I use?" And that's one place to start. And of course, whatever's local is also a really good place to start. Exactly. Yes, you can source it in your own garden or your neighbor's garden if your neighbor has leaves, that's wonderful. Use those leaves.
===================================
The “Beyond the Basics” Garden Basics Newsletter
Farmer Fred
Read and follow all label directions. But how many of you have ever read through the pages and pages of instructions that come some of the most popular weed killers on the market? In the Friday, June 10th edition of the Beyond the Garden Basics newsletter, we highlight some of the most important passages in those instructions that you might have missed. Instructions that can help keep your desirable plants alive after you’ve applied the weed killer. And, we chat with Debbie Flower about the best way to kill weeds organically, soil solarization. And now’s the time to do it. It’s in the newsletter that goes beyond the basics, the Garden Basics with Farmer Fred, Beyond the Basics newsletter, out Friday, June tenth. Find it via the link in today’s show notes, or visit our new website, Garden Basics dot net. There, you can find a link to the newsletter in the tabs on the top of the page. Also, you can listen to any of our previous editions of the podcast, as well as read an enhanced transcript of the podcast episode you are now listening to. That’s at Garden Basics dot net, where you can also link to the Garden Basics newsletter, Beyond the Basics. And it’s free. Look for it on Friday, June tenth. Take a deeper dive into gardening, with the Beyond the Garden Basics newsletter. Find it at garden basics dot net.
===================================
Episode 157 Composting Tips
Farmer Fred
Here on the Garden Basics podcast we like to compile a greatest hits episode every now and then. And now that we are into the “two hundreds”, why not take a look back at the most listened-to segments that occurred between episodes 101 and 199. One of those, talks about composting. And we were discussing composting with Debbie Flower America's favorite retired college horticultural Professor. Debbie composting everybody should do some sort of composting.
Debbie Flower
Yes, everybody should do some sort of composting, and that's a good point. There are different kinds of composting: there's composting your yard waste, and then there's composting your kitchen waste. And to compost your kitchen waste, there's worm composting, or there's lazy green cone composters, or there's there are new machines out that will do it for you. And for your yard composting, there's so much advice. But the number one thing in yard composting: that compost pile needs air, so turning it will get your compost faster than anything else.
Farmer Fred
And oddly enough, when you turn the compost pile, it also gets warmer.
Debbie Flower
Yeah, because the microorganisms that are in there, breaking down the waste that you've piled up, need oxygen to survive, as well; and then they can reproduce better.
Farmer Fred
It's composting tips, part of Garden Basics Greatest Hits Volume Two, let's give a listen:
Farmer Fred
Well, that brings us to a scenic bypass that I wanted to get into with you. They cut down three eucalyptus trees in a neighbor's yard. And of course, I'm out there asking the neighbor, what are you gonna do with all those wood chips? You don't want to ship all that wood chips away to the landfill. Why doesn't the arborist just dump some of it in my driveway? And he says, "okay". And it turns out he had a really big chipper shredder and truck. And the pile is now in my driveway, that I still have to finish moving. It's like 10 yards.
Debbie Flower
Wow. And that's a lot of stuff.
Farmer Fred
It is a lot of stuff. So I'm wondering. How hot does it get in a compost pile? So I took a picture, and I'll have this picture posted in the Garden Basics newsletter, of that pile of chipped eucalyptus mulch, and it's really pretty, and it smells great too. I stuck my compost thermometer, which is a thermometer gauge with a 30 inch probe on it. You stick that in the compost pile, and it was a 50 degree day. The temperature reading in that mulch pile might have gone up if I left it in there longer. I only left it in there about 20 minutes, but the temperature got up to 100 degrees.
Debbie Flower
And how long had that pile been there?
Farmer Fred
Two days.
Debbie Flower
Two days. Okay. Yeah. So it was starting to compost. You were starting a hot compost pile.
Farmer Fred
Why does that happen? Why is there a 50 degree difference between the air temperature and what's going on in the middle of a compost pile? Are there kids in there playing with matches?
Debbie Flower
Kind of. There's life in there. There are micro organisms. So micro means things we have to see with a microscope, we have to see under magnification: micro organisms, algae, fungi, bacteria that are living off of the chipped wood, and they are biological organisms, and they create heat just like a human body does. As they're active, they give off heat and that helps them live and it helps other things move in and it helps their presence. And their heat helps to kill the bad things in a compost pile.
Farmer Fred
Okay, so it isn't a chemical. It isn't like nitrogen breaking down or something.
Debbie Flower
Well, it is in the sense that the microorganisms are chewing on the wood, which, although it's very high in carbon, it does contain nitrogen. They need both carbon and nitrogen to survive. And so it is nitrogen breaking down and it's carbon breaking down, but it's through the process of these live organisms.
Farmer Fred
And you make a very good point to about the carbon-nitrogen ratio, and how important that is to a hot compost pile. If you see instructions for building a compost pile, they'll always tell you to alternate a layer of brown with a layer of green. The brown being carbon, green being any sort of green matter, that's your nitrogen. So yes, in this particular pile, the section I stuck the compost thermometer in was mostly the chips from the trunk of the tree. If I had stuck it in the other side of the pile, where it was mostly the leaves, it probably would have been hotter.
Debbie Flower
Yes. If you get arborist chips from a tree that has had leaves on it at the time it was removed, or tree portions that had leaves on it at the time that was removed. You've typically got a really good carbon to nitrogen ratio. It's supposed to be something like 30 carbon to one nitrogen to have a hot compost pile.
Farmer Fred
And a hot compost pile could be 140 degrees.
Debbie Flower
140 degrees. 140 is ideal. That kills everything. My dad used to mow the lawn, and collect the clippings. This is way back when, folk,s before we knew about mulching mowers. And he put them in the garbage can. And he had a compost thermometer. He stuck it in the garbage can, and sit there and watch. It is almost tota nitrogen. It's not total nitrogen. But it's a very high nitrogen ratio compared to the carbon and it is not great for composting but it quickly becomes hot and then it becomes slime.
Farmer Fred
Which reminds me, that probably in the show notes and in the Garden Basics newsletter that will accompany this episode, I'll have a link to a formula for creating a hot compost pile in as little as three weeks. Dr. Bob Raabe of UC came up with this formula. By gauging the size of the pile and turning it frequently, you can have ready to use compost in as little as three weeks.
Debbie Flower
Well, I beat him. I had a crew, I had students. We did it in two weeks. I worked for the Sacramento city school district at a vocational high school for adults. And we maintained the landscape as part of the horticulture training. And we had a little chipper. People had to work long and hard to get the stuff broken down. But we didn't pay attention to the ratio of carbon and nitrogen. We just took whatever we had and chipped it and threw it in the pile. We had a concrete pad up against a brick building. So we threw it in a pile up against this building every day. Every day, five days a week. The students took the pile and moved it from one place to another. The next day, the same thing, they turned it back. The next day turned it back again. We had compost in two weeks. The number one limiting factor in a compost pile is oxygen, to keep those micro organisms alive. People think it's water. Yes, it has to be moist, but moist, not wet. You might think it might need nitrogen. You need nitrogen, but not a lot of it. The number one thing and there was a organization in Tucson, Arizona that was studying composting, and they came up with the same answer. That's the number one. Tucson Arizona is a very hot, very dry place. And they watered the compost pile and they added the right or the wrong carbon to nitrogen ratio. But the number one limiting factor in the compost pile was oxygen.
Farmer Fred
And you see, sometimes, when you're looking at instructions for creating a compost pile, you might see a suggestion to add nitrogen fertilizer or sprinkle it with water every day, right? But it's more important just to turn it to increase the oxygen.
Debbie Flower
Yes. And then you if you look around, you'll find devices with PVC pipes that go under the compost pile with holes in them that blow air. But really, that would help. But as the components of the compost pile break down, they get smaller and smaller and smaller. So the spaces between particles get smaller and smaller and smaller as they nestle closer and closer together. And by turning it, you open up those spaces and you allow more oxygen into the pile, which allows the micro organisms to work faster and allows that carbon and nitrogen to break down faster.
Farmer Fred
Were these in constructed bins? I mention that because Dr. Raabe's formula was a three foot by three foot by three foot bin that was open and you would turn that pile into another bin of the same size.
Debbie Flower
The ones in Tucson were in bins like that. Yeah, and that is the minimum size: three foot by three foot by three foot. That's a cubic yard. You need a certain amount of insulation, the stuff on the outside it's not going to break down because it's not insulated well enough. And so you need a certain amount of insulation on the outside to allow the center to warm up. The pile in the skill center where I taught was bigger than that, but we just shoveled it. We used shovels to move it from one one corner to another corner.
Farmer Fred
Okay, and you had plenty of help.
Debbie Flower
Yeah, that was a good part.
================================
Farmer Fred
So thanks for listening to all the highlights of the Greatest Hits Volume Two of the Garden Basics with Farmer Fred podcast today. I appreciate it. And if any of those segments intrigued you, you want more information, go to the show notes where you can find links to the entire episode that the segments were taken from. Once again, it was you, the listeners, who put together today's Greatest Hits Volume 2. It is based on Download totals, unique listeners and time consumed, again for episodes 100 through 199. And next time around, I promise you a podcast of 30 minutes or less. I'll try, I'll really try. Thank you.
Farmer Fred
Garden Basics With Farmer Fred comes out every Tuesday and Friday and is brought to you by Smart Pots and Dave Wilson Nursery. Garden Basics is available wherever podcasts are handed out. For more information about the podcast, visit our website, GardenBasics dot net. That’s where you can find out about the free, Garden Basics newsletter, Beyond the Basics. And thank you so much for listening.