Help › Features
Customize your Buzzsprout URL
Your Buzzsprout account comes with a lot of great features including a public podcast website! This website will give your listeners a way to access all your episodes, podcast information, and podcast listings! Check out our help page about your Buzzsprout website if you want to learn more about the website and how to customize it!
On this page, we are going to talk specifically about the URL for your Buzzsprout website! Your website will come with a default URL, which will look something like this: www.buzzsprout.com/123456. If you don’t like that URL and want to customize it to fit better with your podcast then we have two options for you!
Option #1: Customize the URL on the Buzzsprout Domain
You can customize your Buzzsprout URL to read as MyPodcastName.buzzsprout.com. This will easily distinguish the URL as being your podcast but will allow the page to live on the Buzzsprout domain.
You can customize your URL this way by following these steps:
- Log into your Buzzsprout account.
- Go to your Website page
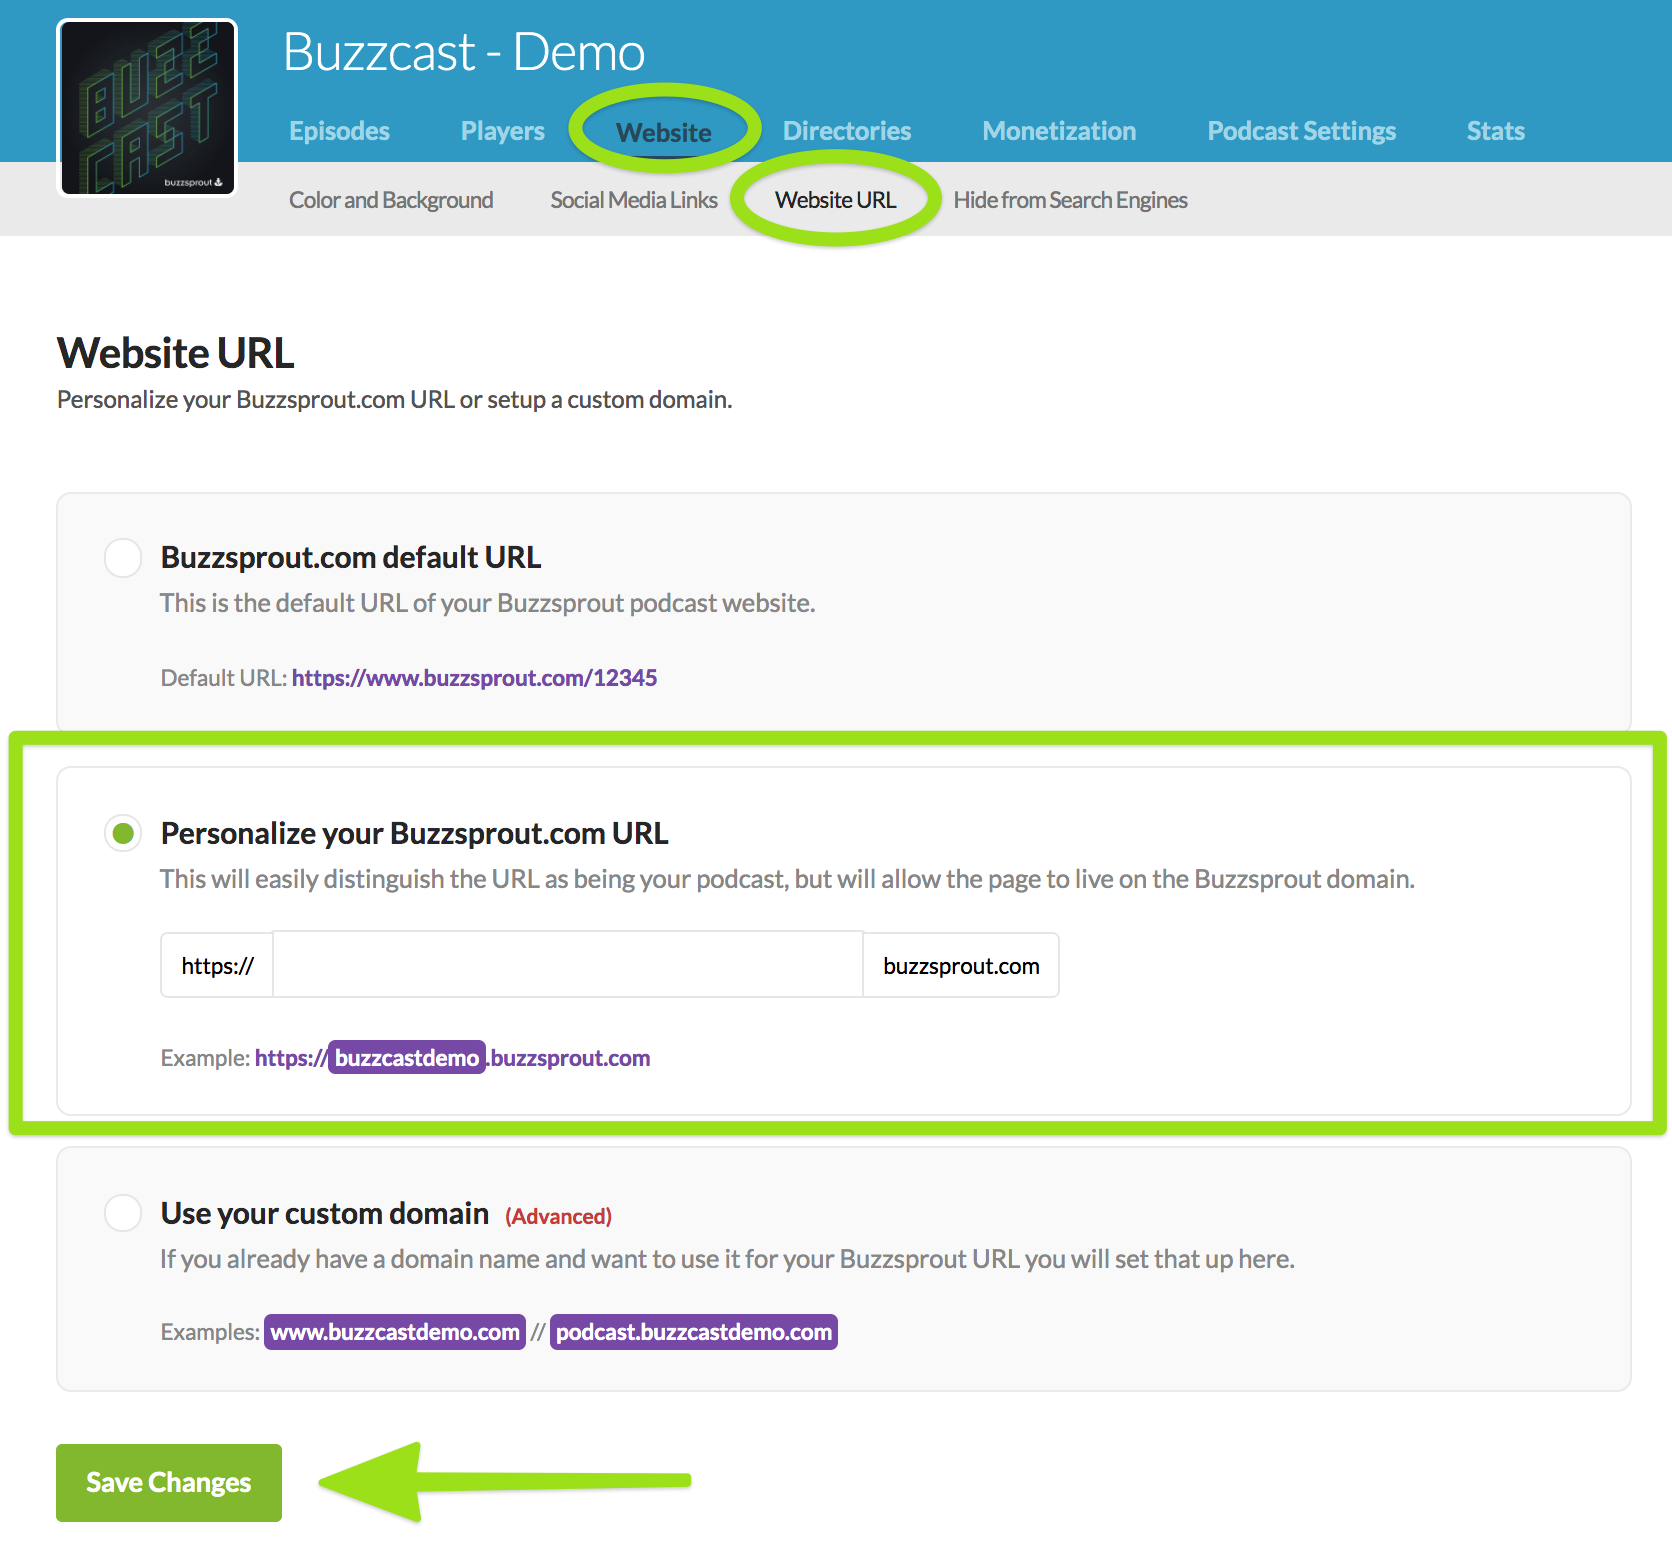
- Within the Website page click on the Website URL tab.
- There check the box to Personalize your Buzzsprout.com URL
- Then you will see a new field appear where you can customize the URL on the Buzzsprout domain.
- Click Save Changes and you’re all set!
We recommend choosing a URL that is simple and recognizable. Over complicated URLs can be hard to remember and easy to mess up.
Option #2: Customize the URL on your own Domain
You may already own your own domain name and want to use it for your Buzzsprout URL. You can absolutely do that, but it can be a little more complicated, so we will break it down for you!
You will start by setting up a CNAME record within your Domain. That will allow your Buzzsprout URL to use your personal domain name.
Follow these steps to set up your CNAME Record:
- Sign-in to your website hosting account and go to the DNS Management page. This may also be called Name Server Management. You may need to enable Advanced Settings to create a new CNAME record.
- Next you will create a new CNAME record using this information:
For the Host, Name or Alias column, enter www
For your Value, Destination or Points To column, enter app.buzzsprout.com
Check out these help guides for a more thorough step-by-step process of creating CNAME records:
- Adding a CNAME Record in Hover
- Adding a CNAME Record in GoDaddy
- Adding a CNAME Record in Register.com
- Adding a CNAME Record in Cloudflare
We have outlined the process to make your URL be www.domain.com. However, if you don't want to use www.domain.com you could use either podcast.domain.com or audio.domain.com. If you choose to use one of those options, just change the name field to be the subdomain you choose. That way you can pick the option that works best for your domain.
Note: If you decide to use www.domain.com and have an existing CNAME using www, then you will want to update the value field to point to app.buzzsprout.com.
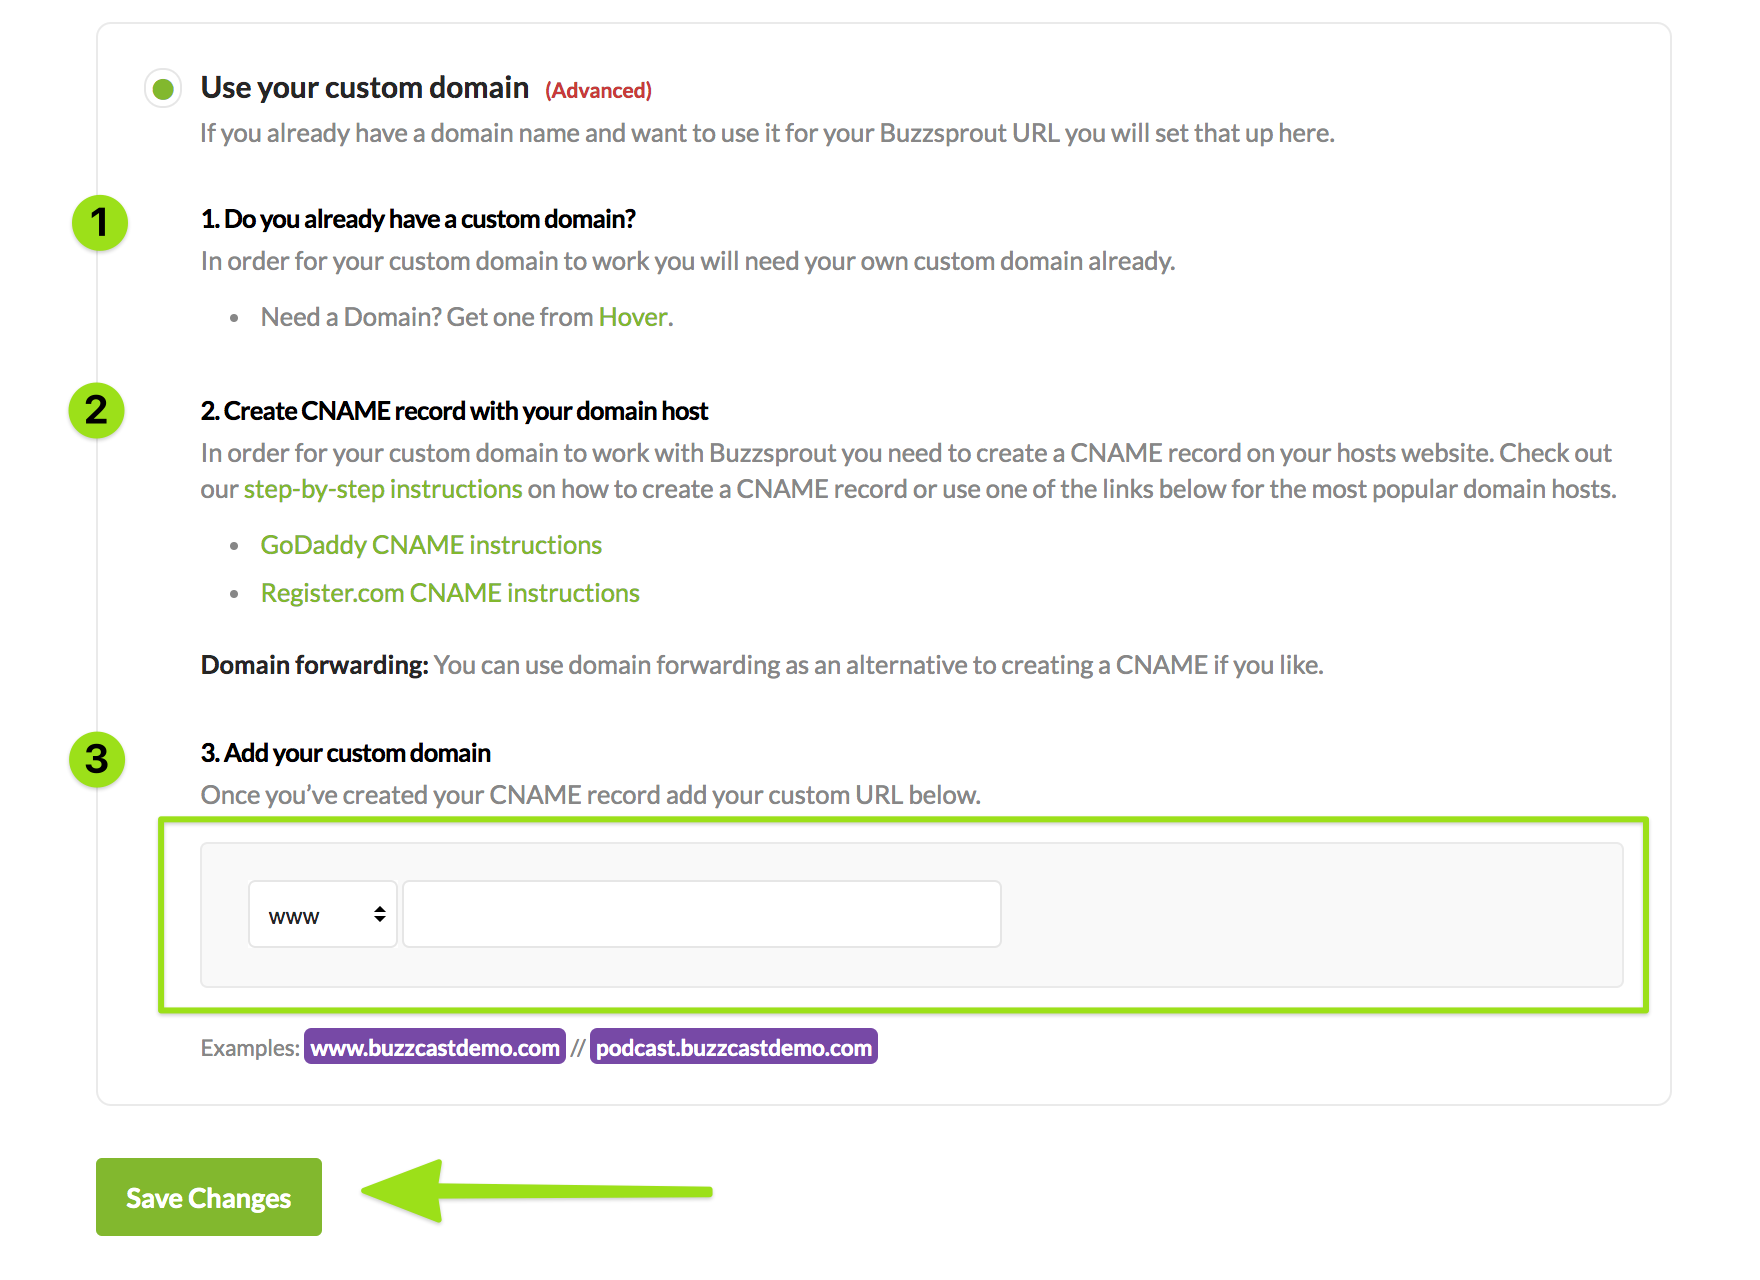
Now the CNAME record is set up, but you’re not quite done yet. Go back to your Buzzsprout account and go to the Website page where you can customize your Buzzsprout URL.
- Within the Website page, click on the Website URL tab.
- There check the box to Use your custom domain.
- In Step #3, write in your URL, including your domain. It should look something like this, www.MyDomainName.com
- Click Save Changes and you’re all set!
Keep in mind that this change may take up to 48 hours to propagate throughout the internet. Here are a couple of common questions that come up when customizing your Buzzsprout URL!
Can I make my URL my root domain?
In some cases, you may want to make your Buzzsprout URL the root of your domain name (MyDomain.com) instead of a subdomain (www.MyDomain.com). This is only possible if your DNS service will let you redirect from root to the address you've created for your CNAME. Please note Buzzsprout's IP address can change, so you will not be able to use it in your DNS configuration.
We know all of this can be a bit confusing so we want to help! If you still have questions, shoot our support team an email and they will walk you through the process.
- Features
- Episode Footer
- Dynamic Content
- Visual Soundbites (Audiogram)
- Chapter Markers
- Cohost AI
- Magic Mastering™
- Automatic Audio Optimization
- Customize Your Buzzsprout Page
- Customize your Buzzsprout URL
- Buzzsprout + Canva
- Canva Artwork Templates
- Hosts & Co-Hosts
- Transcripts in Buzzsprout
- Support the Show Link
- Hide Your Buzzsprout Website
- Podcast Recommendations (Podroll)