
How to Export Audacity File as MP3
The MP3 file format is probably the most common and popular audio file extension for podcasters, second only to the WAV file. MP3s have been an industry standard for a while, offering a good balance of audio quality with a smaller file size.
Older versions of Audacity used to require a separate software called LAME MP3 Encoder to export your files as an MP3. Fortunately, you no longer have to take this extra step since Audacity brought this functionality into their own platform. So, if you have an up-to-date version of Audacity, you can export audio directly from the program as an MP3 file — whether you're on a Mac or Windows device.
This tutorial explains how to export files as an MP3 regardless of your operating system, so you can easily upload finished episodes to your podcast host.
Download Audacity (Mac, Windows, Linux)
Choose file name and type
So here we have an Audacity project opened with an audio file in it. Let's say that you want to export this project as an MP3. Once you've made all your edits, you can go to File > Export > Export as MP3.
From here, you're going to see a pop-up with a bunch of fields you can fill out to make sure that you save the file exactly how you want.
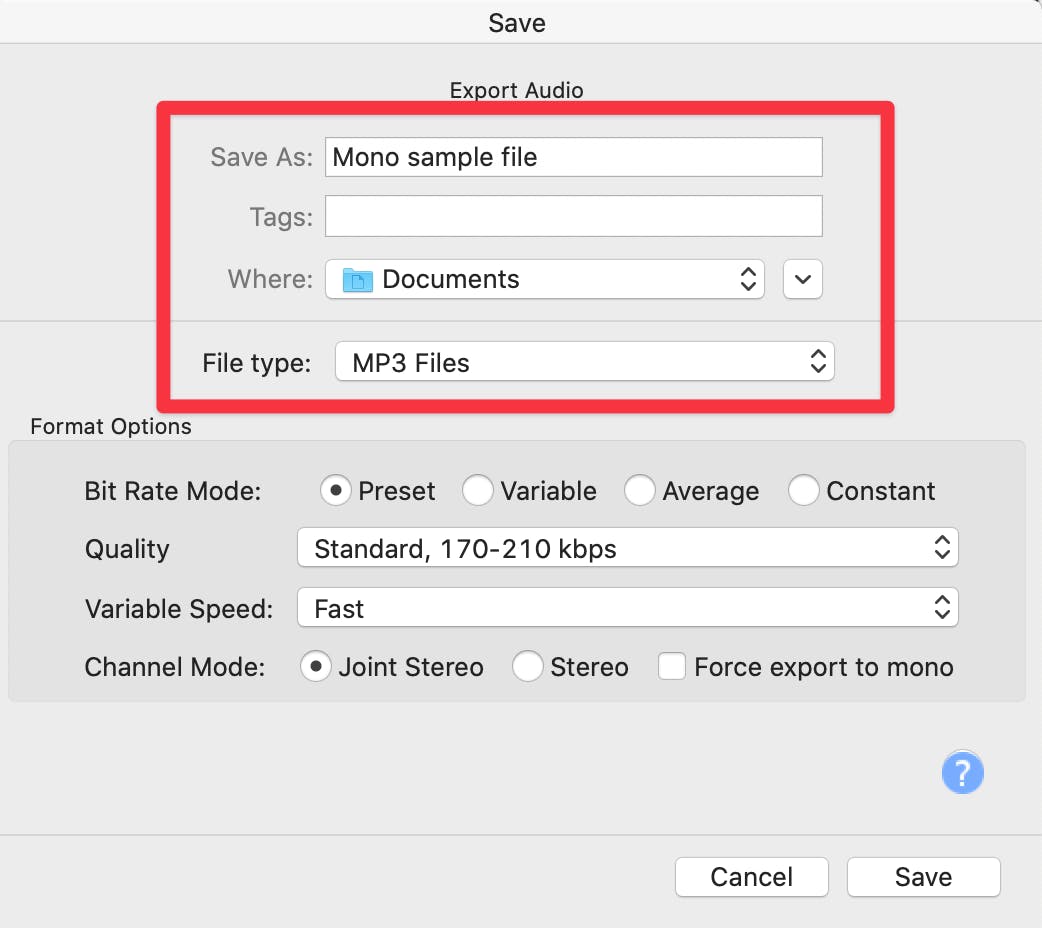
The first field allows you to choose your file name to bring in your project file name as the default, but you can name this whatever you want and select the location where you'd like to save it.
Choose MP3 Files in the dropdown menu if it isn't already selected. You can click the dropdown menu to see all the file options you have, but for this tutorial, we're going to keep it as an MP3.
Adjust file format options
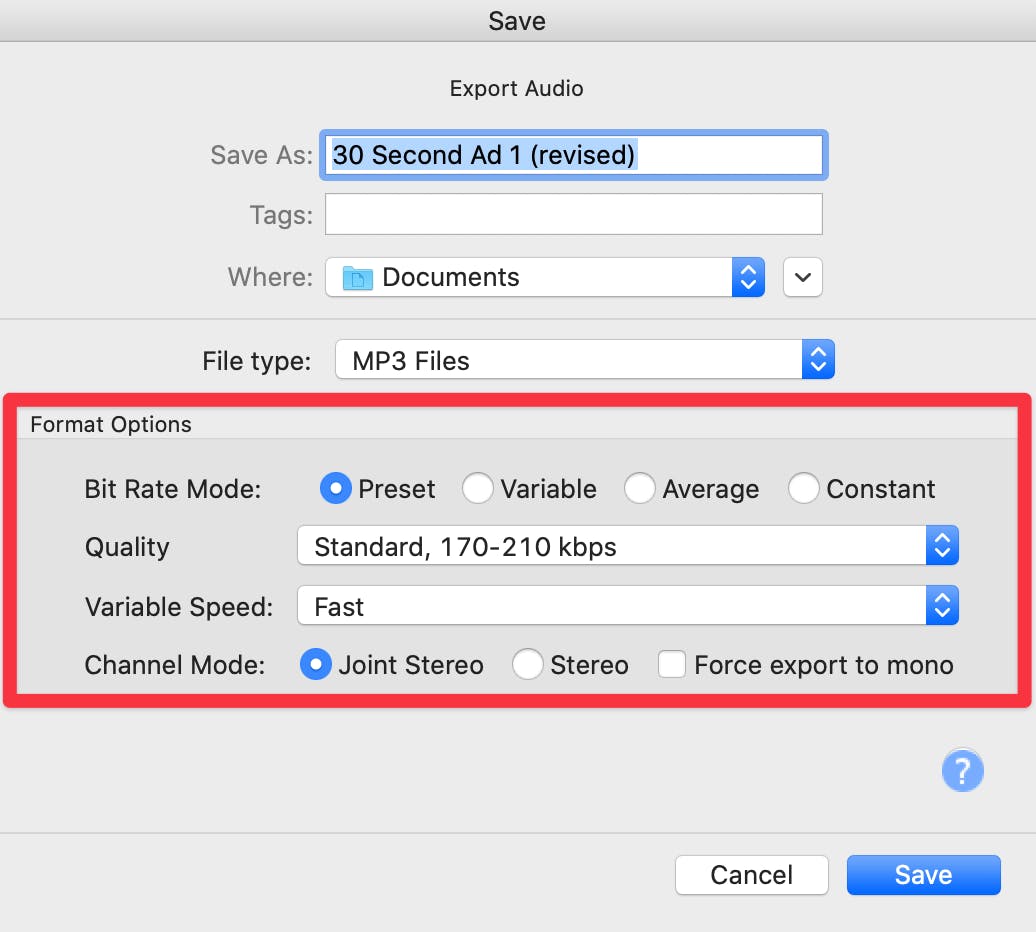
The dialog box beneath the Format Options section is where you can adjust your specific MP3 settings. Let's explain the different format options so you know which ones are best for your podcast episodes.
Bit Rate Mode
For the Bit Rate Mode, we suggest leaving it as Preset. The other options (variable, average, or constant) are unnecessary for most podcasters unless you're very particular about the kind of bite rate you have. For most podcasters, messing with the bit rate isn't important and won't make a noticeable difference.
Quality
A question we often get about exporting MP3 files is how high a quality you need. If you click on this dropdown menu, you have four different options: Insane, Extreme, Standard, and Medium.
All these different settings do is increase the number of bits per second in your file. An Insane amount of 320 kilobits per second means you'll have a larger audio file. Technically, this setting creates abetter quality than the Standard audio file, but it doesn't improve the quality by a discernible amount that listeners will notice.
Unless you're a bonafide expert in digital audio and know exactly what to listen for, you're not going to notice a difference between Insane and Standard. If you use a podcast host where you pay by the megabit to upload your audio files, then you definitely want to export as Standard to save some cash.
But if you use a podcast host Buzzsprout, you only pay for the number of hours you use, so you can export your file at whatever quality you want without worrying about an extra charge.
We actually encourage Buzzsprout users to export as a larger WAV file format for optimum sound quality, but that's a separate tutorial! For this blog, we'll stick to MP3 exports since they are more compact files.
Variable Speed
The next dropdown menu is your Variable Speed. This setting only matters if you choose the Variable bit rate format option. If you use the preset, like we encourage, then it doesn't matter what's in this dropdown box.
Channel Mode
The final thing you can do is adjust the Channel Mode, and there are three options here: Joint-Stereo, Stereo, and Mono. Joint-Stereo is the default and the setting that is most efficient for Audacity to export your files.
Think of Stereo as if you're playing your file on a literal stereo where the left and the right are different. This stereo track setting is usually best for music files and unnecessary for voice-only podcasts. And remember, selecting Stereo makes your file size a little bit bigger, too. So if you're like most podcasters and don't use a lot of music in your episodes, we recommend exporting as a mono file.
Unlike the Stereo setting, Mono produces a single channel file, and saves spaces on your computer since it uses lower bit rates. Choosing Mono also eliminates the issues you get with a dual mono file when the left and right sides are the same. When both sides are the same, they'll counteract each other and make your audio file softer — which is not what you want.
So, when in doubt, choose Mono. And once you have all your settings selected, click Save! Next, Audacity will prompt you to fill in the file's metadata.
A note on Audacity metadata fields
It really isn't necessarily to edit metadata in Audacity since you can fill all of this info through your podcast host; there's no need to do it twice.
If you use Buzzsprout, you'll be able to fill out information like track title, show notes, artist names, metadata tags, etc., once you upload the episode to your dashboard. We'll then take the episode from there and make it available to podcast directories like Apple (formerly iTunes).
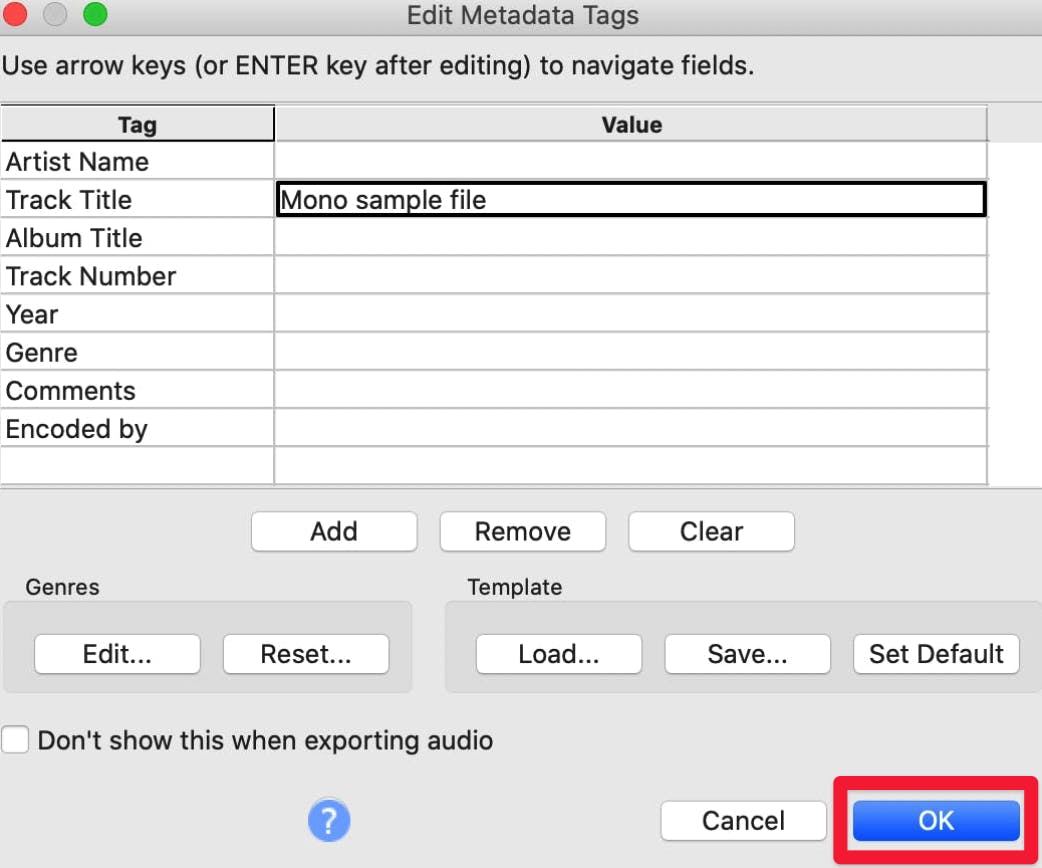
From here, just click Ok to export your final Audacity project file in MP3 format!
Note: You might notice a short silence at the beginning of your track upon playback of your episode — this is a normal limitation of the format. All MP3 files have this quirk, and not an indicator that something is wrong with your file. If this feature bothers you, look into alternative formats like WAV, FLAC, and Ogg files.
More Audacity tutorials
Audacity is an excellent audio editing tool, widely used by digital audio creators. These tutorials can help you get more comfortable, so you can use Audacity to edit your own podcast!