GarageBand Tutorial for Podcasters: How to Setup, Record, and Edit a Podcast on a Mac
GarageBand is a free audio production app included with macOS and iOS. It’s user-friendly and delivers pro-level results sufficient for most podcasters.
Because this tool was created for music production, there are a few workarounds you should know before you use it for spoken word.
This step-by-step guide breaks down everything you need to know to produce quality podcast episodes using GarageBand!
Note: This tutorial is for the Macbook and iMac versions of GarageBand. This process works if you use GarageBand on your iPhone or iPad, but the mobile app has fewer functions.
Step #1. Set up a template
When you open GarageBand iOS, you’ll have the option to create a new GarageBand project. Choose Empty Project to create a custom template.
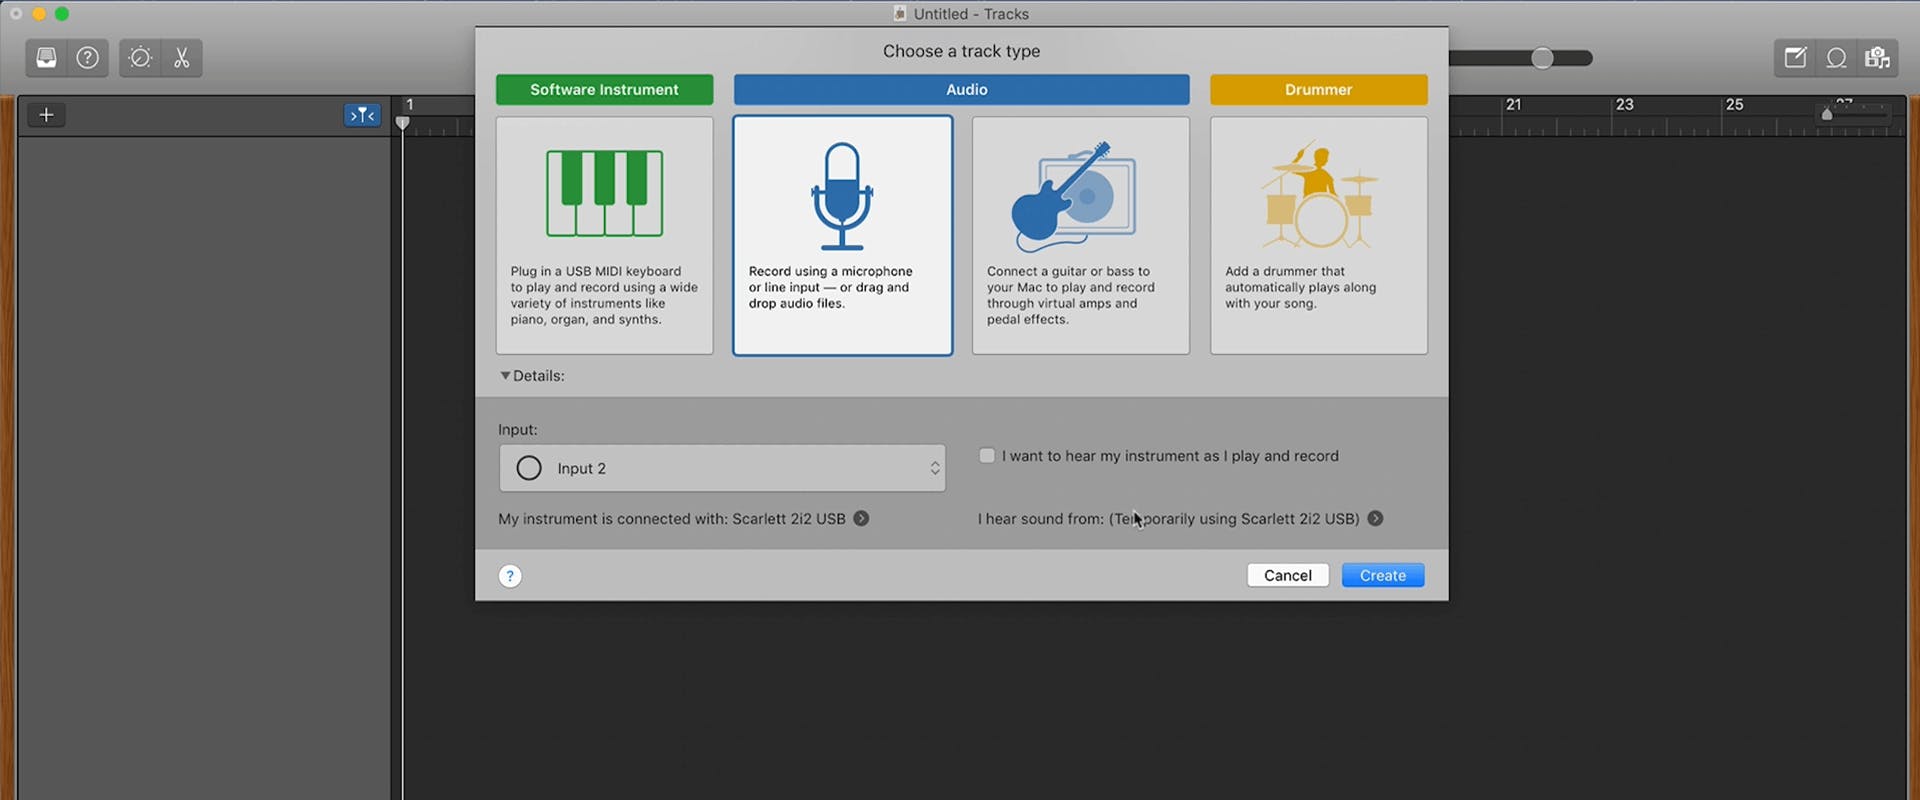
Next, the tool will prompt you to add your first track from three different types.
Choose the track with an image of a microphone. Then, select the input your mic is connected to and click Create. Your track will appear in the workspace in the upper right next to Garageband's Library section.
You can verify and, if necessary, edit your microphone input settings under the Recording Settings tab at the bottom.
Click the + icon at the top left if you're recording with multiple microphones. Repeat these steps to create new tracks for each channel.
Make sure to assign inputs in Recording Settings for each track you create.
You may also want to include tracks for any music or sound effects you regularly use. Add an audio microphone track for each effect and set the input to None.
Double-click the track title to rename it and right-click on the blue waveform to change the track icon.
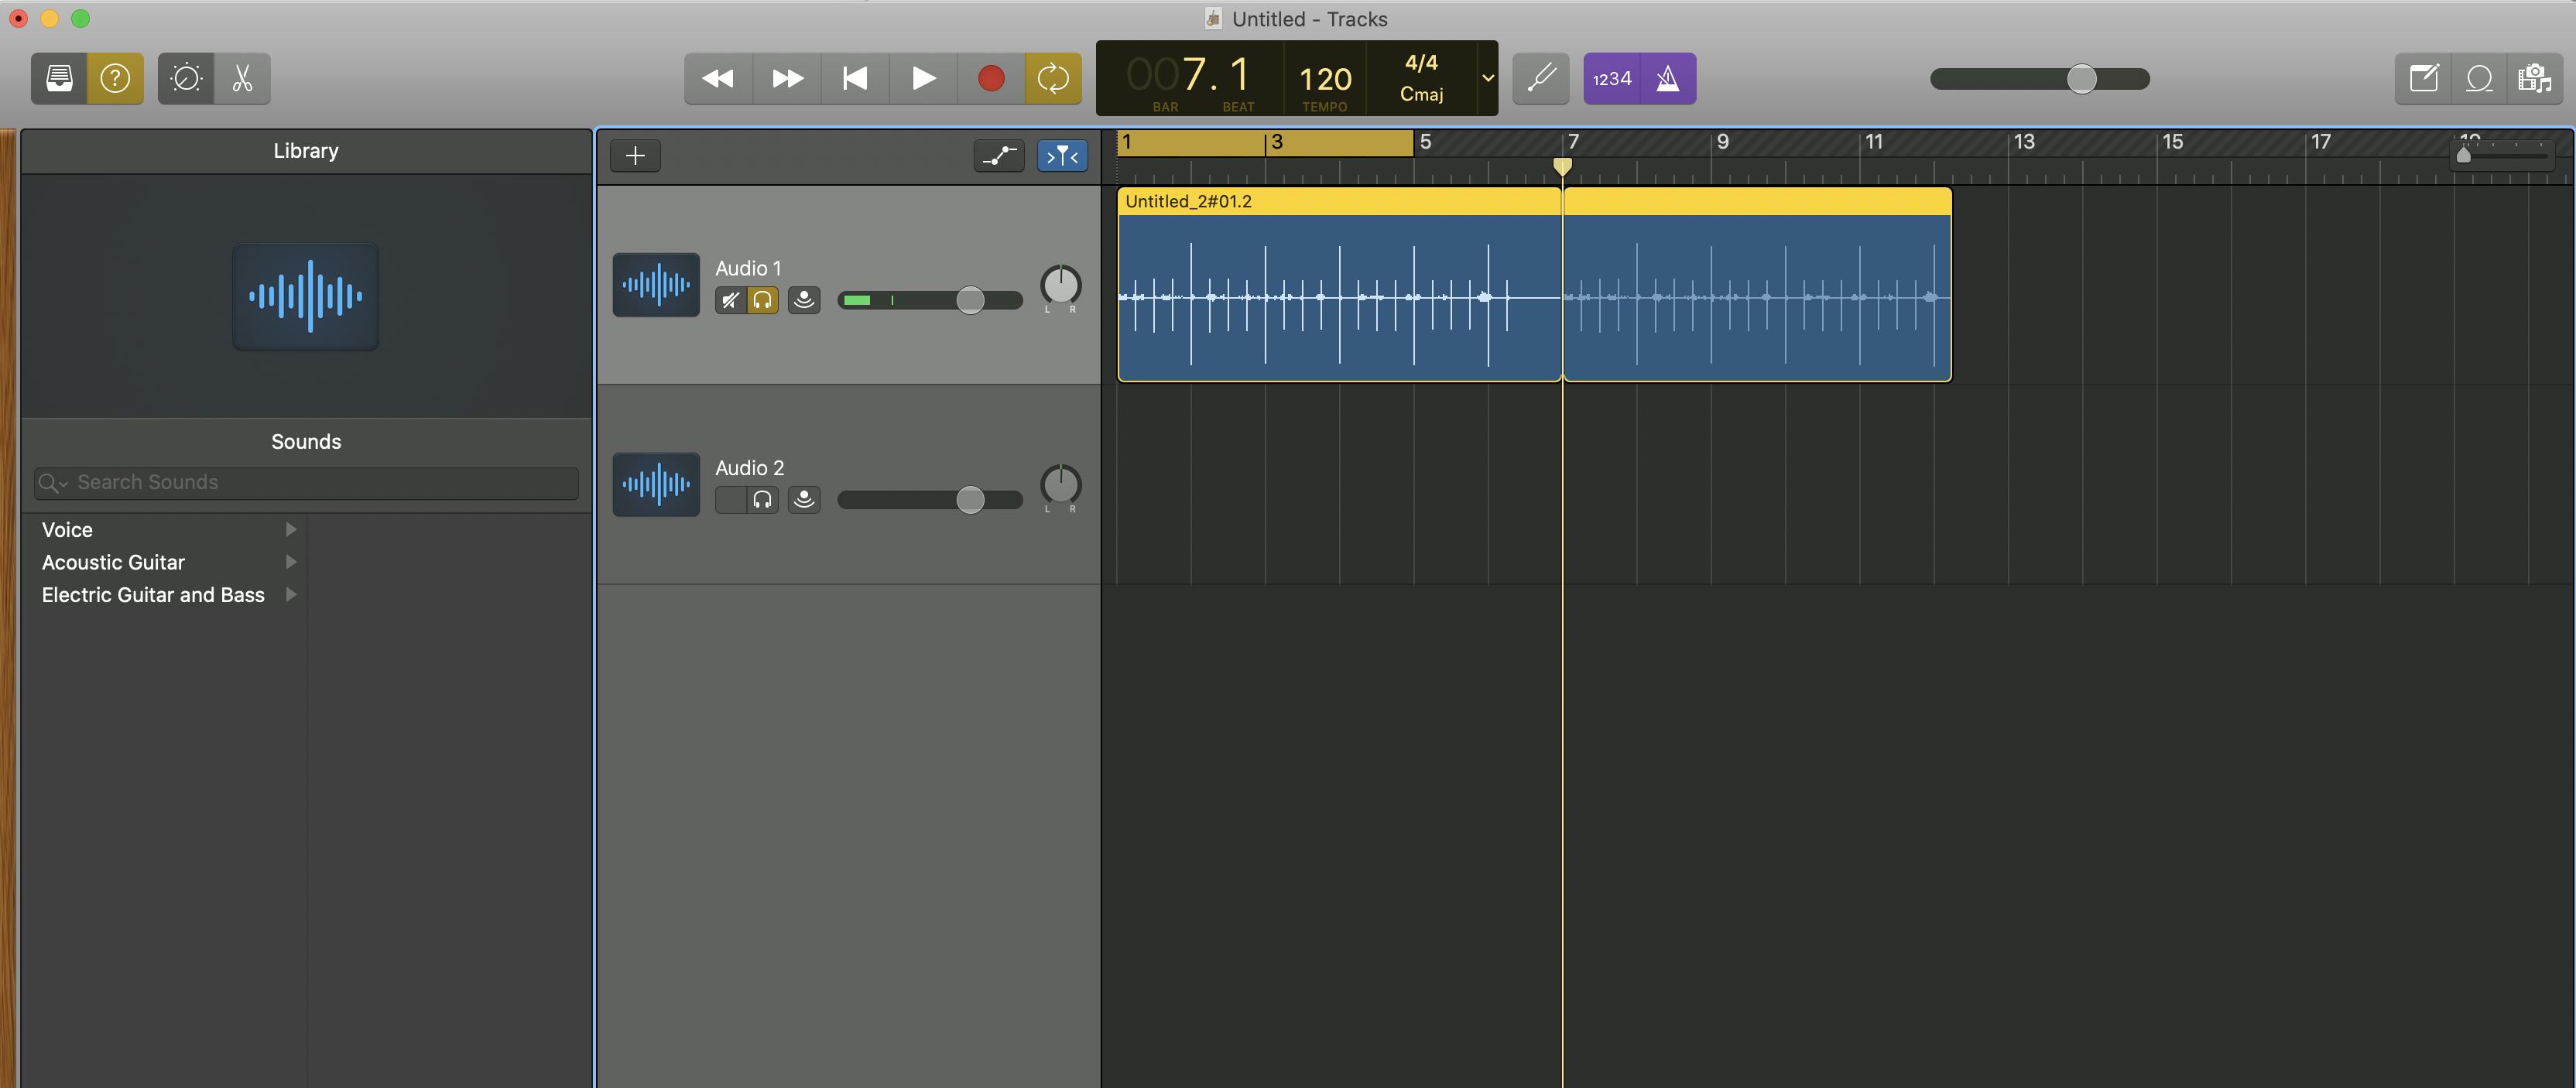
The Transport section displays musical information like beats-per-minute, time signature, etc.
Choose Time from the transport dropdown menu to simplify the display. Then, click on the metronome and count-in features to the right of the display to turn them off. Go to File > Save As to save your recording.
Step #2. Record your episode
When you open your template, save it as a new project, so you don't accidentally change any settings.
If you’re recording a solo podcast, you’ll select Singletrack recording. If you’re recording with cohosts or guests, choose Multitrack recording.
Singletrack recording
With Singletrack recording, all you need to do is hit the red record button.
Before you record, check your mic settings and record a test to check your levels. Adjust the input gain on your audio interface to compensate wherever it’s too loud or soft. Your levels should stay below the yellow or red territory.
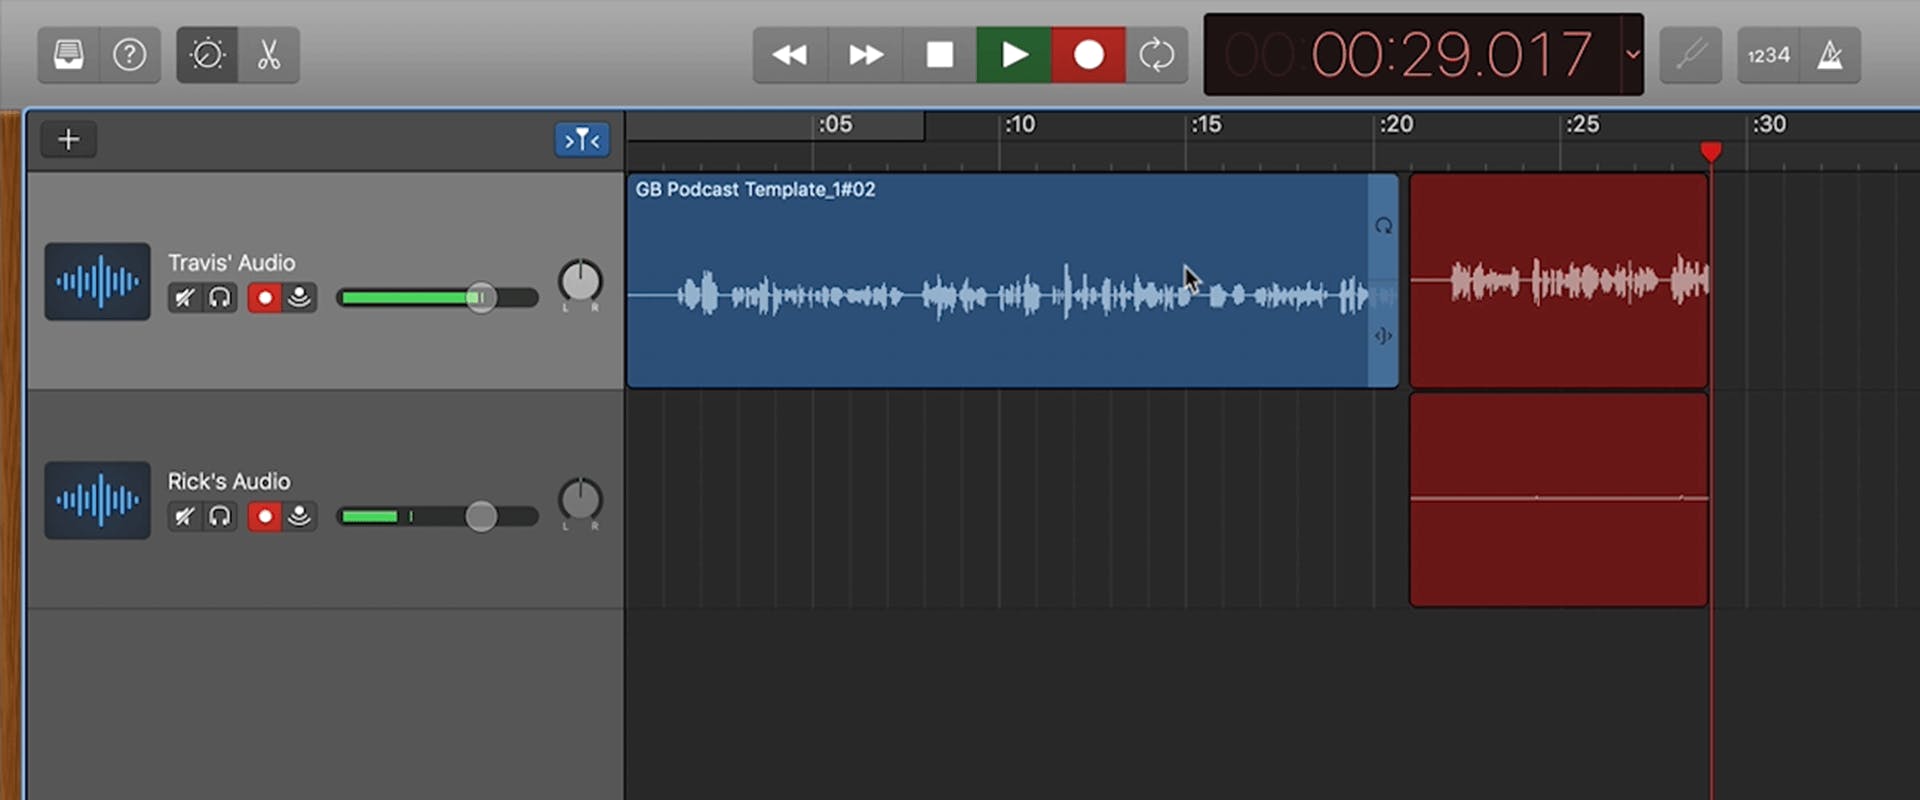
Multitrack recording
Multitrack recording lets you record each person on their own track. Recording on separate tracks makes it easier to edit each person’s audio in post.
Click the + symbol in the top left corner to add an additional track.
Select Microphone Track again and choose the appropriate input for each mic (input 2, 3, etc.). Then, click Create.
It's a good idea to rename each track by the speaker to avoid confusion.

By default, GarageBand only records one track at a time. To enable multitrack recording, go to the menu bar and choose Track > Configure Track Header.
You can also right-click on any track and choose Configure Track Header (keyboard shortcut: Option + T). Tick the box next to Record Enable to toggle it on in the dialog that opens. This will add the record-enable button to each track.
When you're ready to start, toggle on the record-enable button on each track you want to record.
The tracks will flash when they’re armed. To disarm a track, click the Record-Enable button again. Armed tracks will record simultaneously when you press the record button.
Pro tip: If you can’t arm multiple tracks, double-check your recording settings for each one and make sure you have separate inputs. GarageBand will not record the same input to multiple tracks.
Step #3. Edit your episode
You only need to know a few features in GarageBand to edit your podcast. Let's review the most important ones.
Loop Pointer
The Loop Pointer tool shortens an audio clip by dragging it from the edge. To reveal previously trimmed audio, drag the edge back out.
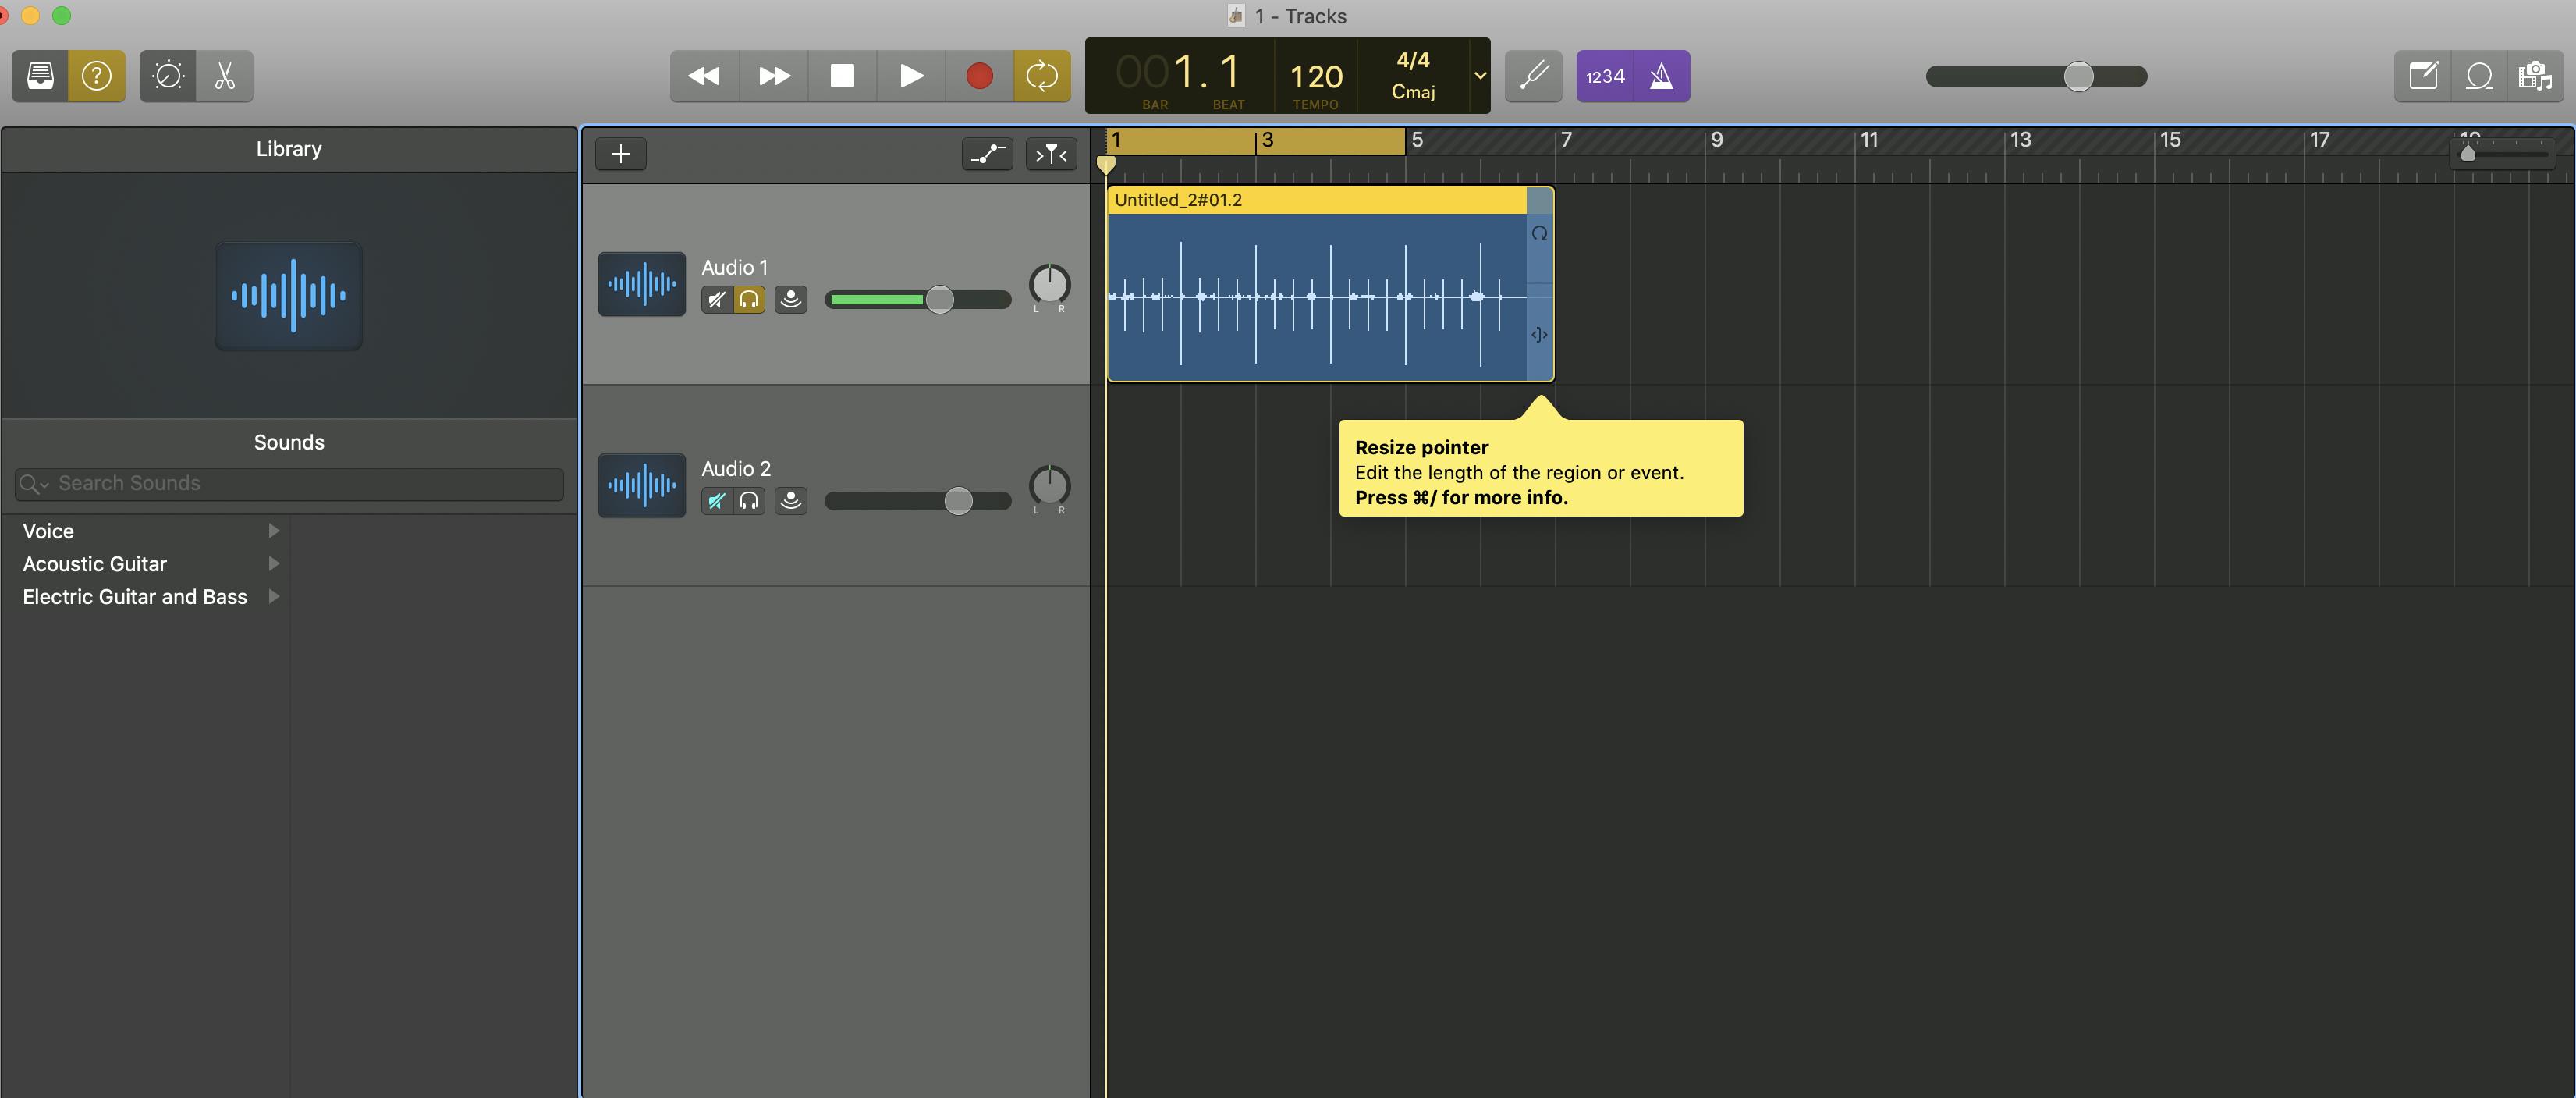
The pointer tool appears when you hover your cursor over the lower right edge of an audio region. Use this tool to trim any clip to the appropriate length.
Split regions at Playhead
Keyboard shortcut: Command + T
Menu: Edit > Split Regions at Playhead
The Split Regions at Playhead tool lets you split a clip into separate clip regions that you can move and edit individually.
This comes in handy if you want to delete a few seconds from the middle of your track. Just isolate the regions, trim the clip, and move the sections together to close the gap.
Automation
Keyboard shortcut: A
Menu: Mix > Show Automation
Using the Split at Playhead tool can result in clips that stop abruptly.
GarageBand doesn't have a Fade tool like many other DAWs, so you'll need to use Automation to create volume changes and smooth transitions.
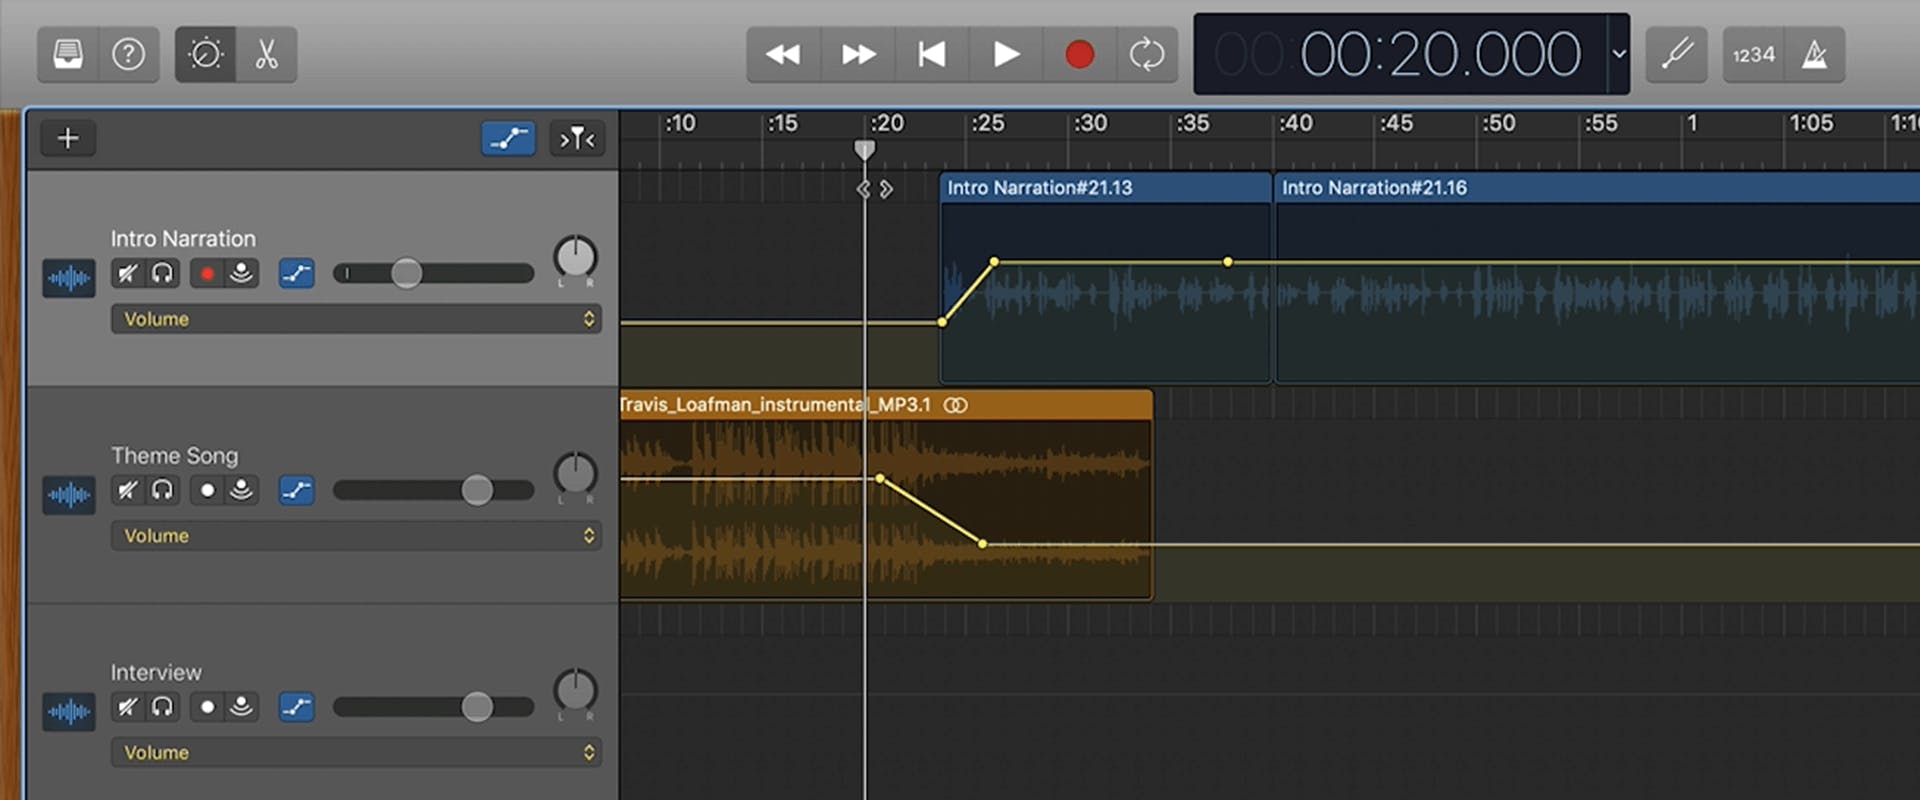
You can select each track’s drop-down menu to automate its own parameters.
With automation visible, click anywhere on a region in the workspace to create an automation node.
When a bright yellow line appears, you can add additional nodes. Drag a node down or up to adjust the volume level at that specific point in the track.
Editing music in GarageBand
GarageBand was made primarily for music production. As a podcaster, you can use this feature to create unique intro and outro music or background music.
First, create a new project. Select the Software Instrument track type. This lets you plug in a USB MIDI keyboard and use other real instruments via USB.

You can also use GarageBand's virtual instruments, like the synth, electric guitar, or drum kit. Go to Window > Musical Typing to use the virtual keyboard.
Pro Tip: Apple Loops are prerecorded musical phrases in the Loop Browser. You can use these to add drum beats, rhythm parts, and other sounds to a project.
Step #4. Assemble and mix your episode
Now it’s time to arrange your tracks into a podcast episode. This isn't an exact science, but following these tips can help streamline your editing workflow.
Arranging your tracks
Try to keep different types of audio on their own track. Music, sound effects, and each voice should all be kept separate. From here, you have two options.
Option #1: Arrange tracks chronologically
You can arrange your audio tracks chronologically, beginning at the top. In this example, we have an intro clip followed by theme music on the track below.
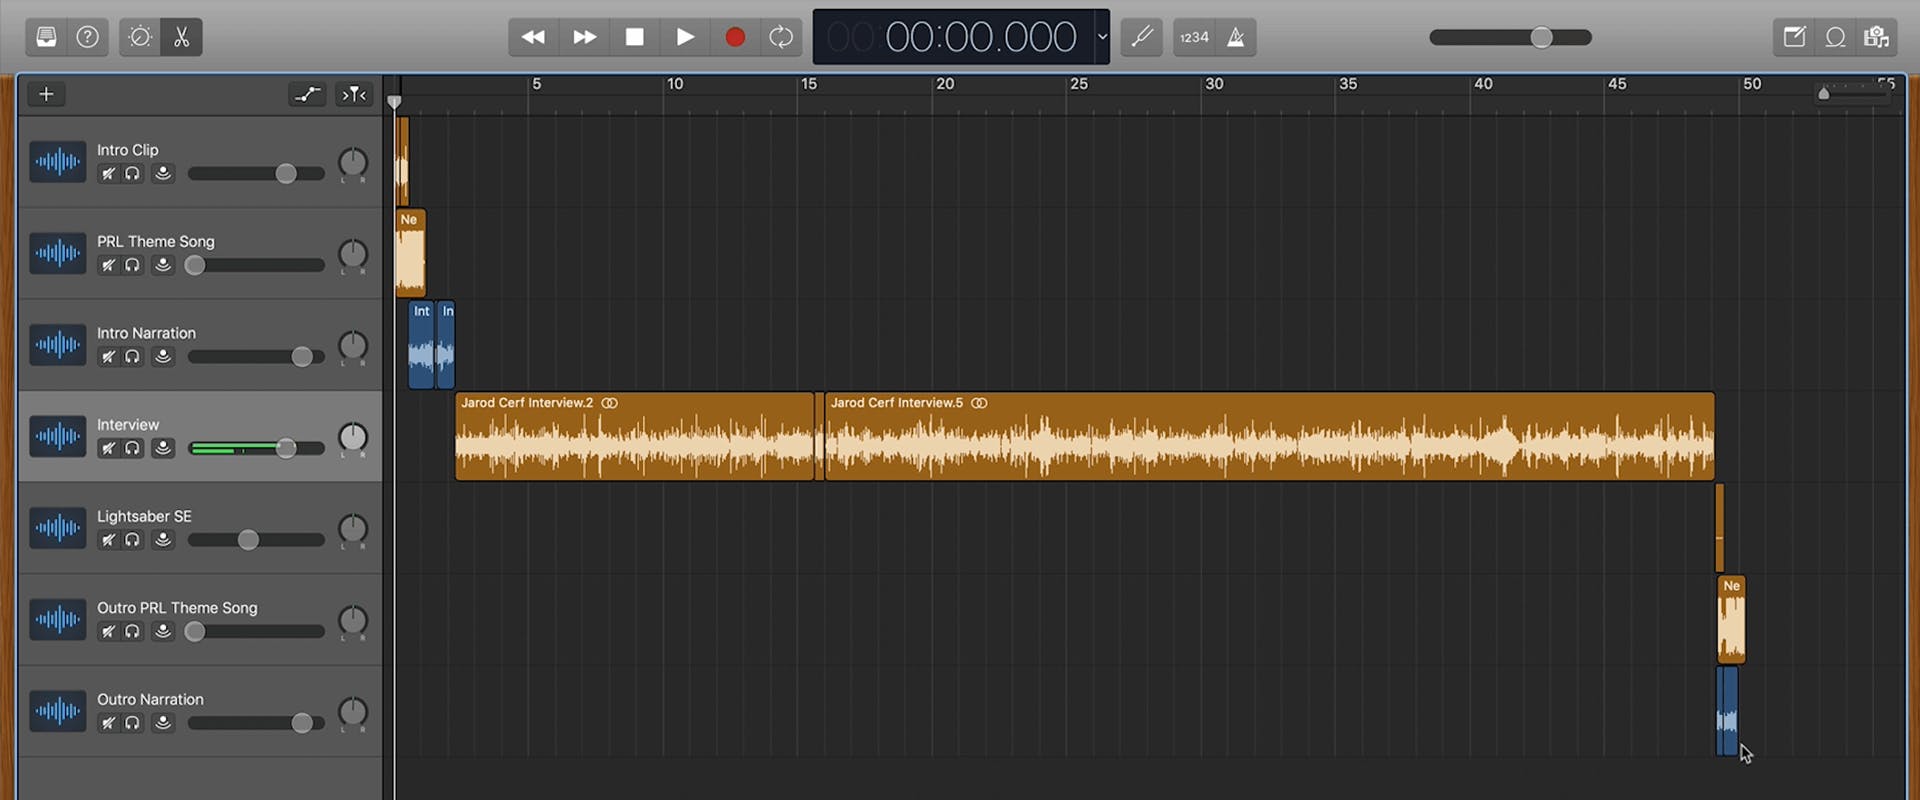
Then we have the intro narration and the interview itself. This arrangement allows for visual organization, with audio cascading from top left to bottom right.
Option #2: Use one track per audio source
When you use one track per audio source, you only have to apply effects (EQ, compression, etc.) once.
In this setup, the intro clip would be on the same track as the interview since they're from the same source.
For example, the intro and outro narration would be on one track, assuming both segments were taken from the same audio recording.
Intro and outro music could be on the same track if you're not using different processing on them.
This approach can minimize the number of tracks you use in your mix and save vertical real estate in your workspace.
Mixing your tracks
Mixing is the process of striking a good balance between the levels of your different tracks. We recommend using the voice level of your recording as the baseline for other levels.
Each track has a metered volume slider in the track header. Listen to a clip of your episode to ensure the voice levels are in the meter’s green range.

Then, set any intro or outro music to a level that sounds consistent with the voice level. Do the same with any sound effects or narration.
Balancing your volume gives you what’s called a “static mix.” Once you've set your static mix, you can leverage the power of automation.
Add volume automation to music to have it play behind intro narration or fade the level out gradually. You can also use this tool to eliminate pops or clicks in your audio.
Pro tip: Click the space bar to easily start and stop your track's playback.
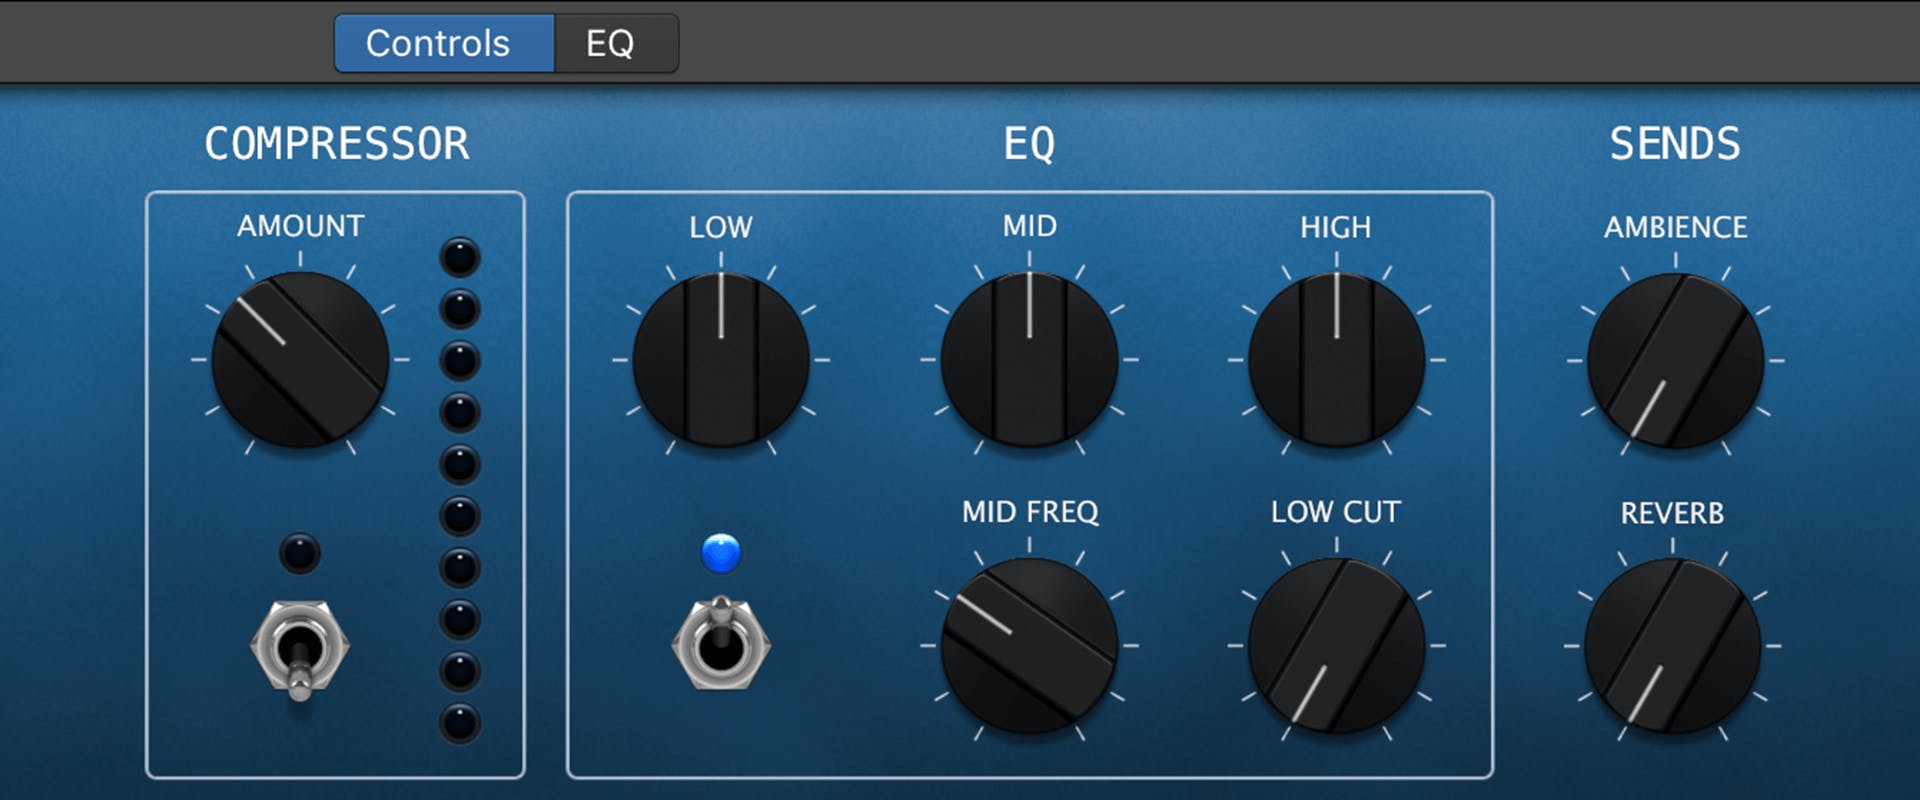
Audio processing plugins
You may want to use audio processing plugins like EQ or compression. These effects help shape the tone or dynamic range of your material. Keep in mind that less is more in most cases.
Make sure your effects processing doesn't add or subtract volume from your static mix. Some plugins include an output control to raise or lower the volume to its unprocessed level.
You can also use Garageband's Gain plugin, located under the Utility section of the plugin list.
If you're looking for more mixing and mastering capabilities, consider upgrading to Logic Pro X, Apple's pro-level audio editing software.
Step #5. Export file
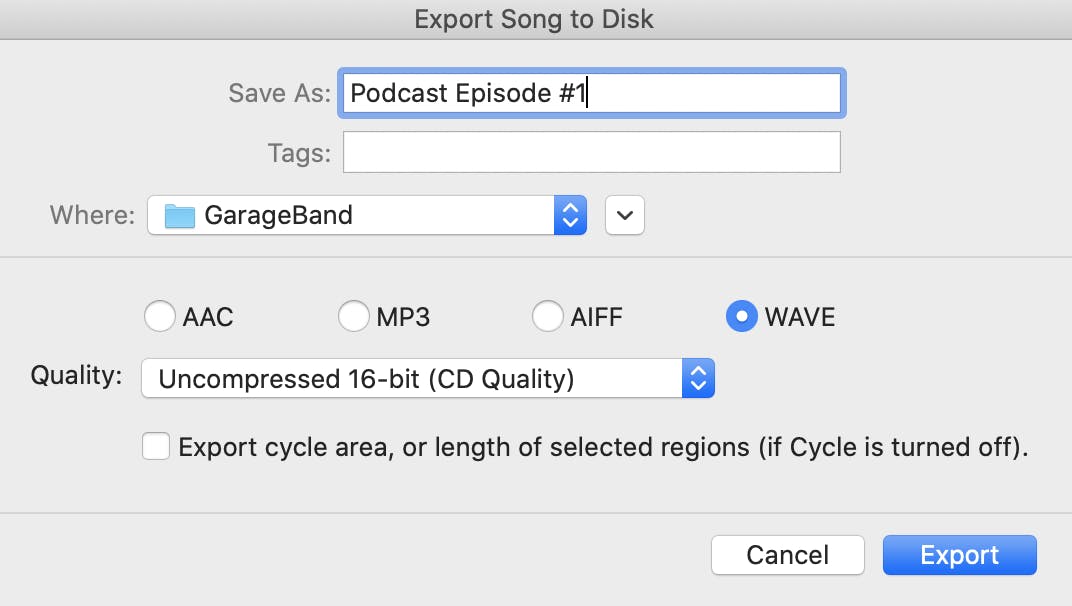
Before exporting your final episode, hit the play button and listen to each segment for mistakes you might have missed. When you're happy with the mix, export it as a single audio file in WAV format.
Click Share > Export Song to Disk. A dialog will open where you can name your file, choose a destination for it, and select the format. Once you fill out the required fields, click Export.
After you export your file, do something relaxing to reset your mind and ears. Then, listen to the episode one more time for mistakes you might have missed.
Once you're satisfied, upload the file to your podcast host for distribution.
Pro tip: Export an uncompressed WAV file to ensure the best audio quality.
Final thoughts
GarageBand is an excellent beginner tool for editing podcast episodes. Even though the software was created for musicians, the workspace is intuitive and has everything most podcasters need to edit a quality episode.

Alban Brooke
Alban Brooke is the Head of Marketing at Buzzsprout and the co-host of Buzzcast. Have any questions about this guide? Reach out on Twitter.
FAQS
Is GarageBand good for podcasting?
GarageBand is an excellent beginner tool for editing a podcast. However, because it was created for music production and songwriting, you might need to turn off some of the features to make it work for podcasting.
How do I make a podcast in GarageBand?
To record a podcast in GarageBand, plug your microphone in and open a new project. Set up your workspace, choose between single or multitrack recording, and press the record button!