How to Edit a Podcast: The Step-by-Step Guide
Besides creating the content itself, podcast editing is arguably the most important step in producing a podcast that your subscribers will actually want to listen to.
The ubiquity of digital audio workstations (DAWs) and other editing software puts the power of editing easily within reach, but if you’re not an audio professional, it can be hard to know where to start.
Thankfully there are some universal editing tools, techniques, and workflows that you as a podcaster can leverage to up your game, regardless of your choice of software.
Before we get into how-to’s and technical stuff, here are a few “why-to’s” and suggestions to make your editing life easier.
Table of Contents
- Things to consider before you start editing
- Step 1: Get your podcast audio files organized
- Step 2: Understand Your Software: DAWs vs. Audio Editors
- Step 3: Know These Universal Editing Techniques
- Step 4: Make Your Edits
- Step 5: Use Good Editing Judgment
Things to consider before you start editing
Remember that editing is where your story happens
The technical & tactical should always be used in service of your content. It’s easy to get lost in the weeds once you start the editing process, so before you lay a finger on your audio make sure you know what you’re trying to accomplish.
Listen to your recording, take notes, and decide what’s important to you and your listeners before you start. Decide what and why you’re editing at the outset and you’ll stay out of time-wasting rabbit holes.
A little bit of planning goes a long way
Decisions made in the pre-production and recording stages of your podcast episodes can either simplify or dramatically complicate your edit. Experience is the best teacher here, but there are plenty of resources available on how to write good interview questions, for example, or how to employ good mic technique, that can prevent headaches in your edit.
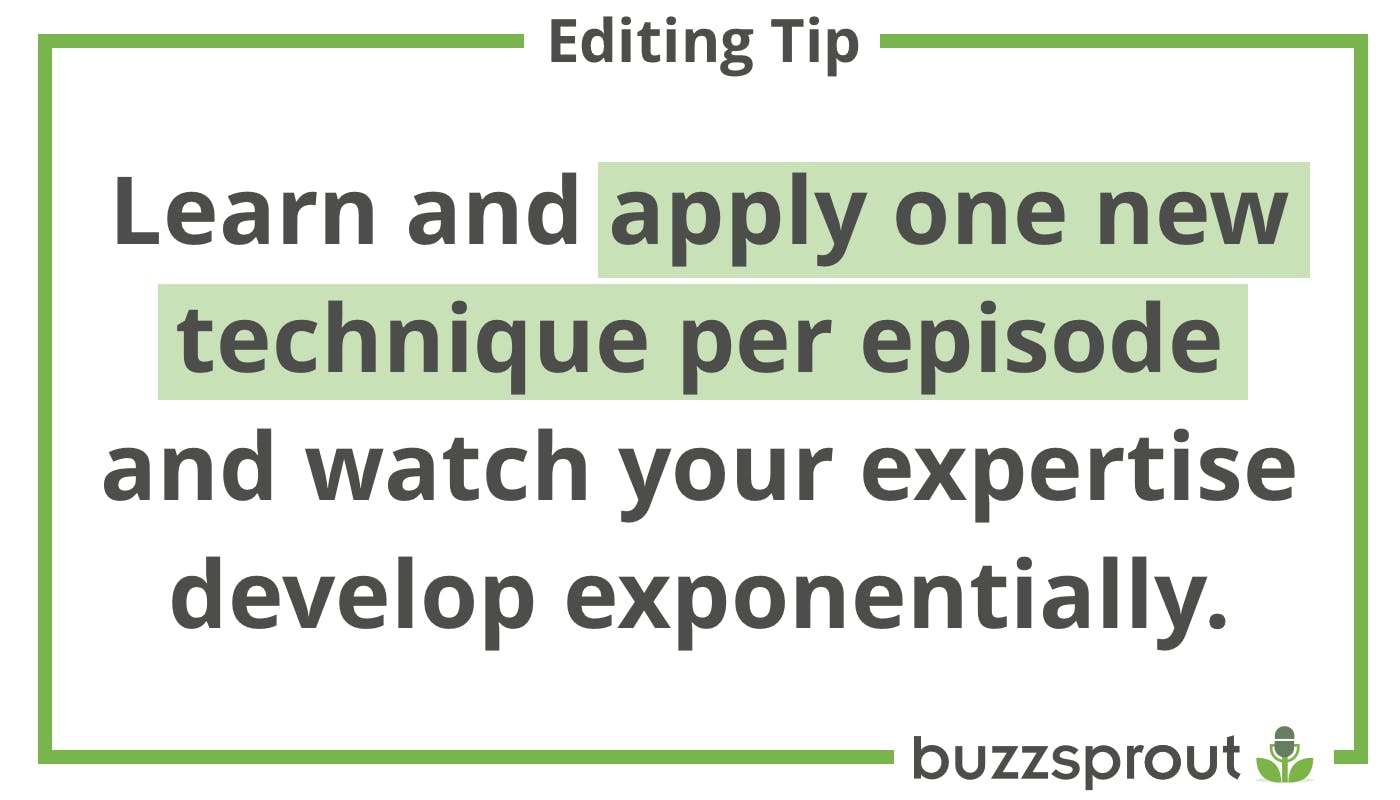
Learn and apply one new technique/concept per episode, or choose a handful per season, and watch your expertise develop exponentially.
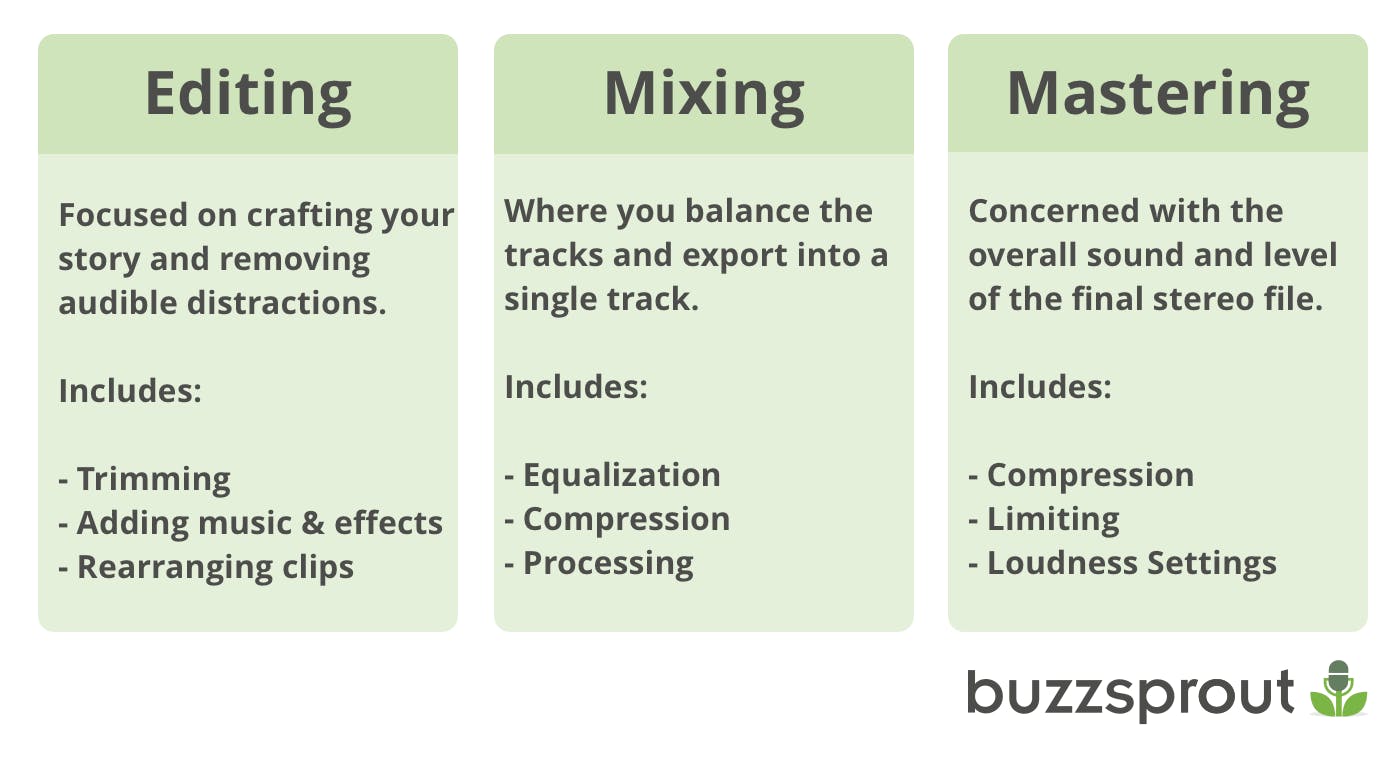
Remember that editing, mixing, and mastering are not the same thing
You may eventually (or already) use a blended workflow for these tasks, which can be an efficient timesaver. But it’s still helpful to disambiguate these concepts whether you’re feeling out your workflow or you’ve been at it for a while.
Editing
Audio Editing is the process by which you refine your story, craft a sense of flow, and mitigate any audible distractions. It’s a largely subtractive process of trimming your raw recording down and rearranging it, where necessary, into its most compelling form.
This is generally the time to lay out any sound effects, transitions, music, or pre-recorded advertising you may be including in your episode, as well as employ any necessary de-noising processing to your tracks.
Mixing
Mixing is concerned with balancing levels between tracks, making tonal adjustments, using noise reduction to minimize or eliminate background noise, and finally, bouncing your episode down to a single stereo track for mastering/distribution.
This is the time to use equalization, compression, and other processing tools to tame any rowdy frequencies or inconsistent dynamic range on your tracks, or to get creative with effects, if appropriate.
Mastering
Mastering is the last stage before distribution. Where mixing applies processing to individual tracks to shape tone and levels, mastering is concerned with the overall sound and level of the final stereo file - achieved through the judicious use of compression/limiting.
Even a cursory mastering job can help ensure that you’re compliant with loudness standards and mitigate some of the lossy artifacts that may be introduced when streaming services compress your file.
Edit before you mix
It’s easy to blur the lines between editing and mixing thanks to modern DAW feature sets, but I’m of the mindset that it will only help you to spend time crafting your episode before you polish it. Broad strokes first, then details.
Even after you’ve produced enough episodes to create a reliable mix template, the process will still be more streamlined if you can distinguish your focus between the two tasks.
With those things in mind, let’s look at some steps for developing an optimal editing workflow for your podcast.
Step 1: Get your podcast files organized
I’m a total sucker for digital tidiness, but even if you aren’t, embracing a level of organization in your process will make your podcasting life much simpler. Here are three ways to better organize your workflow for editing podcasts:
1. Use consistent folder structure and filename conventions. When you’re producing content at volume, standardization is your best friend – don’t leave yourself wondering where you put that clip or whether “Episode6 - FINAL v2 Master B.wav” is actually the one you published. Choose a system that works for you and stick with it.

2. Use dedicated tracks in your DAW for different types of audio – voice-over, dialogue, field recordings, sound effects, music, and ads – and group them by kind. I recommend giving each interview participant their own audio track and then using a few separate tracks each for sound effects, music, etc. You may be tempted to use fewer tracks to keep everything visible on the screen at once, but don’t. It’s a messy approach that will lead to a sloppy, complicated mix. Session organization is a pro audio move you can implement right now, regardless of skill level, and will set you up well for mixing and template creation.
You may be tempted to use fewer tracks to keep everything visible on the screen at once, but don’t. It’s a messy approach that will lead to a sloppy, complicated mix. Session organization is a pro audio move you can implement right now, regardless of skill level, and will set you up well for mixing and template creation.
3. Separate content editing and sound editing tasks. If your interviews are lengthy, get them transcribed with timestamps and create a punch list of content edits from the transcription. Once the content edits are done, listen down for any audible distractions you may need to address and then tackle those.
In my sound work I find it so helpful to focus my attention on one type of task at a time rather than tackling issues as they arise chronologically in the recording. If you delete all dead space first, for example, you’ll save time listening for content. If you wait until your content edit is tight to work on audible distractions, you’ll have fewer of them to address. Try it out and leverage your brain’s ability to move at speed down one lane at a time.
Step 2: Understand Your Software: DAWs vs. Audio Editors
While there is increasing overlap between DAWs and audio editors in the modern app-scape, it’s helpful to note a few differences between the two – namely multi-tracking capability and destructive vs. non-destructive editing.
DAW features:
- Multi-track capability – meaning you can import and play back multiple audio clips simultaneously. This offers much greater flexibility, but also exponential complexity.
- Non-destructive editing allows you to work with your audio clips however you like while preserving source files as-is. Chop up clips, rearrange them in time, and add plugins and effects to your heart’s content.
- Examples include Garageband, Pro Tools, Adobe Audition
Audio Editor features:
- No multi-track capability – audio editors are designed for editing a single clip at a time.
- Destructive editing means that whatever you do to the clip is done to the source file.
- Examples include Audacity, Sound Forge
Further differences include how each type of application handles effects and exporting/rendering. Automation, signal routing, and MIDI capabilities are usually DAW-only features.
Many DAWs, like Garageband, actually have a built-in audio editor for in-app destructive edits that are reflected immediately in your workspace/timeline, which is a convenient best-of-both-worlds feature.
Step 3: Know These Universal Editing Techniques
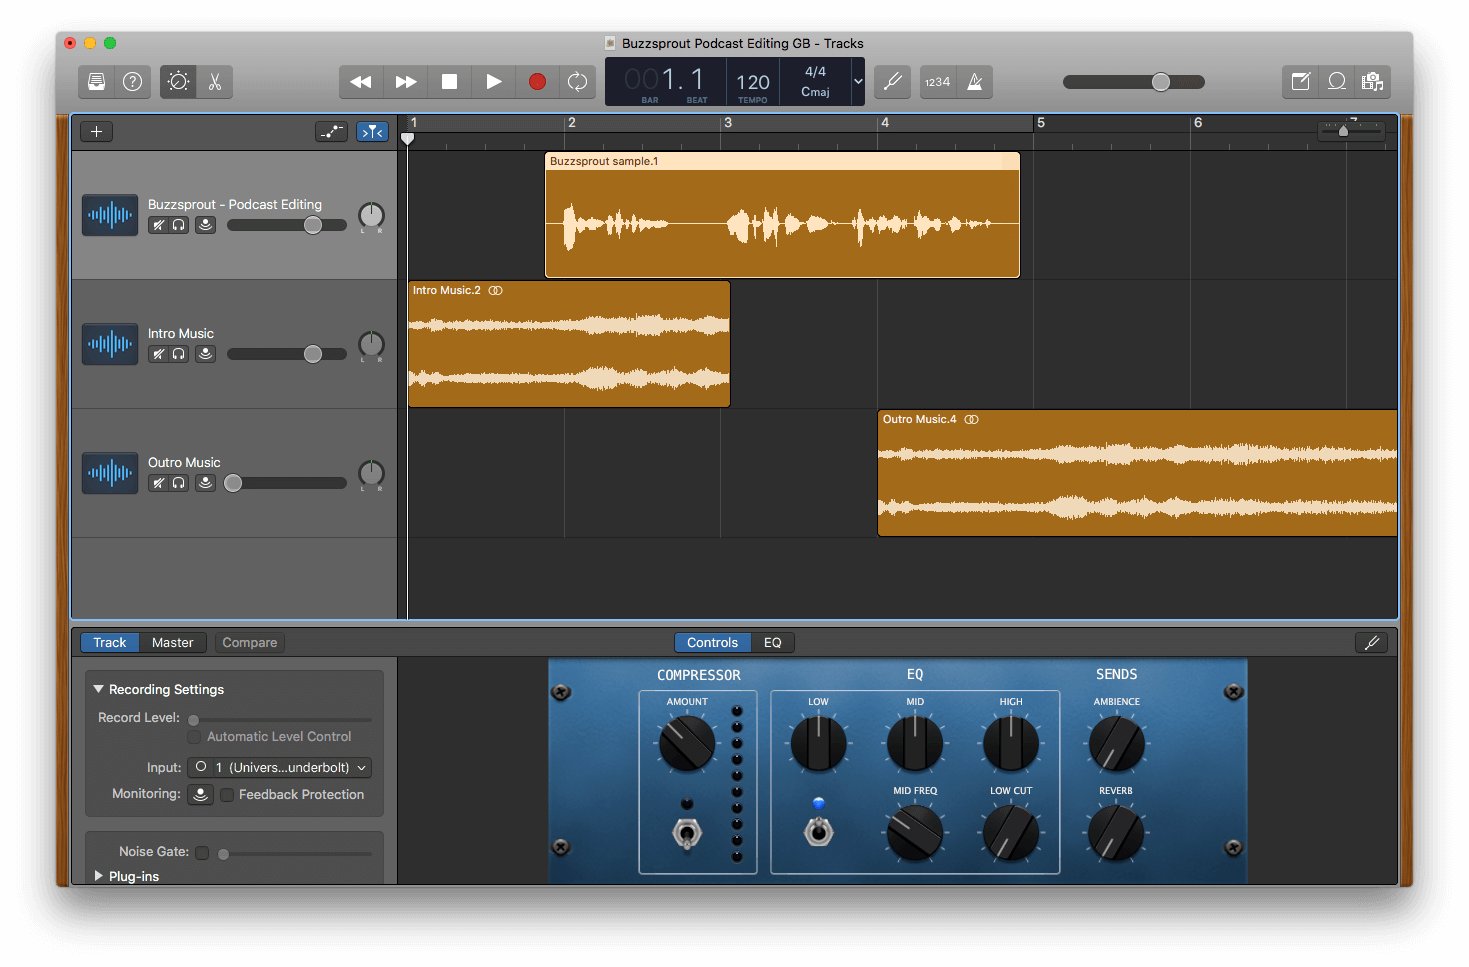
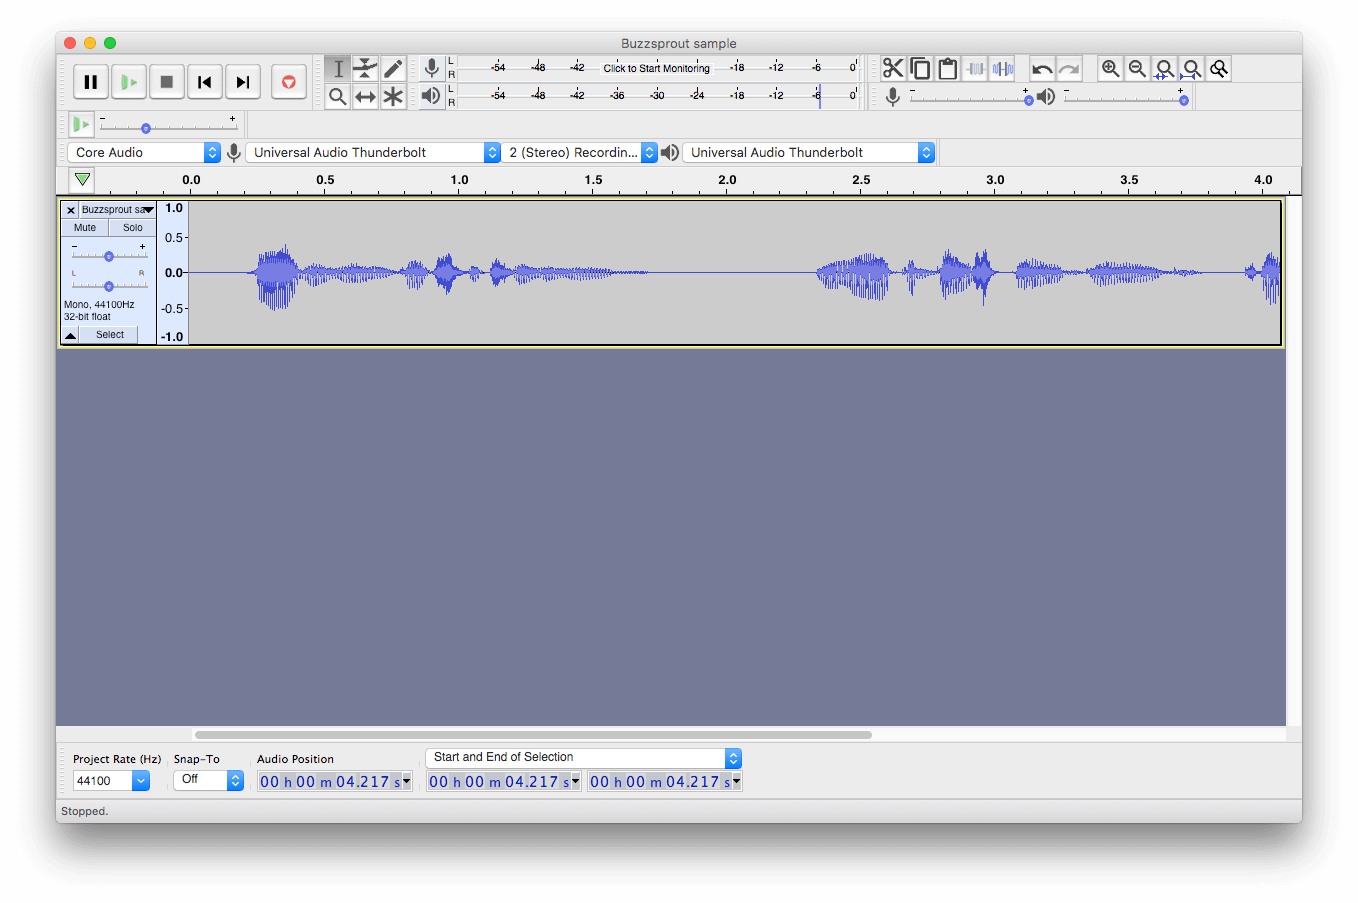
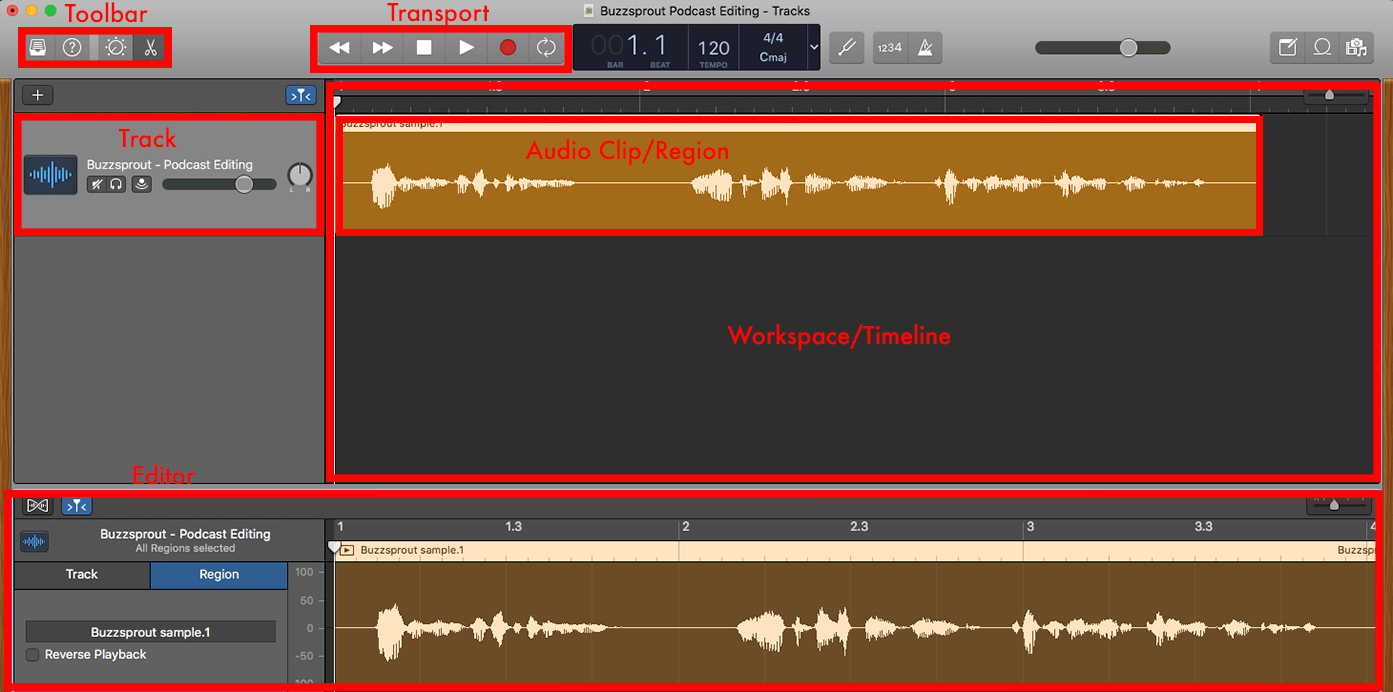
Whatever your choice of software, most will share a common set of features, including various toolbars, a transport section (stop/play/record, etc.), a workspace or timeline where you can add audio clips/regions to tracks, and in the case of some DAWs like Garageband, a built-in audio editor.
We’ll focus on editing workflows in a DAW, but many of these techniques apply to audio editors as well. Learn which tools and features to look for and you’ll be able to work in almost any software you come across.
Technique 1: Track-Based Workflow
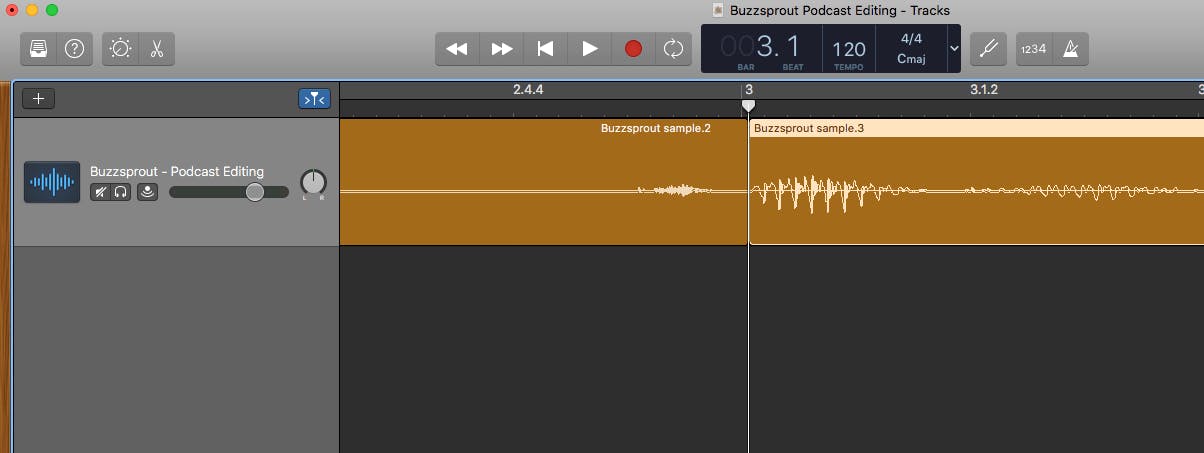
Let’s assume you’ve just opened a fresh session in your DAW. In almost any application you should be able to select files to import via “File > Import” in the menu bar, or by simply selecting them on your computer and dragging them into the DAW workspace. Most DAWs have keyboard shortcuts built in as well. These vary by app, but can dramatically speed up your work once you learn them.
Many DAWs will automatically sort audio clips onto their own individual tracks upon import, but if yours doesn’t, create a new track for each clip and add it from your DAW’s audio bin. The main benefit of a track-based workflow is independent control over each audio clip in your session.
Clip cuts and fades, the ability to move clips forward/backward in time, plugin processing, volume levels, panning, and automation of these parameters are all track-specific choices that will help you craft the episode you want to hear – more on that to come.
Once you’ve imported to your tracks, I highly recommend organizing and, if possible, renaming tracks to make your session as easy as possible to work in. I like to arrange my sessions by track type with voice tracks at the top, followed by any field recording or sound effect tracks, followed by music tracks (including intro/outro music), and any other material below that.
How you sort things is up to you – but finding a layout that you can stick to will make working on each subsequent episode a cinch.
Some DAWs allow you to physically group tracks together for batch editing, which can help preserve timing alignment between simultaneously-recorded clips. This can be especially helpful for broad-stroke cuts to interviews where you need to preserve the relationship between clips in a conversation, or mute clips on a track when someone else is speaking.
In addition to group-based editing, some DAWs also utilize track playlist features. One benefit here is that while nothing is technically happening to a source file when you edit in a DAW, that doesn’t mean you’ve got access to the raw file for playback at all times.
Putting the raw file in a playlist and duplicating it before you make any changes means that you can quickly recall and compare your edit with the source material.
Technique 2: Create a Punch List
Once your tracks are imported and sorted it’s time to start editing. If you went the annotated transcript route, start running down the punch list. If you haven’t yet created one, you may want to either A) listen down to your raw recording and edit in real time or B) listen down to your recording and create a punch list of edits. If you’re working on a team, this can also be a helpful way to collaborate on the edit and stay on the same page.
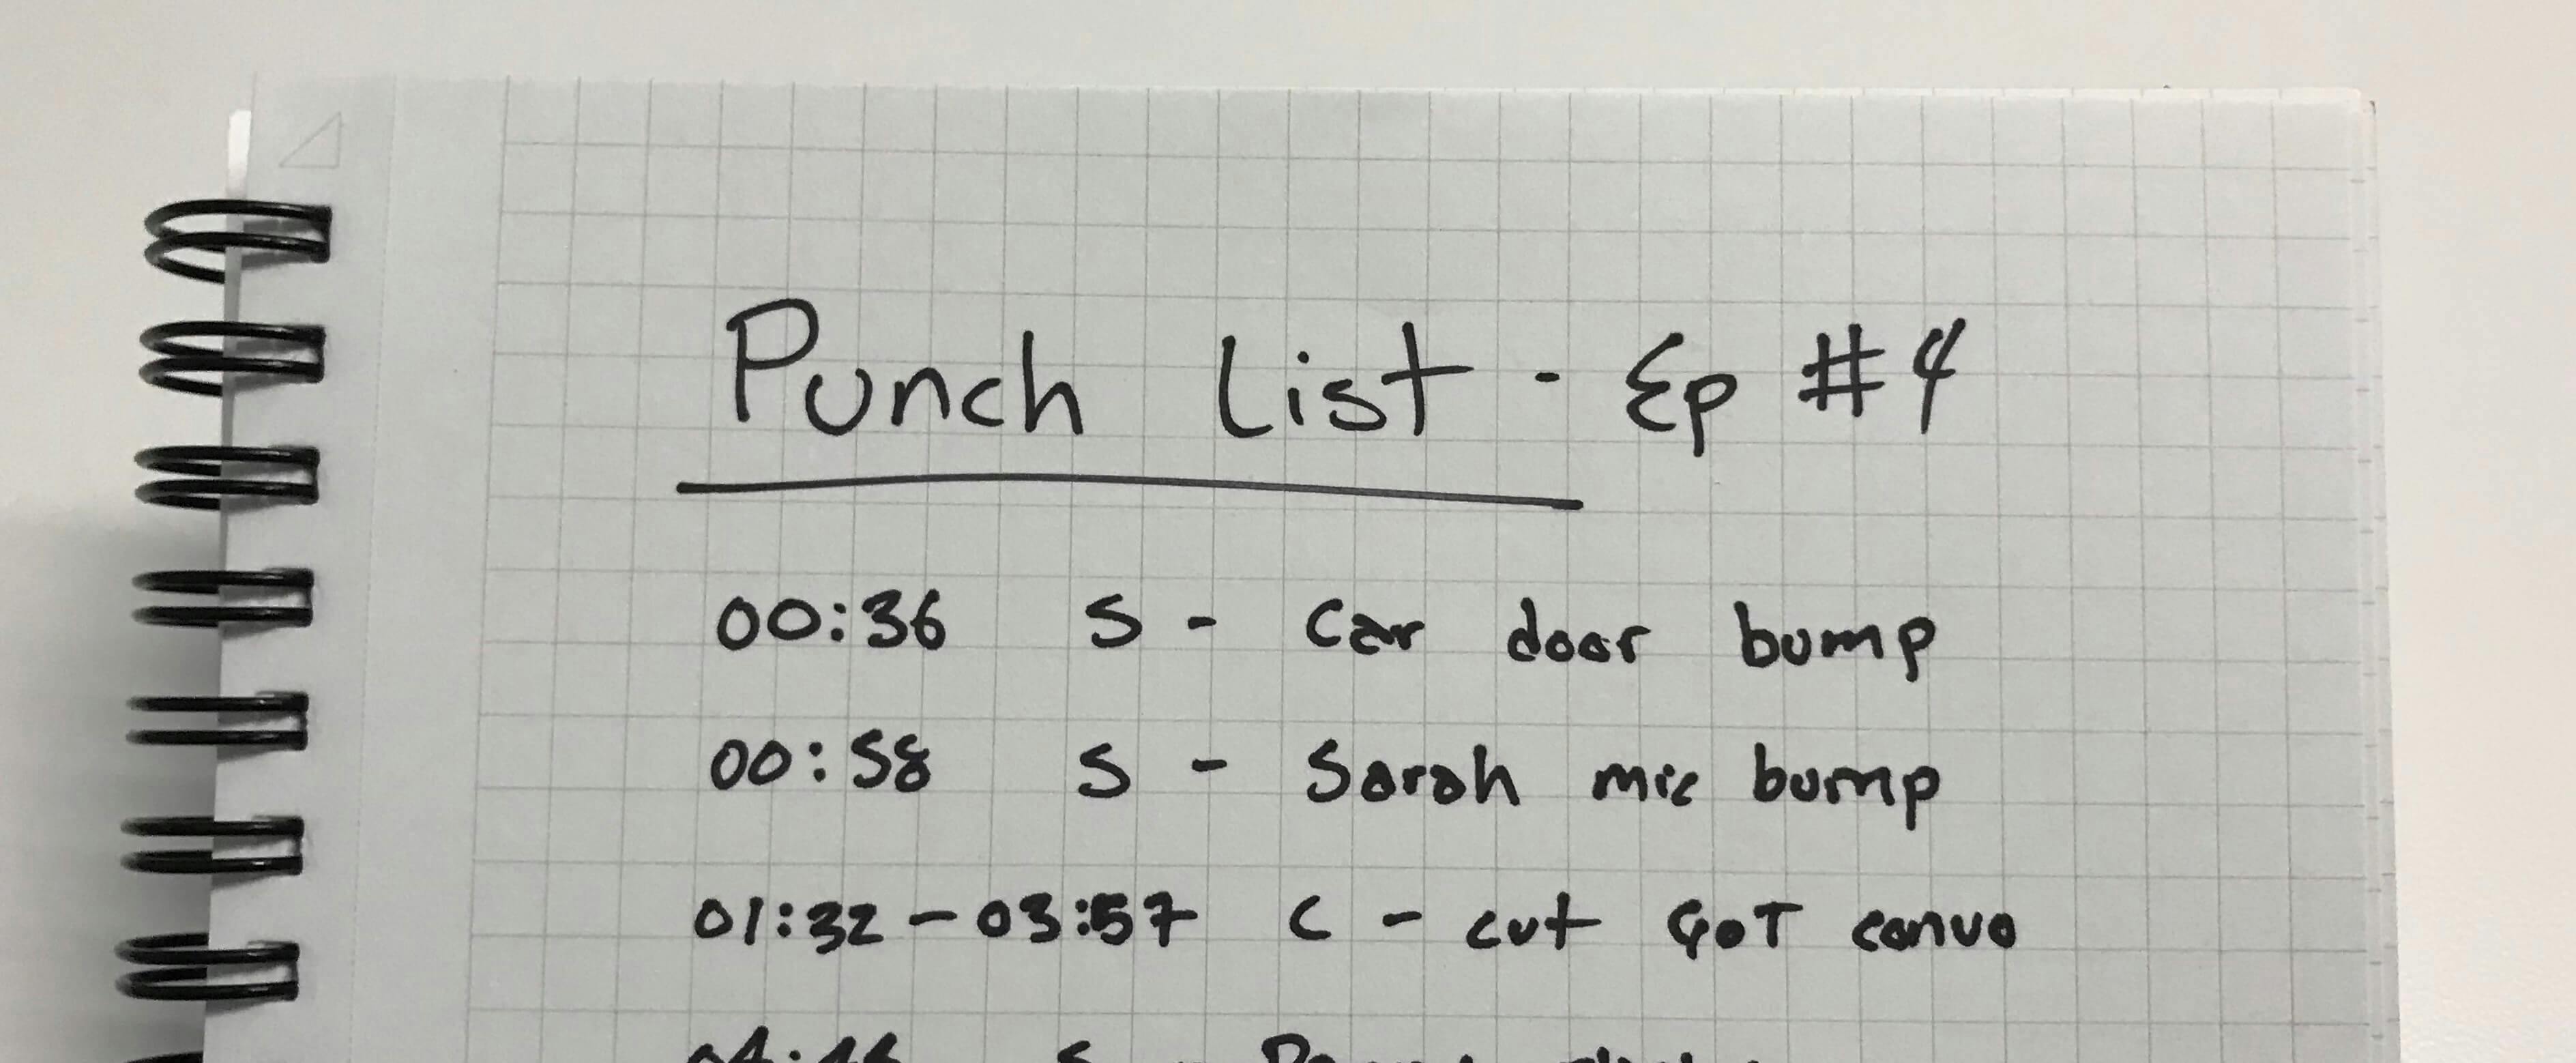
Here’s an example edit punch list:
00:36 S - Car door outside
00:58 S - Sarah mic bump
01:22-03:57 C - cut ‘Game of Thrones’ convo
04:44 S - Danny plosive
...
In this example I’ve used ‘S’ to denote sound edits and ‘C’ to denote a content edit. Create your punch list in one pass, but as I said before, editing content before sound will make the whole process more efficient.
Whether you include a description is entirely up to you, and in fact you may find that simply noting or marking timecode is sufficient. Use whatever works. If it’s a feature of your DAW, adding markers in the timeline is a quick and simple way to flag your punch list. Delete them as you go to “check off” the list.
Technique 3: Tools and a Clip-based Workflow
Most DAWs include a comparable suite of tools/features, including select, trim, grab, cut/split, and fade. In brief, here’s what these tools are and when to use them:
- Select - works similarly to a cursor in your word processor of choice for selecting one or multiple clips.
- Trim - allows you to shorten an audio clip simply by dragging in from the edge, and to reveal previously trimmed audio.
- Grab - allows you to grab an entire clip and move it forward or backward in time, or drag it on to a different track.
- Cut/split - separates your clip at a given point of your choosing, creating a sub-clip of the source file.
- Fade - comes in three iterations: fade in, fade out, and crossfade. A crossfade is just a combination of the other two, literally fading one clip out at the same time as the other fades in. Using a fade in/out at the edge of an isolated cut or a crossfade between adjacent clips will mitigate any potential pops or clicks that can result from a cut.
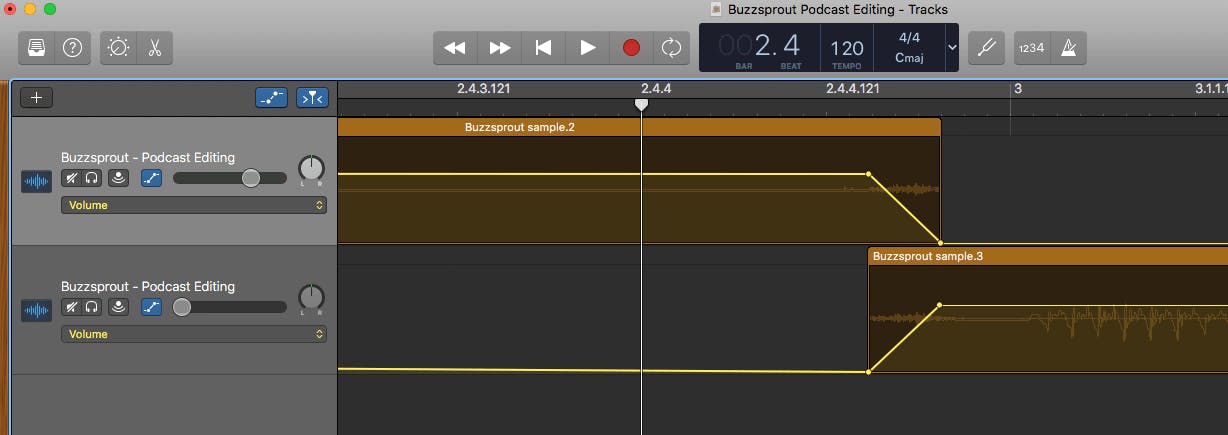
If your DAW doesn’t have a fade tool (Garageband doesn’t), try making your cut as close as possible to a transient (a short volume spike, such as a consonant in speech) where the sound wave approaches the visible midline point.
Another option is to duplicate the track and put the first half of the clip on one track and the second half on the other. Then add an overlapping volume automation fade out and fade in to the two tracks respectively, which essentially creates an equal gain crossfade.
Step 4: Make Your Edits
For content edits, the simplest approach is to make a pair of cuts at the boundary of unneeded audio and delete it. Then use the grab tool to drag the resulting pair of clips together and close the gap, applying a crossfade at the joint between the two new clips.
If you want to trim the beginning or end of a clip, use the trim tool to drag the edge of the clip to your desired timing and add a fade in or fade out as needed.
For sound edits, follow the same logic when an audible distraction happens in a gap in the recording. If the result creates a “hole” in the sound bed of your clip and/or you can’t sacrifice timing by moving adjacent clips together, try to find another moment of quiet ambience from elsewhere in the recording and copy/paste it into the gap, using crossfades at the edges.
Use denoising tools, like those found in Adobe Audition or iZotope’s RX suite, to deal with distracting room tone, ground hum, mouth noises, and other anomalies.
Always remember to maintain the timing relationship between clips that were recorded simultaneously, such as in a multi-mic interview recording. Not only can you disturb the flow of your interview, but it’s possible to introduce phasing issues in your audio as you move clips out of sync with one another. Whether it’s a content or sound edit, do to all of the clips what you do to one of them at this stage.
Step 5: Use Good Editing Judgment
When editing for sound issues, it’s important to know what to leave and what to cut out. It’s easy to think that “clean” audio is the paramount goal, but there’s no objective approach for achieving the “right” sound. A couple questions you can ask to help in the editing decision process include:
- “Might this sound distract the listener from what I want them to hear?” Think contextless ambient sounds, mouth noises, coughs, etc.
- “Could this sound be something that immerses the listener in the story?” Think appropriate ambient sounds in a man-on-the-street interview, room tone, a dog barking, etc.
- “Am I directing the listener’s focus?” For example, leaving all of the clips in a multi-person interview at full volume can create a noisier room tone than is necessary, where muting, deleting, or volume-automating the tracks for anyone not currently speaking can help minimize distractions and direct focus. Smooth fades from one element (music) to another (the host) also create a sense of direction.
- “Am I sacrificing story for audio quality?” Sometimes the best content doesn’t sound the best. Don’t create greater distractions by trying too hard to “fix” flawed audio — it’s often a case of diminishing returns. Learn from the mistake and do better next time.
- “Am I acting like audio quality doesn’t matter?” It does. The best podcast listening experience absolutely takes audio quality into account. As much as you can control it in the recording phase, always work toward the best sounding audio you can.
Finishing Up
Once you’ve made your edit, give your ears a rest and go get another coffee or take a walk. Get outside of your editor mindset. When you’re ready, come back and listen down to your episode as if you’re a subscriber.
What sticks out to you? Are there any audible distractions you missed? Does the music flow into the interview, and do any field recordings or effects make sense where you have them? Listen for anything that pulls you out of the experience and take note of it.
For anything not mix-related, go ahead and address it before moving on. Beginning the tone-shaping and leveling processes of mixing without being pulled in the direction of the edit will keep you moving quickly and efficiently. And, I’d argue, it will help you produce consistently better episodes.