
Acoustic Treatment for Podcasters: How to Prepare Your Home Studio Without Spending a Lot of Money
One of the most apparent indicators of a sub-par podcast is a roomy, reverberant sound.
There can be a time, and a place for that vibe — documentary-style, run-and-gun interviews or field recordings come to mind, but even those are generally contextualized by studio-quality production. In general, excessive reverb will only make an unfavorable impression on your listeners.
The good news is there’s a lot you can do on your own to mitigate the effects of reverb on your recordings. But before we dive into those solutions, let’s explore a few concepts that will clarify the issue.
What is reverb?
We often don’t notice it, but the reverberation of sound gives us hugely important sensory clues about our environment. When we walk into an auditorium or a closet, hear a bird call in the woods or the sound of thunder, reverb provides essential contributions to our sense of the size of a room or the distance of a lightning strike. But what exactly is it?

Simply put, reverb is sound reflecting off of a surface or surfaces, also known as an echo. When there’s a prominent hard surface to bounce off, you may get the classic “Hello! ...hello!” distinct type of echo. But most environments are more convoluted, with a variety of surfaces producing numerous reflections in such quick succession that they become indistinguishable, blending into one another.
The result is a diffuse “tail” lingering after an initial sound, and the time it takes the tail to die down tells our brains how large of a space we’re in or how far we are from the source. Shorter tails = smaller spaces/closer sounds, longer tails = larger spaces/more distant sounds. A good example of this is when you walk into a large space like a warehouse and clap – the reverb from the clap may last up to several seconds because the sound has room to travel and continue reflecting. Clap in a closet and you’ll hear it die almost immediately because the space is small and the energy disburses quickly.
How to think about reverb in your room
Most of the rooms we record in tend to have close, short reflections that will be more or less pronounced, depending on the dimensions and how hard surfaces are. This can lead to problems in the editing or mixing phases of your podcast because the reflections happen almost simultaneously with your voice, getting “baked into” the recording. This makes them difficult to separate via processing, so the takeaway here is simple: keep them from happening in the first place.
The first step to mitigating these effects is understanding first reflection points. First reflection points in your room are the surfaces directly around your recording position – floor, ceiling, and walls – that reflect the sound of your voice back at you. They’re easy to identify – from your speaking position, imagine that each of the surrounding surfaces is a mirror. Looking into your imaginary mirrors, estimate where you would see the mic on the floor, walls, and ceiling. These are your first reflection points.
There are several approaches you can take to keep them out of your recording. Start by trying a dynamic microphone instead of a condenser, if you have the option, as they’re typically more directional and less sensitive to the peripheral environment.
If you record in the same space week after week, it may be worth buying or building acoustic treatment to hang on the walls and incorporate into the aesthetic of the room. If your setup is more mobile, you might consider a vocal booth box. More on all of this below.
How to think about acoustic treatment
The most common principles of acoustic treatment are absorption, diffusion, and sound-proofing. We’ll define all three but focus on the first two, for reasons that will become clear.
Absorption & Diffusion
Absorption is the most common approach to acoustic treatment and is especially effective at mitigating reflections. When absorptive material is placed between a sound source and a reflective surface like a wall, sound must travel through it to reach the wall and then the reflection must travel back through to reach your ear or a microphone. By that point, most of the sonic energy (especially in higher frequencies) has been discharged, and there will be little to no discernible reflection, which will result in a less “live” or more “dead” sounding room.
Diffusion occurs when a sound meets a variety of surfaces of different depths and/or angles. Each of these surfaces produces reflections at different speeds and angles, essentially breaking up and scattering what would otherwise be a more distinct reflection from fewer/larger surfaces.
While acoustic absorbers and diffusers are a mainstay of recording studios, the same principles are actually at work in your home. As an example, think about the last time you moved into a new house or apartment. On move-in day the empty space probably had a prominent reverb or even distinct echoes present. But once you moved in all your stuff, the sounds that used to reverberate or echo were absorbed and diffused to some degree by furniture, rugs, books, and blankets.
The takeaway here is that you don’t necessarily have to spend a ton of time and resources on professional acoustic treatment – merely choosing the right room in your home or office or adding furniture and rugs to your available space can be a significant first step toward a better sounding recording.
Sound-proofing
Sound-proofing is often incorrectly used as a catch-all term for these concepts, but in reality, it’s the least common and most expensive approach. Where absorption and diffusion are concerned with deadening and disrupting reflections inside a room, sound-proofing is concerned with keeping outside noises from getting in and vice versa.
A truly sound-proofed room requires structural renovation to achieve true isolation from the external environment, in addition to interior treatment for reflections. Overkill for the average podcast?
Absolutely.
DIY acoustic treatment tips
There are many prefabricated acoustic treatment options available on the market, but if you’re on a budget, these can sometimes be cost-prohibitive. Additionally, your podcast may not always have you in a controlled studio environment, and you may need a more mobile setup. The good news is there are plenty of DIY options to suit your needs. Let’s discuss a few of the possibilities.
Stationary interior treatment
If you record in the same environment week after week, it’s not a bad idea to consider acoustic paneling for the walls and/or ceiling of your space. Your choice in-room treatment material should consider thickness – the thicker the material, the more absorptive power across all frequencies.
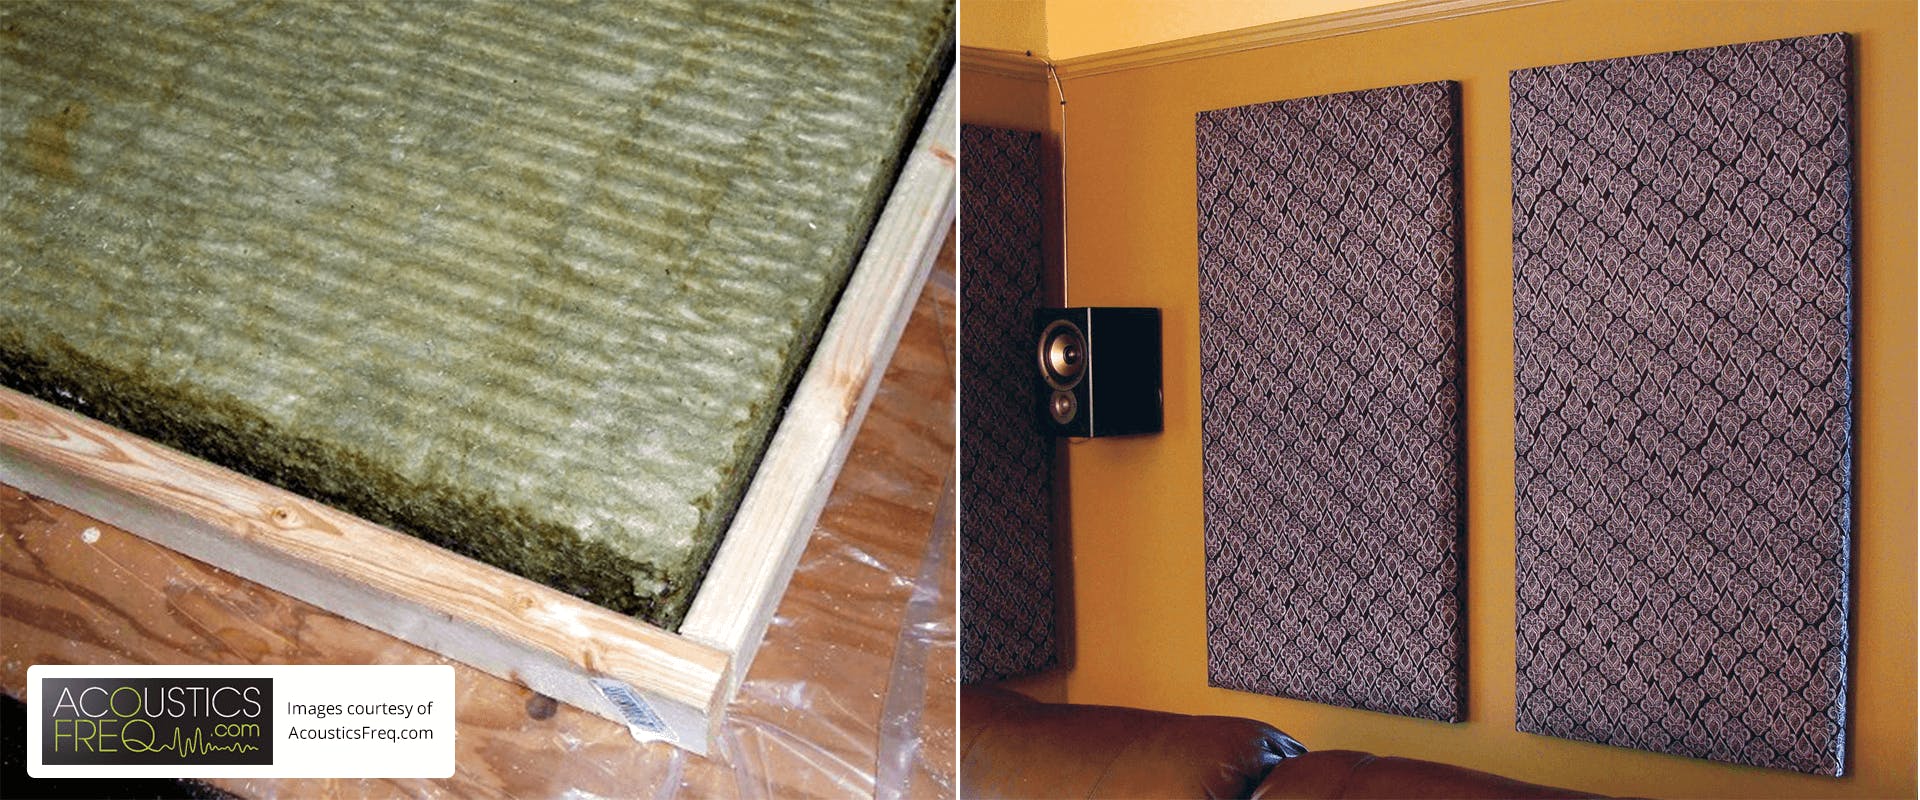
A standard size is 4x2’ and 2” thick, built around conventional fiberglass or mineral wool construction insulation panels.
AcousticsFreq.com has a great article that teaches you how to build your own acoustic panels.
You can build simple frames around these panels using inexpensive pine lumber from your favorite hardware store, and finish them off by wrapping them with any breathable fabric of your choosing. Thinner fabric is better. A good gauge of fabric thickness is to hold the fabric in your hand and blow – if you can feel your breath, it’s good. Sound is moving air, and you want it to move through the fabric into the absorbing material.
Another option is to purchase used materials locally. Auralex foam is a common sound solution and may be readily available in your area. On the absorptive front, be aware that foam panels are less dense and therefore less absorptive, particularly in the lower midrange and bass frequencies.
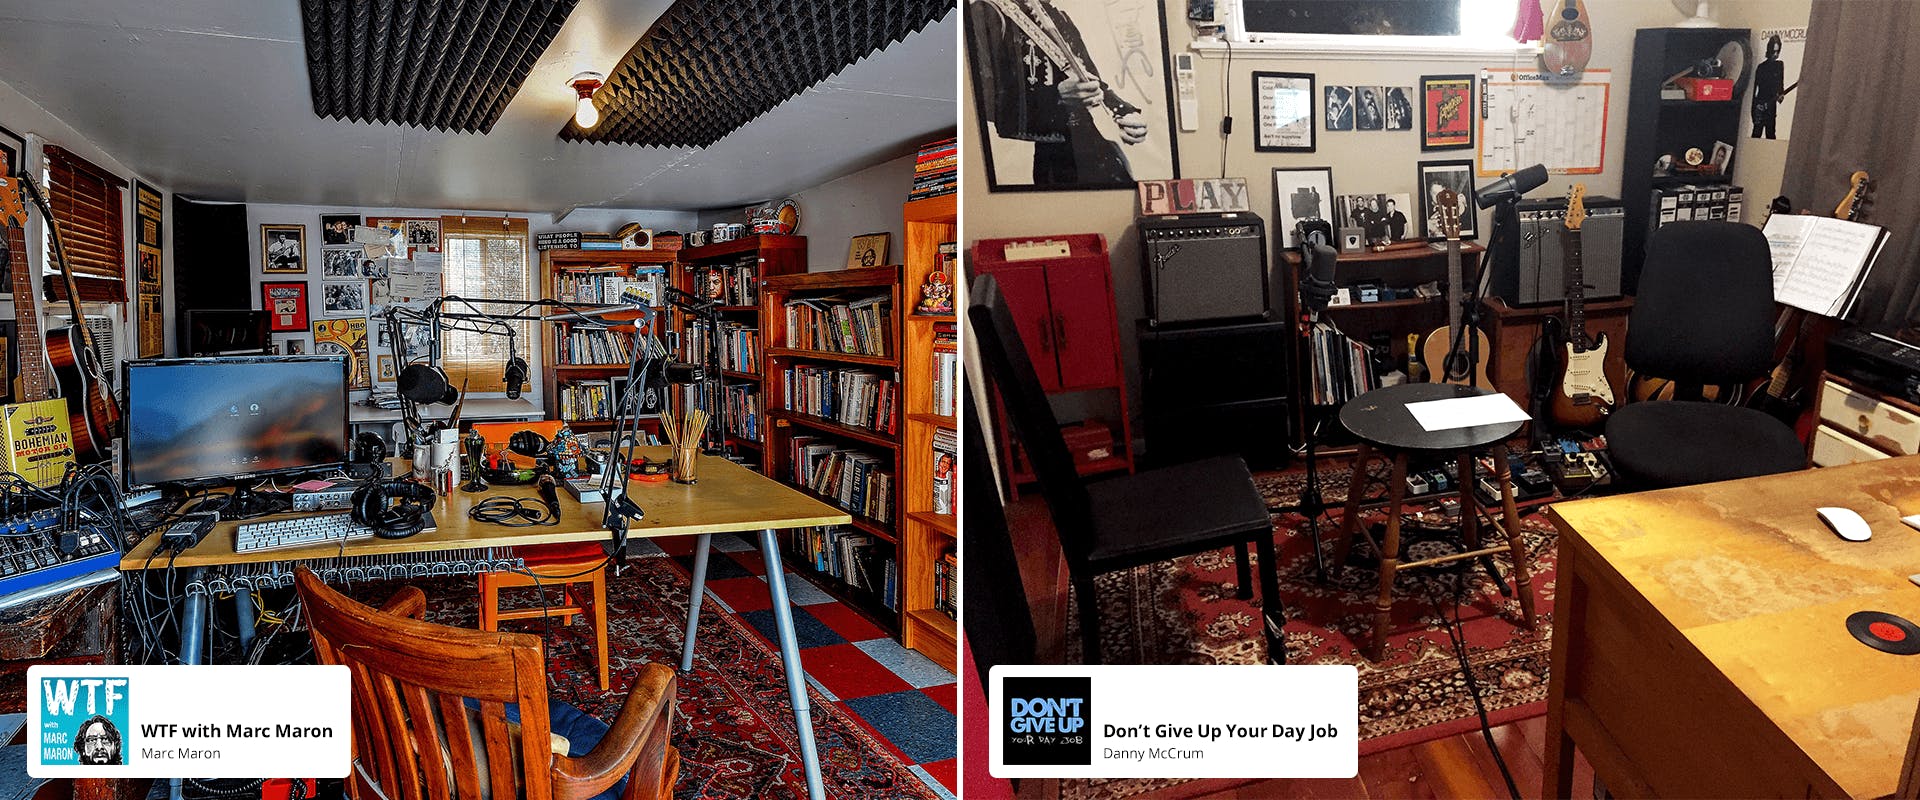
The cheapest option for treating your room is simply to fill it with stuff.
This is a legitimate approach, especially for interview-style podcasts where a comfortable environment is essential or if you’re a solo podcaster and don’t mind a little curated clutter. Furniture, rugs, curtains, full bookshelves, and decor all come with their own absorptive and diffusive character that can contribute significantly to reducing reflections. You may find that you still want to add some strategically placed acoustic panels after the fact, but it’s a significant first step.
Mobile and temporary treatment
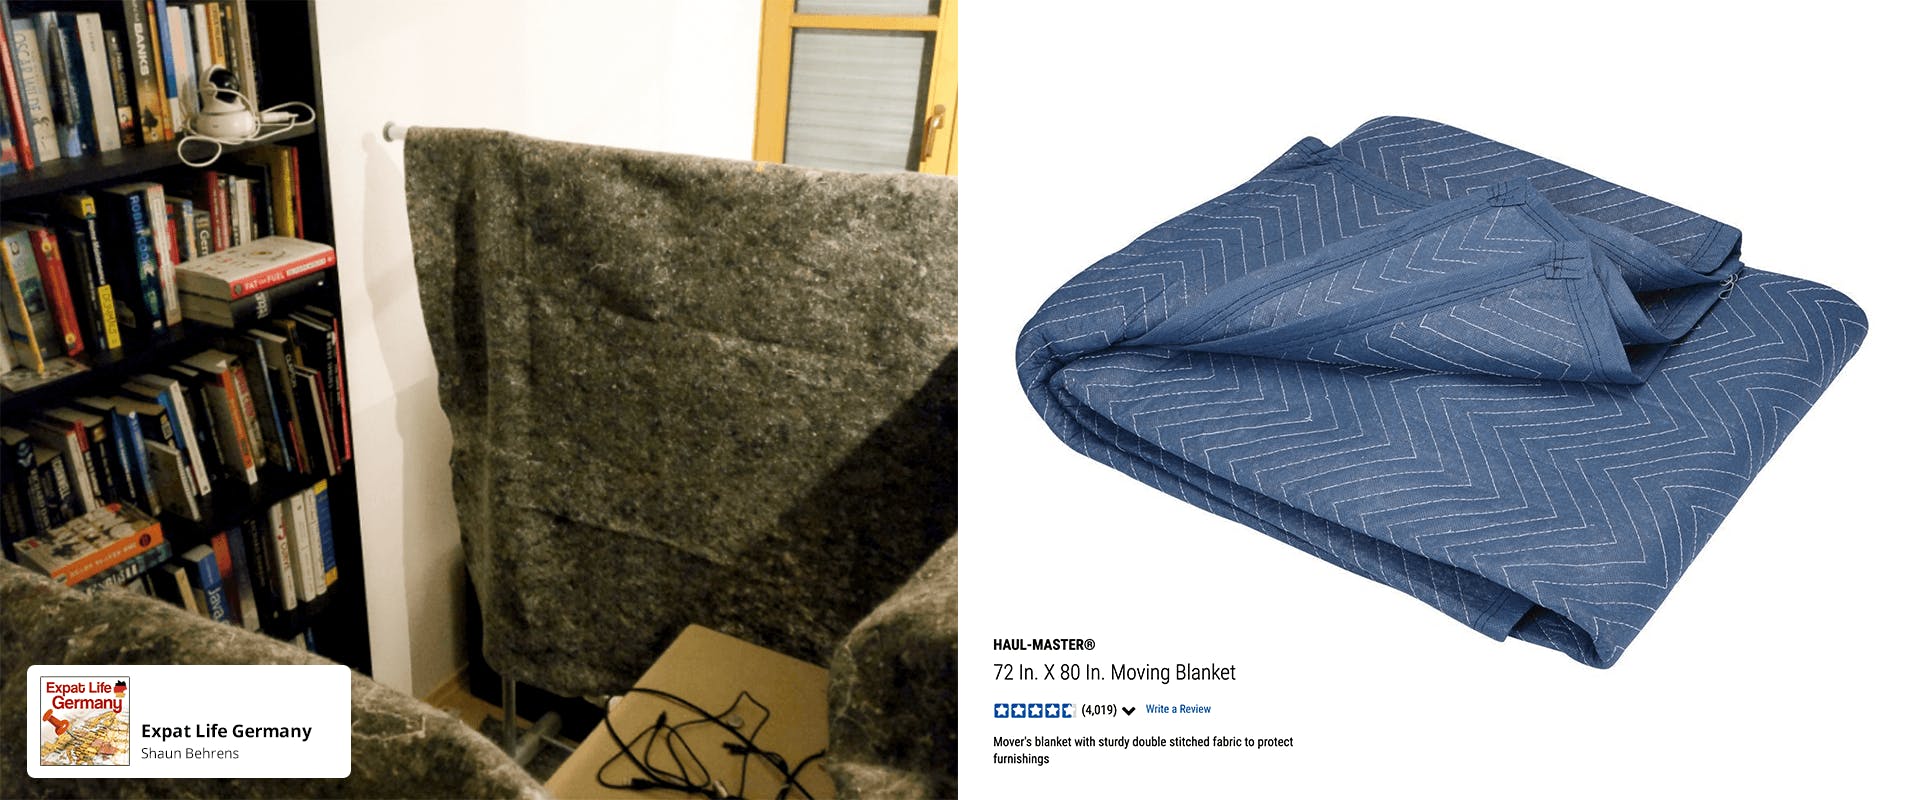
It’s common in the film industry to use furniture blankets (like the one shown above from Harbor Freight) to dampen sound on set. They’re easy to roll up, carry with you, and to set up/tear down as needed. Lay them on floors, hard tables, or any horizontal reflective surface you may be dealing with. Use microphone stands with boom arms as makeshift “curtain rods” for these – extend the mic stand as tall as it will go, then put the boom arm at a perpendicular angle and center it so that it looks like a “T.” Drape or clamp the blankets on the boom arm, and you’ve got a free-standing acoustic panel.
Of course, other types of heavy blanketing will work as well, just remember that thicker is better. When placing free-standing blanket panels like this, your goal is still to set them up so that they block first reflections. Consider your microphone position and place treatment between the mic and your first reflection points. Try a few test takes and adjust to taste – you’ll often find that closer to the mic will give you stronger absorption.
Closets: yes or no?
We get asked often about recording in walk-in closets and other small spaces. These kinds of areas tend to be the quietest, most isolated option available in many homes, and there’s certainly some value to that. There are a few more things to consider, though.
Small spaces tend to have very immediate, very prominent reflections because the walls are so close to the sound source – your voice, in this case. When recording in a small space like a closet, you’ll likely hear an unpleasant, “boxy” quality because the reflections happen so quickly as to become part of the sound of your voice.
This can sometimes be helped by – you guessed it – absorption. If you have a lot of clothes hung in the closet, it may provide enough sound absorption to offset the boxiness, but ultimately you may need to consider a larger room.
And please, don't ask your guest to record an episode with you in the closet, walk-in closets are only for solo podcasters only.
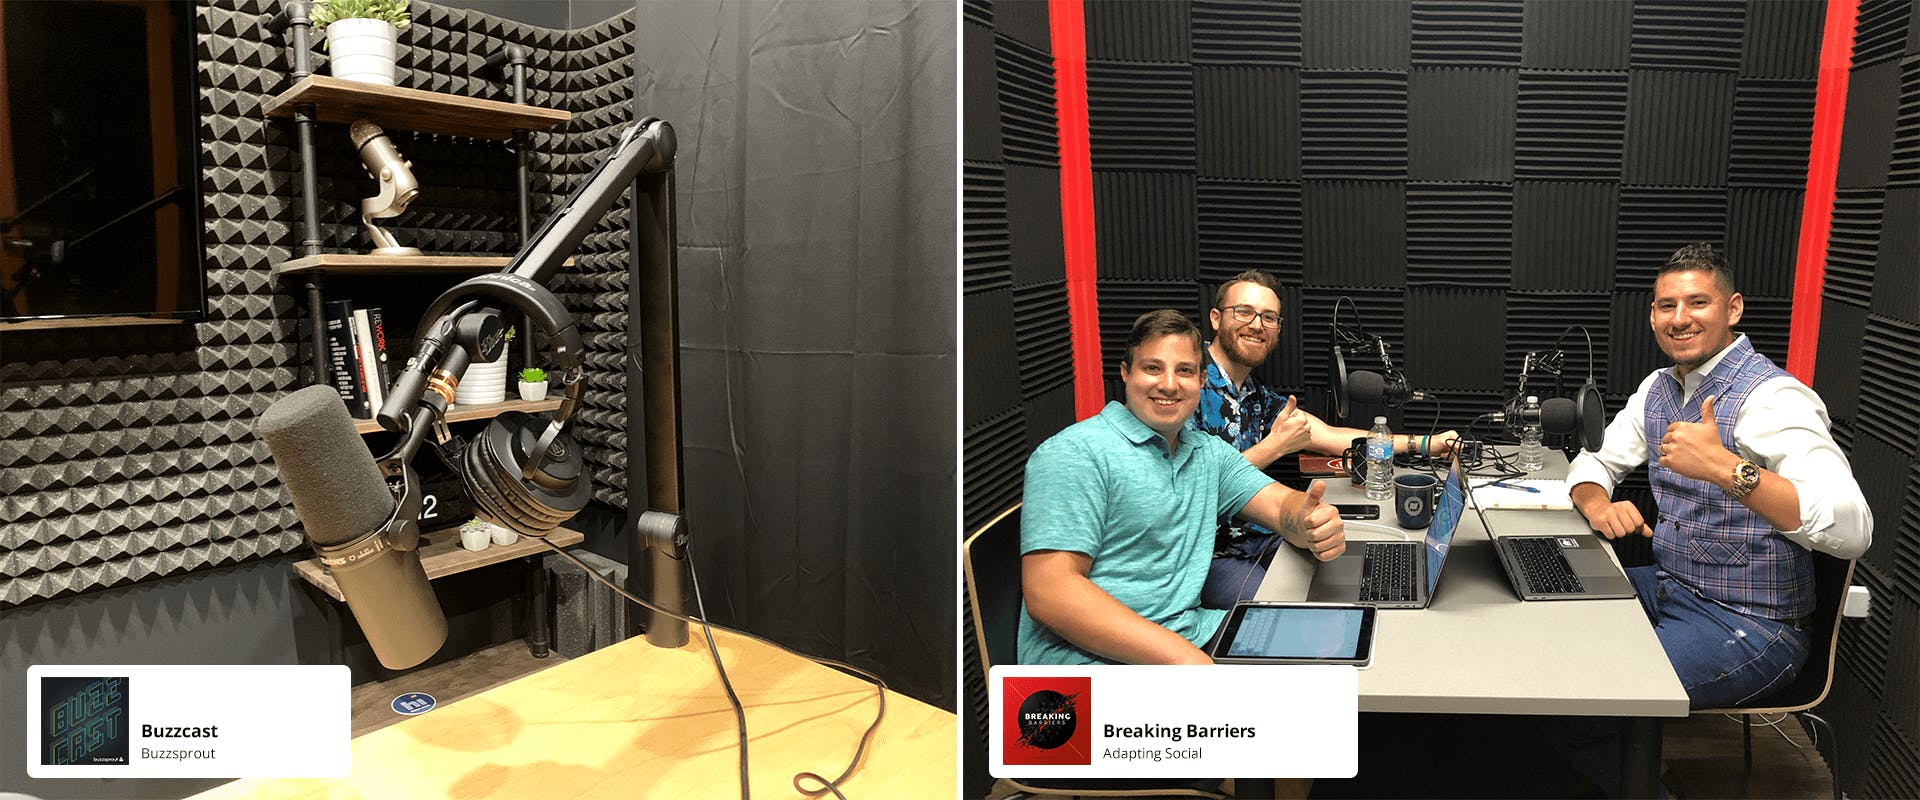
What do we use in the Buzzsprout Studio?
Here are the items we use in the Buzzsprout Studio:
- Bass Traps, 24" x 12" x 12"
- Pyramid Acoustic Absorption Foam, 2" x 24" x 48"
- Pyramid Acoustic Absorption Foam, 2" x 24" x 24"
- Blackout Curtains
Disclosure: Some of these product links are affiliate links, which means Buzzsprout might receive a small commission if you decide to purchase them.
How much, how soon?
As a result of modern recording technology, the barrier to entry for producing a podcast has never been lower. But this also means that the baseline for quality is higher and you’ll need to give more attention to things like acoustic treatment if you want to rise above the noise.
If you have the resources to invest in treatment solutions before you start, great. If you don’t, think iteratively and build into the quality of your production and environment as you grow. Always strive to do the best work with what you have and always look for opportunities to improve, and you won’t go wrong.