Audacity Tutorial: 17 Essential Podcast Recording & Editing Tips
Audacity is an amazing program, but the price tag is even better.
Podcasters like you - beginners and pros alike - can use Audacity to edit your podcast to make it sound professional and help you captivate listeners.
Despite Audacity’s strong points, sometimes it isn’t the most intuitive program. Though, after you’ve got the hang of it, you’ll see that the features make it worth the learning curve.
Now, before we start remember, remember to save a copy of your podcast before you import it into Audacity.
How to Set Up Your Podcast for Success
#1: Get Audacity to recognize your mic
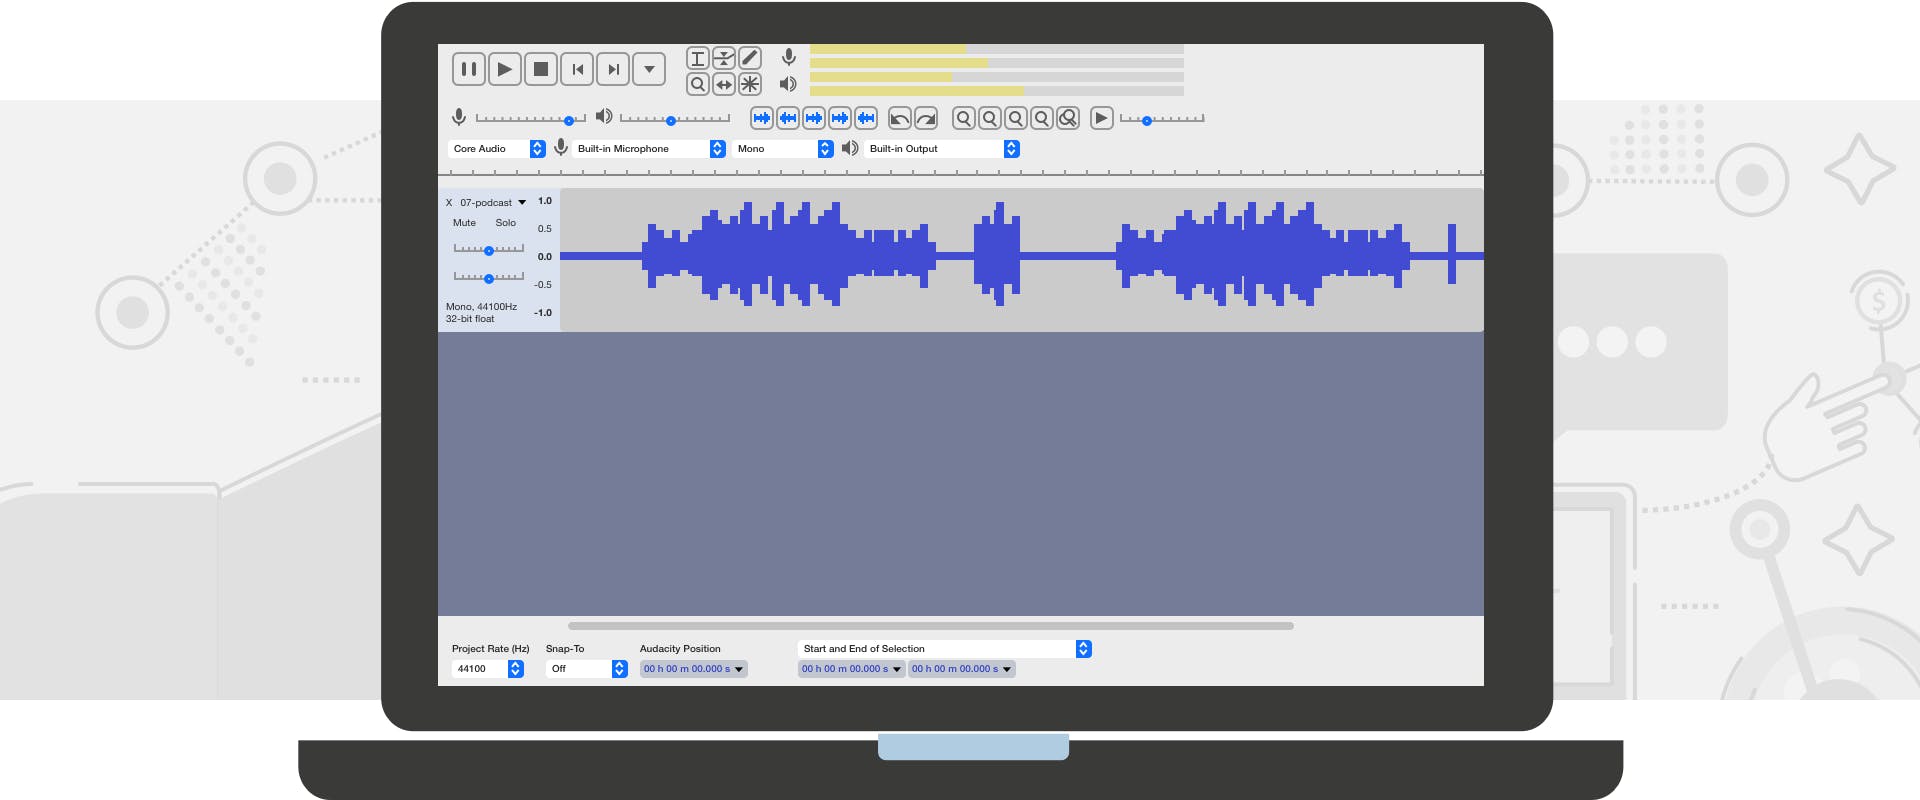
The show can’t start unless your recording program recognizes your microphone. Here are the step-by-step instructions to get Audacity connected to your mic:
On a Mac (OS X)
- Go to System Preferences from the little Apple logo at the top left of your desktop. Click on Sound.
- Click on the Input tab, and select the microphone you are using from the available options. Finally, adjust the input volume levels as necessary.
- Open Audacity on your Mac. Make sure that Audacity is set up to recognize your microphone. Click Audacity in the main menu then Preferences.
- Click Devices, and make sure that the selected microphone under Recording > Device is set your external microphone.
Note: Make sure to plug in your recording device first, and then turn on the program. If you turn on Audacity before plugging in your microphone, Audacity won’t be able to see it. - Test your microphone by pressing the record button and recording a quick audio snippet. It can be something random like “Buzzsprout provides the best customer support in the industry” or something like that.
In Windows:
- Get Windows to recognize your microphone. Go to the control panel and access sound settings.
- Click on “change system sounds or manage audio devices”. Select your microphone under audio input devices. Check and adjust audio input properties to improve sound quality, by adjusting levels.
- Open Audacity and make sure that Audacity is set up to recognize your microphone. First, go to the Edit menu.
- Check your Preferences and Settings for Audio I/O. Make sure that the selected microphone (recording device) is set for your microphone.
Note: If you turn on Audacity before plugging in your microphone, Audacity won’t be able to see it. Make sure to plug in your recording device first, and then turn on the program. - Test your microphone by pressing the record button and recording a quick audio snippet.
#2 Using pop filters
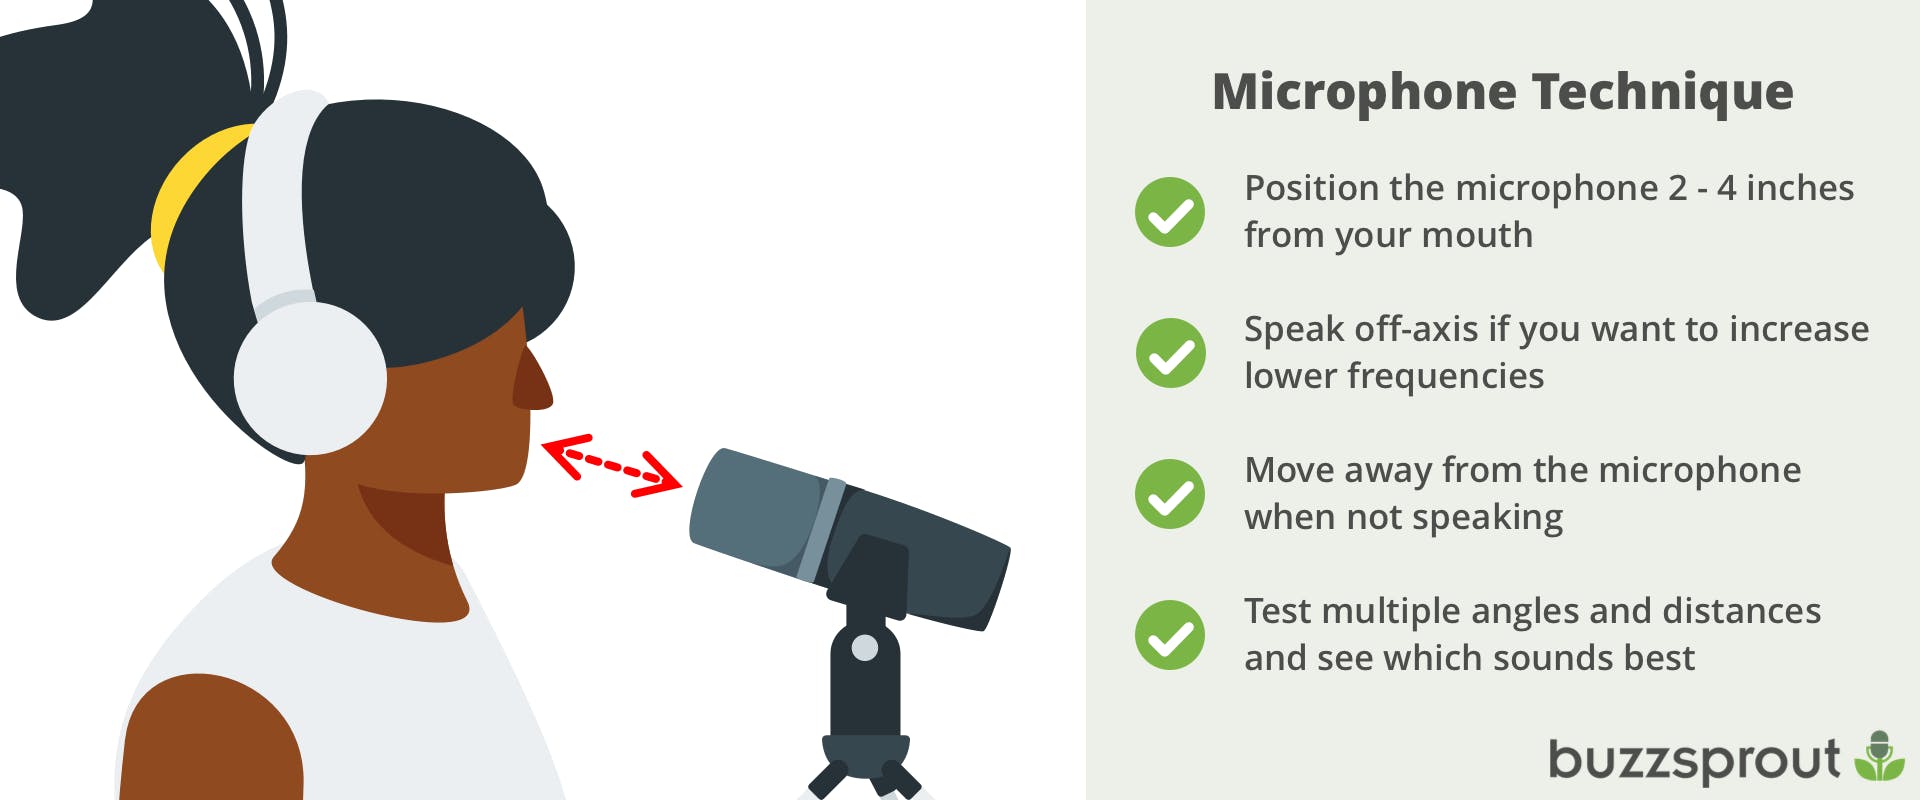
Recording a studio-quality podcast is easier than you think. The first step is using a good pop filter. These simple devices improve your sound quality by limiting the *pop* sound and excessive puffs of air (plosives) your voice makes when you speak naturally.
Some podcasters speak into the side of their mic to minimize noise, but a pop filter is an economical option that will give you great results.

How to use your pop filter:
- Choose a good NYLON pop filter. Metal ones are out there, but not as effective. Expect to pay roughly $25. You don’t want to use a windscreen as a pop filter - they aren’t the same.
- Attach the filter following the manufacturer’s directions.
- Speak into the mic - not to the side of it. Try to remember to reign in your ‘p’s, ‘b’s, and ‘d’s. No matter how good your pop filter is, those sounds may get past it.
Tip: Try playing back some audio recordings with and without the pop filter to hear the difference.
#3: Check your levels before you start recording
You can check your levels in two places - from your main computer setting and from Audacity. We recommend using Audacity for a more accurate reading.

Here’s how to check your levels:
- Choose your recording device from the Device toolbar.
- Use the Mixer Toolbar to adjust your recording levels.
- Keep your maximum peak levels around -6dB in order to leave some space for editing.
Note: If you don’t see the recording volume slider in Audacity, you might need to tell your operating system or sound card to let you set the volume from Audacity.
Perfecting the Sound of Your Podcast
#4: Use a fade in or fade out to give professional polish to your podcast
A clean fade in and fade out, will give your podcast episode a polished and professional feel.
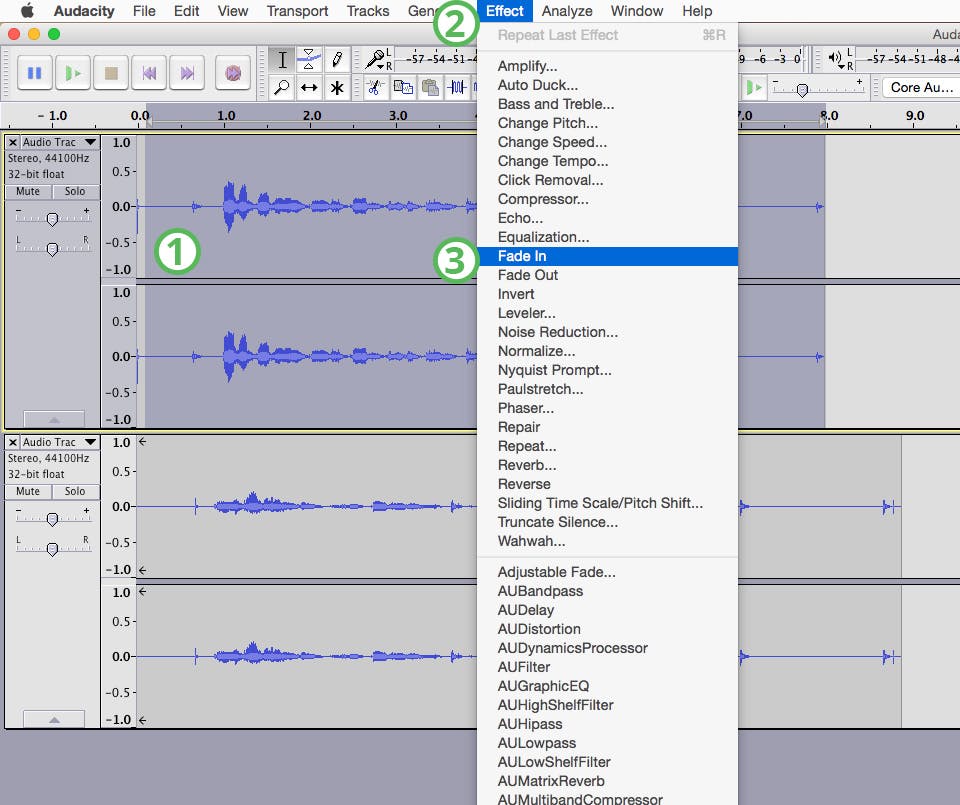
- Highlight the section of the audio track you want to fade in or out.
- Under the Effect menu,
- Select either Fade In or Fade Out.

Tips: Use a longer fade out than your fade in. For a more professional sound, consider using a Studio Fade In or Studio Fade Out, which smooths the sound and varies slightly in speed. It’s a popular effect for music recordings.
If you want your intro or outro to continue for a longer period of time at a reduced volume level, apply an adjustable fade over the selected section and vary it to meet your needs. If you’d like to fade between two tracks, use the Crossfade tool.
#5: Use chains to combine effects and save your settings
Chains are used for either Batch Processing or Effects Automation. Audacity ships with a single chain included. If you find yourself using the same effect over and over, chains are the ideal way to speed up your workflow.
- Identify the techniques you use for every podcast.
- Write down the sequence of these techniques.
- Consider including an audio file (like your intro or outro) as part of your chain using the Export WAV command.
- Create your chain by selecting File >> Edit Chains >> Add.
- Add commands and set parameters for each technique you want to apply in the chain.
- Click Ok to exit.
- To apply a chain, click File >> Apply Chain. Click the right option to apply the chain to either the entire project or specific files.
#6: NEVER edit in MP3 format
MP3 is an amazing sound format that is great for keeping file sizes small while still preserving sound quality. But it is a delivery format, so you shouldn’t be using it while editing.
Use your native file format (WAV or AIFF) to edit for better results. Then you can export as an MP3 after you have your episode in it’s final form.
#7: Save a copy of your episode, before you start making changes
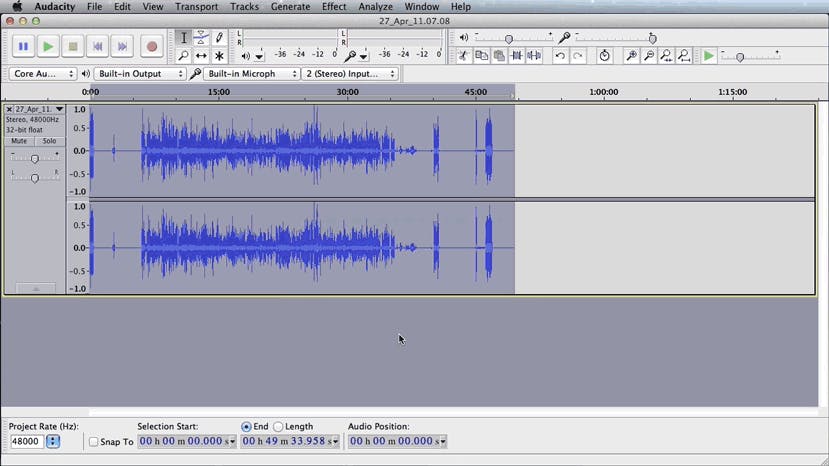
The changes you make in Audacity are irreversible. If you accidentally delete a section of your audio, or ruin the sound, you can kiss the original goodbye. That’s why you always want to save a copy of your audio file before importing it into Audacity.
#8: Create an EQ setting to repair plosives
Not sure what a plosive is?
Try saving this three times fast - "Peter Piper picked a patch of pickled peppers."
The popping p’s are plosives. Even if you have a pop filter like we recommend in Tip #2 some plosives might still sneak into your recording.
You can use this tip to minimize their effects:
- Highlight the problematic section of your recording.
- Open Effect and select Equalization.
- You should see a flat line. If not, click Flatten.
- Starting roughly at 160 Hz, set a curve the drops from the midline gradually by intervals of 2dB, with the last four set to -20dB.
- Save this curve with a title you can remember, like Plosive Fixer.
- Click Ok, and watch the highlighted section correct itself.
- To adjust multiple sections, click Repeat Equalization under the Effects menu.
- Finally, listen to the section again to see check the changes the equalization has made to your sound file.
Use Amplify, Compress, and Normalize … in the Right Situations
It’s easy to get carried away with the wide array of editing and processing effects in Audacity, but too much of a good thing is exactly that - too much. The following Audacity tutorial tips will help you get the best sound from your recordings by using three of the most popular techniques in the right circumstances.
#9: Using Amplify
- Check your audio track for peaks or dips that fall outside your ideal volume levels.
- Apply the amplify technique with a positive number if you are aiming to increase a dip, and by a negative number if you need to decrease a peak. You can do this by clicking Effect >> Amplify.
- Remember: You do NOT want to use Amplify if DC offset is present, and you do NOT use Amplify if you are using a chain.

#10: Using Compress
- If your entire track is filled with peaks and dips, apply this technique to the entire track to bring the levels closer together.
- Use this technique carefully. It can leave a track sounding too flat if overdone.
- Highlight the portion of your track that you’d like to compress. Then click Effect >> Compressor.
#11: Using Normalize
- Apply this technique to bring the gain of the entire track to its max without clipping.
- Note: If DC offset is present, you can and should use Normalize with DC Offset Correction.
- Never normalize multiple tracks that include intentional variations in peak volume, because you’ll lose the effect.
- Highlight the audio you’d like to change. Then click Effect >> Normalize.
#12: Truncate Silence
Nobody wants a bunch of dead air in the middle of their podcast. Use this tip to remove some of the silences to keep your podcast episode flowing:
- Highlight your audio track.
- Click Effect >> Truncate Silence.
- Set your Operation mode to Truncate Detected Silence.
- Set your Level to the appropriate level; anything that falls below this will be deleted.
- Choose the Duration that a pause must last for in order to be considered silence. Silences that last longer than this amount of time will be ignored. Periods of 10 seconds are good candidates for truncation.
- Set the Truncate control to 2-5 seconds.
- Set Compress to 50 percent.
#13 Remove The Snakesssss
If your podcast is plagued by hissing, don’t worry you can eliminate it.
Remove excessive ‘s’ sounds with a D-esser plugin like Digital Spit Fish D-esser, or you can do it from within Audacity by following these simple steps.
NOTE: This tip works best if you are editing a podcast with significantly higher intensity on your s’s.
- Select and Duplicate the control track.
- Put your control track into Waveform dB.
- Identify the dB barrier that most of your track falls below, but your s’s go above.
- Auto Duck the selected audio, most likely between -18dB and -20dB. The maximum pause and fade in and fade up lengths should be significantly shorter than normal (0.1 seconds max).
#14: Use keyboard shortcuts during playback to save time
Audacity includes many keyboard shortcuts that can take time to discover. Use this cheat sheet to see all the shortcuts in Audacity.
During playback, the following shortcuts are the ones you’ll need on hand. Courtesy of Midnight Music (PDF).
- Start playback → Space bar
- Stop playback → Space bar
- Listen to a selection → Space bar
- Play up to selection → B
- Record → R
- Append record (add recording to the end of the current track) → Shift+R
- Pause → P
- Skip to start - move playback cursor to beginning → Home
- Skip to end - move playback cursor to end → End
- Move playback cursor a little right/left (while stopped) → Right/left arrow
- Loop play - play selection over and over → Shift+space
- Preview a cut - play 1 second before and after a selection → C
- Skip playback cursor back one second during playback → Left arrow
- Skip playback cursor forward one second during playback → Right arrow
- Skip playback cursor back 15 seconds during playback → Shift+Left arrow
- Skip playback cursor forward 15 seconds during playback → Shift+Right arrow
#15: Whatever you do, don’t overdo the effects
With noise reduction, compress, truncate silence, etc. You’ve got a lot of toys to play with. It’s better to use these effects in moderation. If they are overdone your podcast can be left sounding uninviting and artificial.
#16: Add intro and outro music with studio-quality sound
Create separate intros and outros instead of recording them with each episode. You can import them as audio files later, and save yourself plenty of time and hassle in the process. Using prerecorded stock or royalty-free audio is usually a good option.
How to add an intro or outro with Audacity:
- Find audio you can use legally. Here are the best places to get music for your podcast.
- Import the audio by clicking File >> Import >> Audio.
- Use Tip #4 to fade your music in and out.
#17: Export to the highest quality
After you’ve got your episode sounding exactly how you want you want, you’ll want to export it in the best delivery format. We’d recommend exporting as an MP3 (Constant, 256 kbps, Joint Stereo?) or Ogg Vorbis (Quality 8).
Tip: Think twice before exporting in .AU. Windows does not support .AU so we don’t recommend using it.
Now that you’ve learned the basics, get out there and start podcasting! Remember that while pro-quality sound is important, it’s the content of your podcast that is going to win you listeners.