How to Normalize Audio in Audacity
Audio normalization is the process of adjusting the volume of your audio files so the loudest part and the quietest part fall within a target level or dynamic range.
Applying this effect to your tracks is a quick way to make your podcast sound more professional and even.
This guide breaks down the process of normalizing your audio within Audiacty so you can optimize your episodes with ease!
JUMP TO A SECTION:
When do you need to normalize your audio?
There are two main reasons you'd want to normalize your audio files, and both situations arise in nearly every podcast edit.
Reason #1. To match the volume levels across different clips
Let's say you have an intro music segment, a narrated segment, and an interview section you want to all be at the same volume level.
You can use the Normalize tool to make sure one is not too loud or soft. You don’t want to record a voiceover that's louder than the clip that comes after it, or vice versa.
Reason #2. To make the original file louder
You also might normalize your audio recording if it isn't loud enough. If the volume is too low, you might not even see the waveforms or hear the content, making editing nearly impossible.
Amplifying your audio with the Amplify effect quickly fixes these issues.
Let's look at the different normalization components and how to add the effect within Audacity.
Apply audio normalization
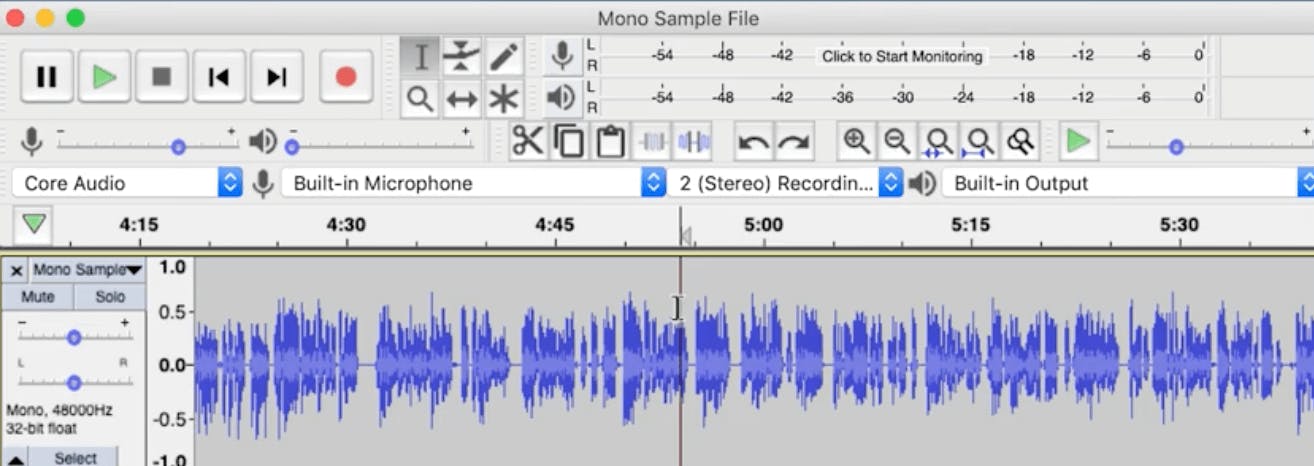
Open a file within Audacity and select Cmd + A or Ctrl + A to highlight the track in the workspace.
You'll notice the track's color change in the background, so you know you've selected the entire thing. You can also select multiple tracks and normalize them all at the same peak level.
From there, go up to the Effect menu on the top of your screen and click Normalize. In this menu, Audacity will give you a couple of options.
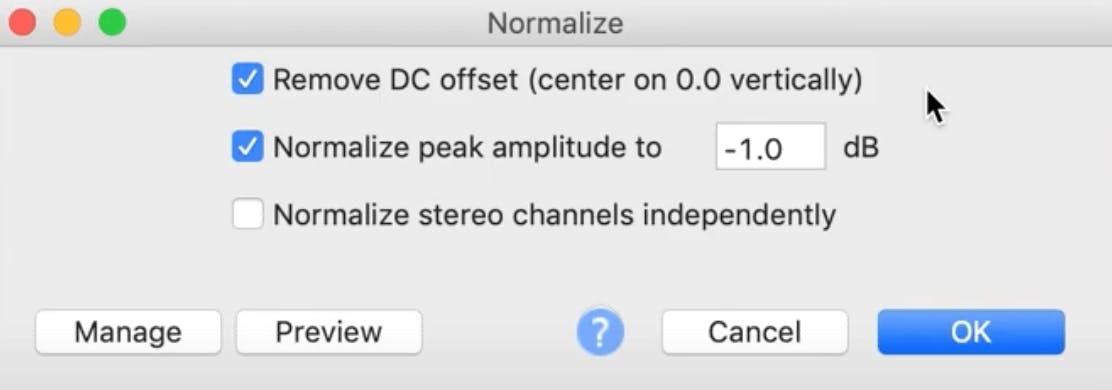
Option #1. Center on 0.0 vertically
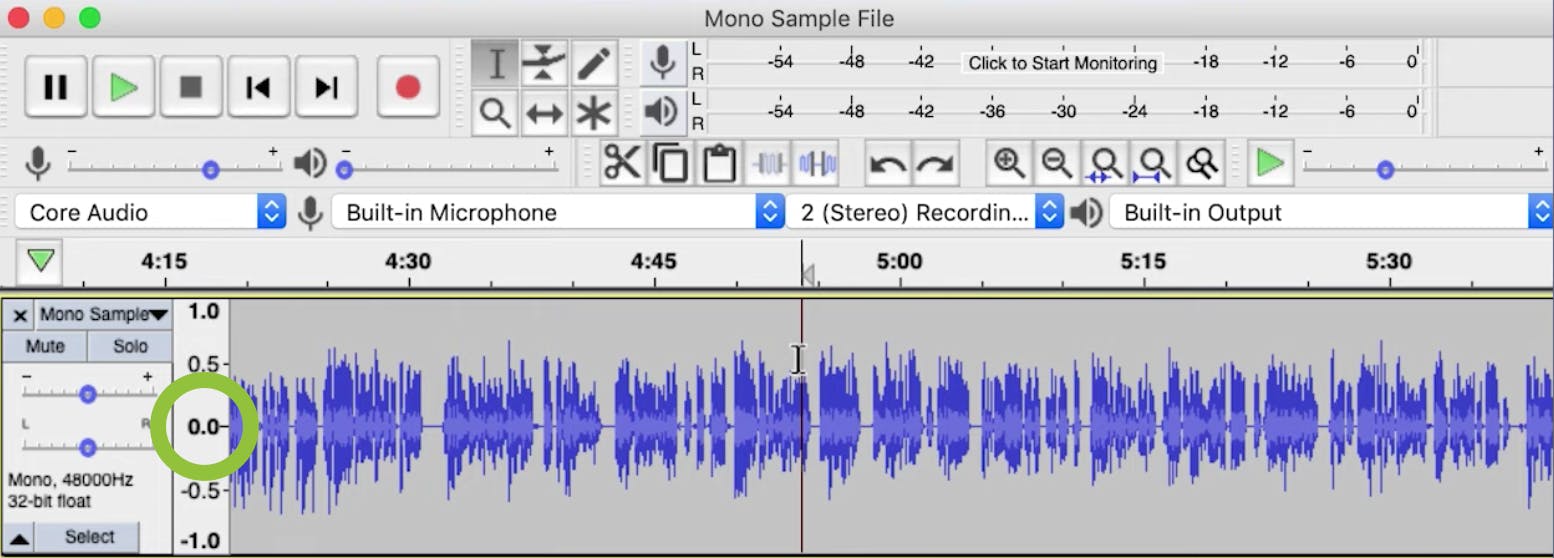
The first option it gives you is to Remove DC offset and center on 0.0 vertically.
Moving the DC just means making sure your waveform is on the 0.0 line. If the DC offset isn't on 0.0, it can distort your audio and not leave enough space for other effects.
Because DC offset can throw off other aspects of editing, we suggest doing this step before applying amplitude to the track.
Option #2. Normalize peak amplitude
The second option is to normalize your peak amplitude to -1 dB, or whatever value you choose. The abbreviation dB is a measure of audio signals and is short for decibels.
You don't want your track's peak volume to be so loud that they extend beyond this peak value. Extending the maximum volume past this boundary results in distortion and clipping.
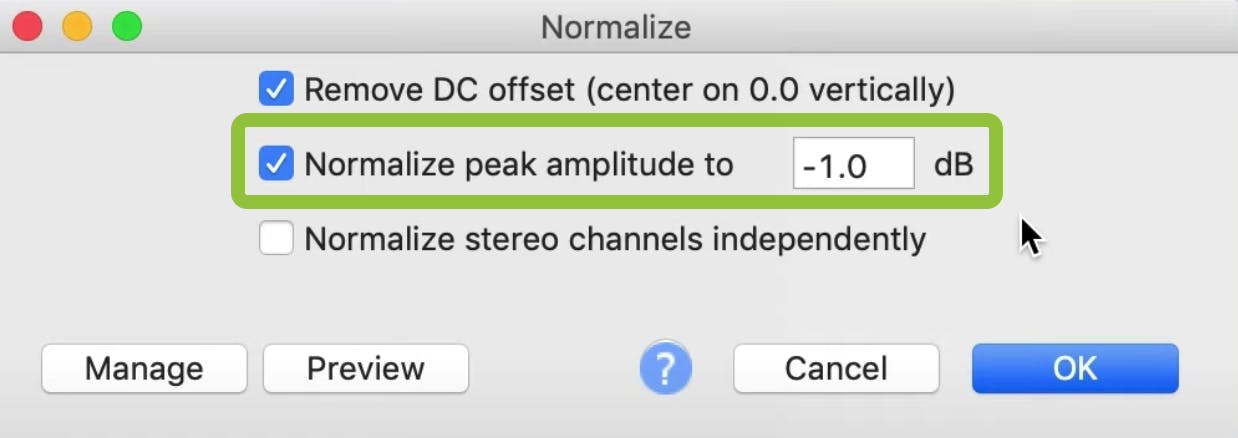
We chose a level of -1 dB to stay below the maximum amplitude and leave headroom for other effects.
Before you apply a change to a stereo track, you can use the Preview button to playback six seconds of the audio before you make any final decisions.
If you like what you hear, you can click the OK button to apply the Normalize effect to the selected audio.
Note: Remember that Normalization helps remove the audio disparity between tracks, and Amplification changes the volume level of one or more tracks by the same amount.
How to normalize stereo channels independently
Let's say you use a Behringer mixer with one mic recorded on the left side of the stereo mix and one on the right side.
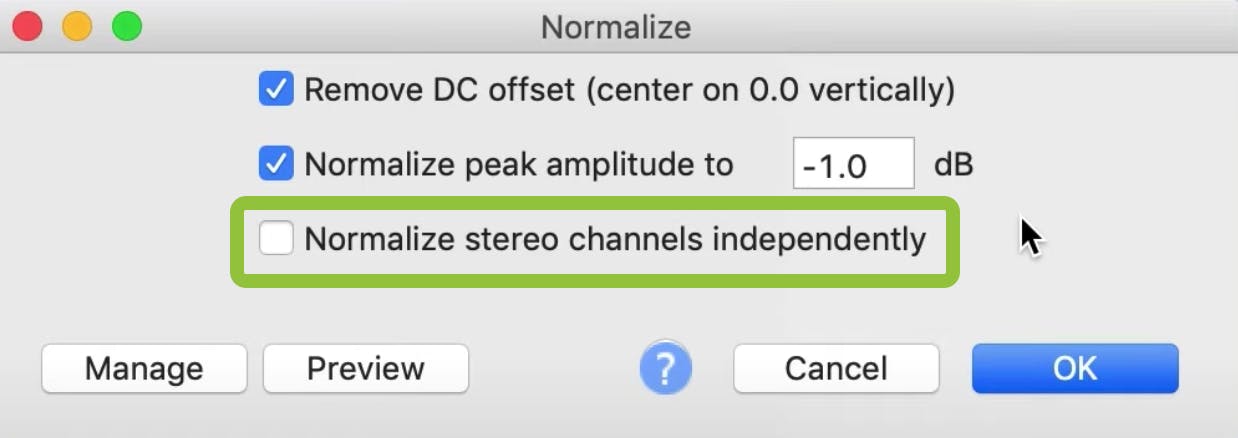
In this case, you'd want to analyze both of these channels separately because you might be speaking in a different volume than your co-host or your guest throughout the dialog.
To normalize audio in this situation, select the checkbox to Normalize Stereo Channels Independently and adjust the amplitude separately for each channel. If you aren't mixing two microphones, you can leave this box unchecked.
More Audacity tutorials
Audacity is an excellent open-source audio editing tool, widely used by digital audio creators, and one of our top audio editor recommendations.
These tutorials can help you get familiar with the workspace so you can confidently use Audacity to edit your own content!

Alban Brooke
Alban Brooke is the Head of Marketing at Buzzsprout and the co-host of Buzzcast. Have any questions about this guide? Reach out on Twitter.
FAQ
What is loudness normalization?
Loudness Normalization can help you set your loudness target level and is measured in LUFS. For podcasting, we recommend staying between -20 and -16 LUFS.
What should my peak normalization be?
Most podcasting pros suggest setting the peak normalization at or around -1 dB. Whatever value you choose, make sure to stay below 0 dB as this can cause clipping.