
Hindenburg Journalist Pro: Complete Review & Walkthrough [2020]
Most of the audio editors that podcasters use, like Adobe Audition, GarageBand, Audacity, or Reaper, either have a steep learning curve or were originally designed for music production.
Hindenburg, on the other hand, was designed specifically for journalists and podcasters.
This user-friendly audio editing software is a cross-platform program available on Windows and Apple's macOS, so it works whether you use a PC or a Mac operating system.
The software is extremely user friendly and includes all the pro tools you would expect in a pro-level digital audio workstation (DAW).
So whether you've been podcasting for two years or two months, you should have no problem getting the hang of Hindenburg!
Note: There are two versions of this software: Hindenburg Journalist and Hindenburg Journalist Pro. In this blog, we're going to focus exclusively on the pro version. While Journalist Pro offers more advanced features, the basic layout and editing functions are the same in both versions.
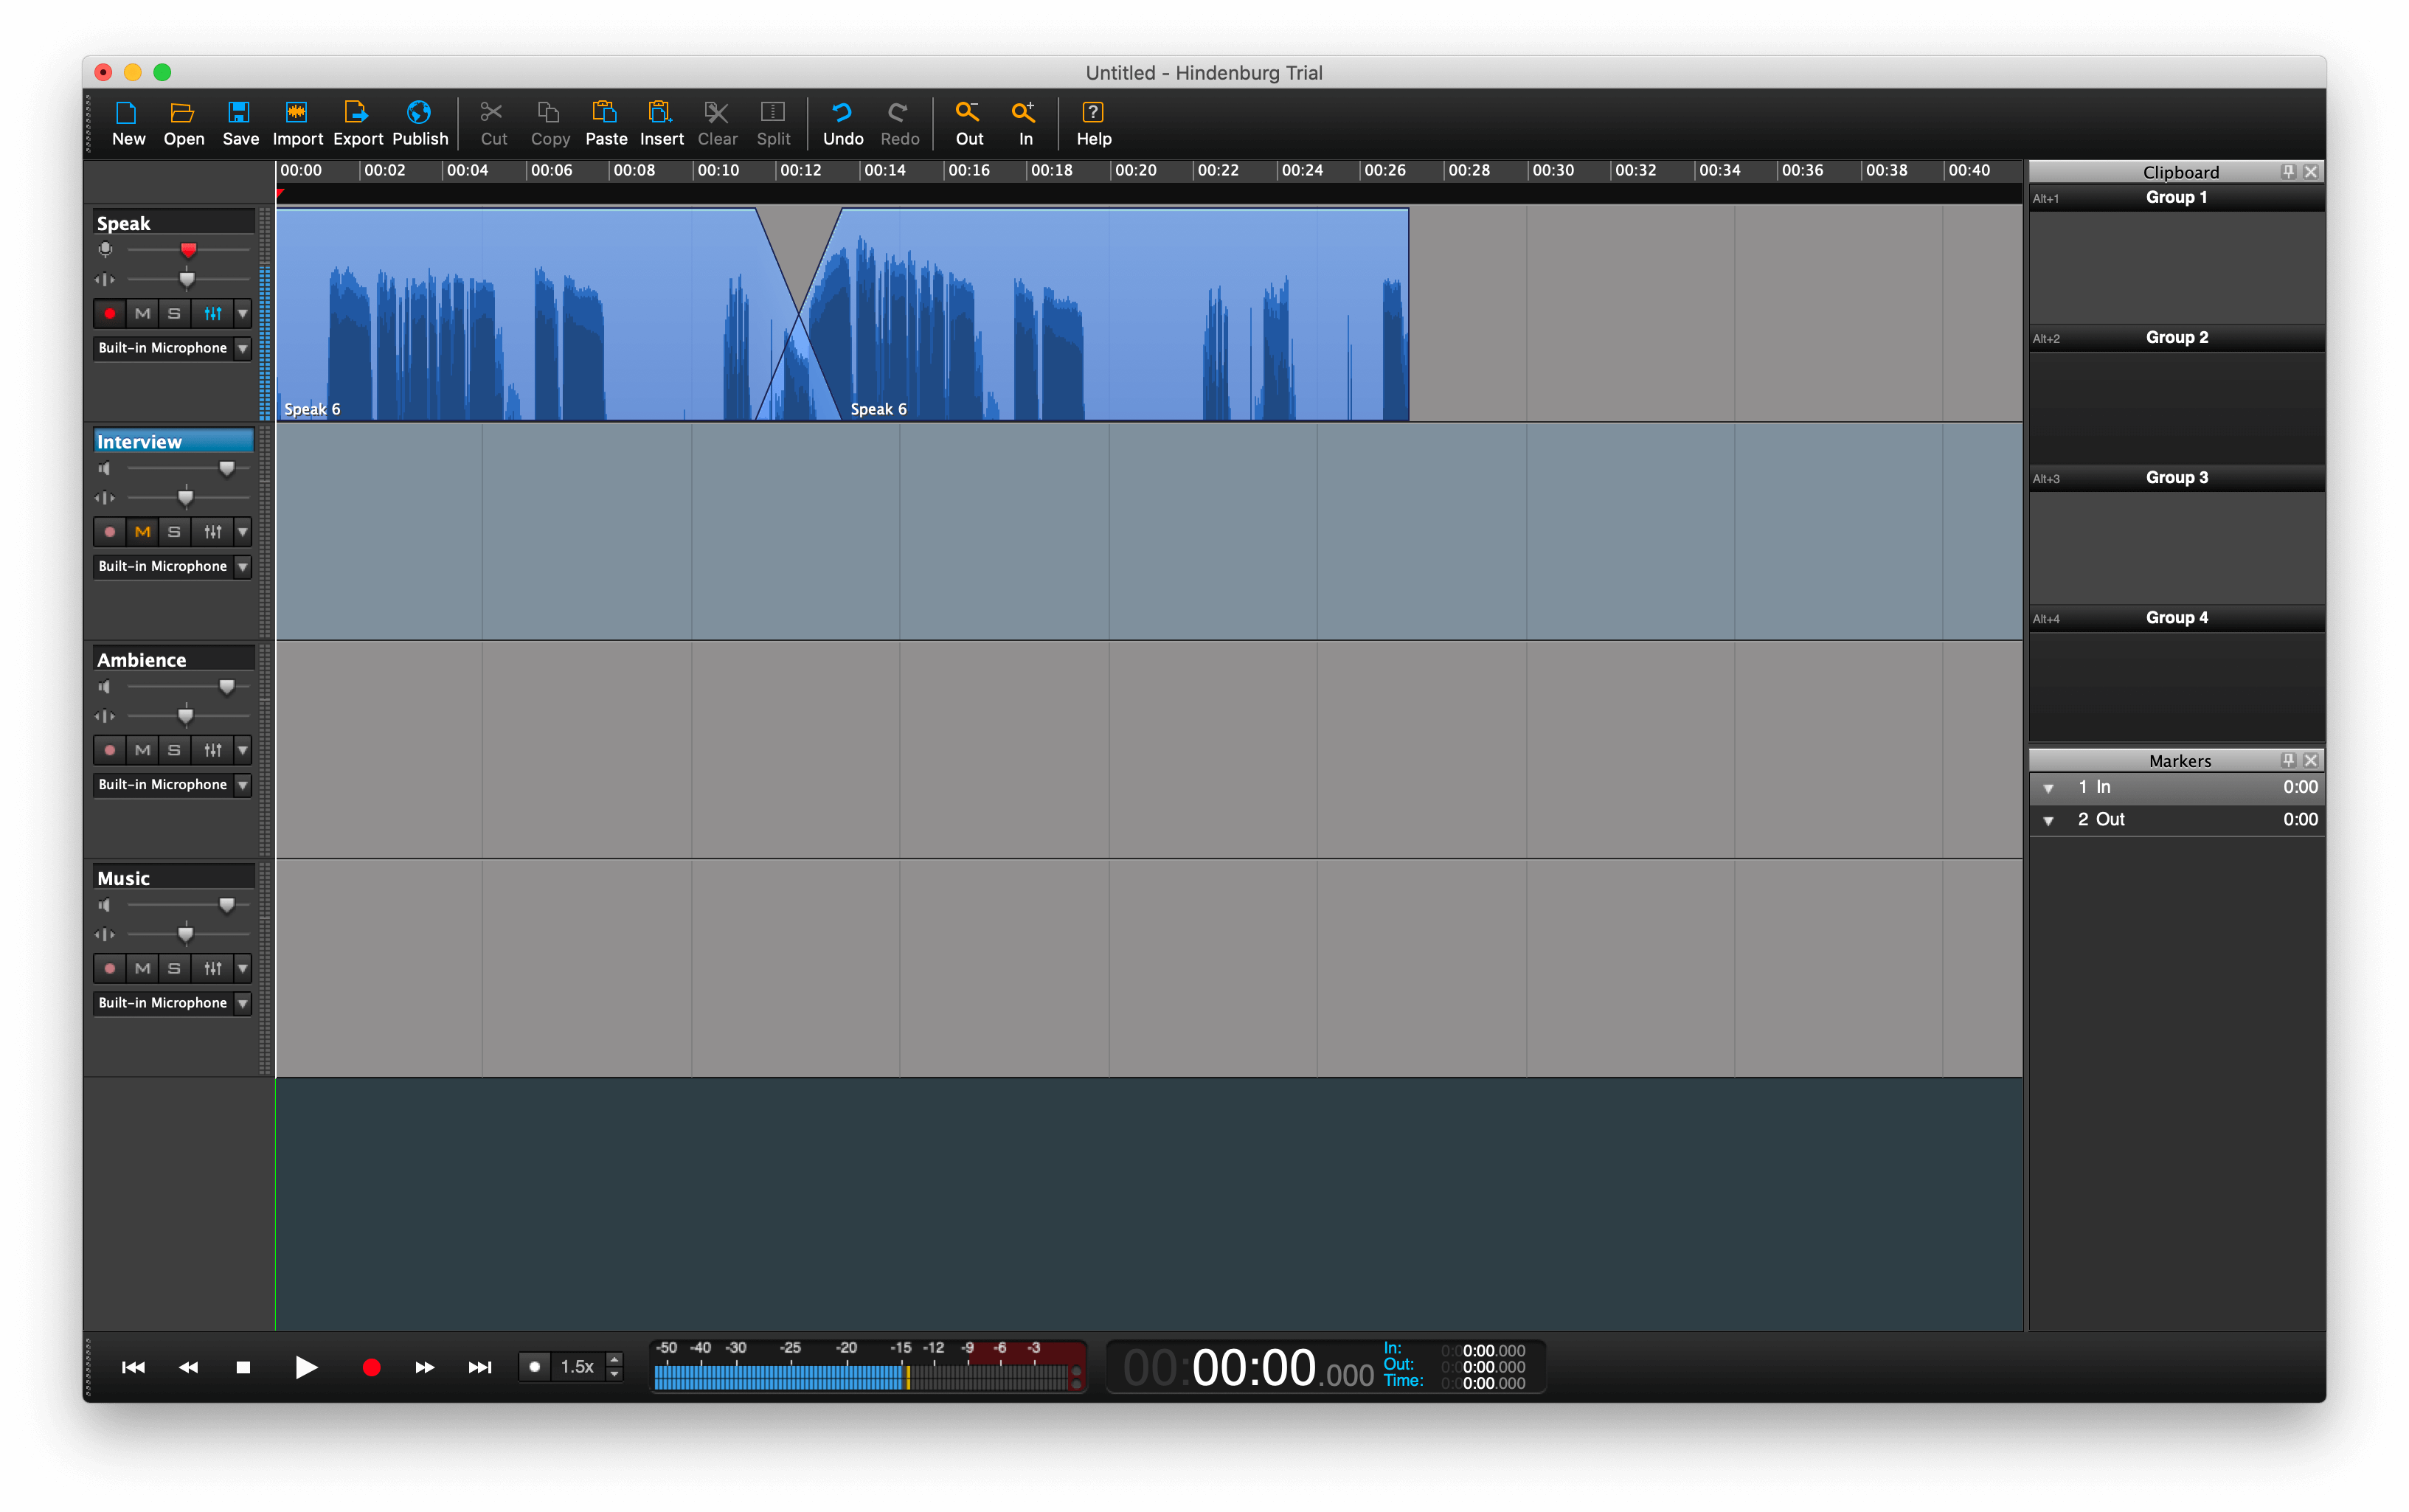
Tour of the workspace
Hindenburg's workspace is where you'll record, edit, and organize your podcast episode.
At the very top of the workspace, you'll find the toolbar with buttons for the main editing actions like Cut, Paste, Insert, Clear, Split. The Undo and Redo features let you reverse or reinstate an action without damaging any of your audio — something not all editing software can do!
Use the Zoom feature to zoom into a clip for more precise editing, and zoom out to see the contents of your entire episode.
The workspace comes with four pre-populated audio tracks. You can rename these tracks, add more, or delete the ones you don't need.
To the left of each track are its settings where you can adjust the volume levels, pan the balance to the right or left speaker, and add effects.
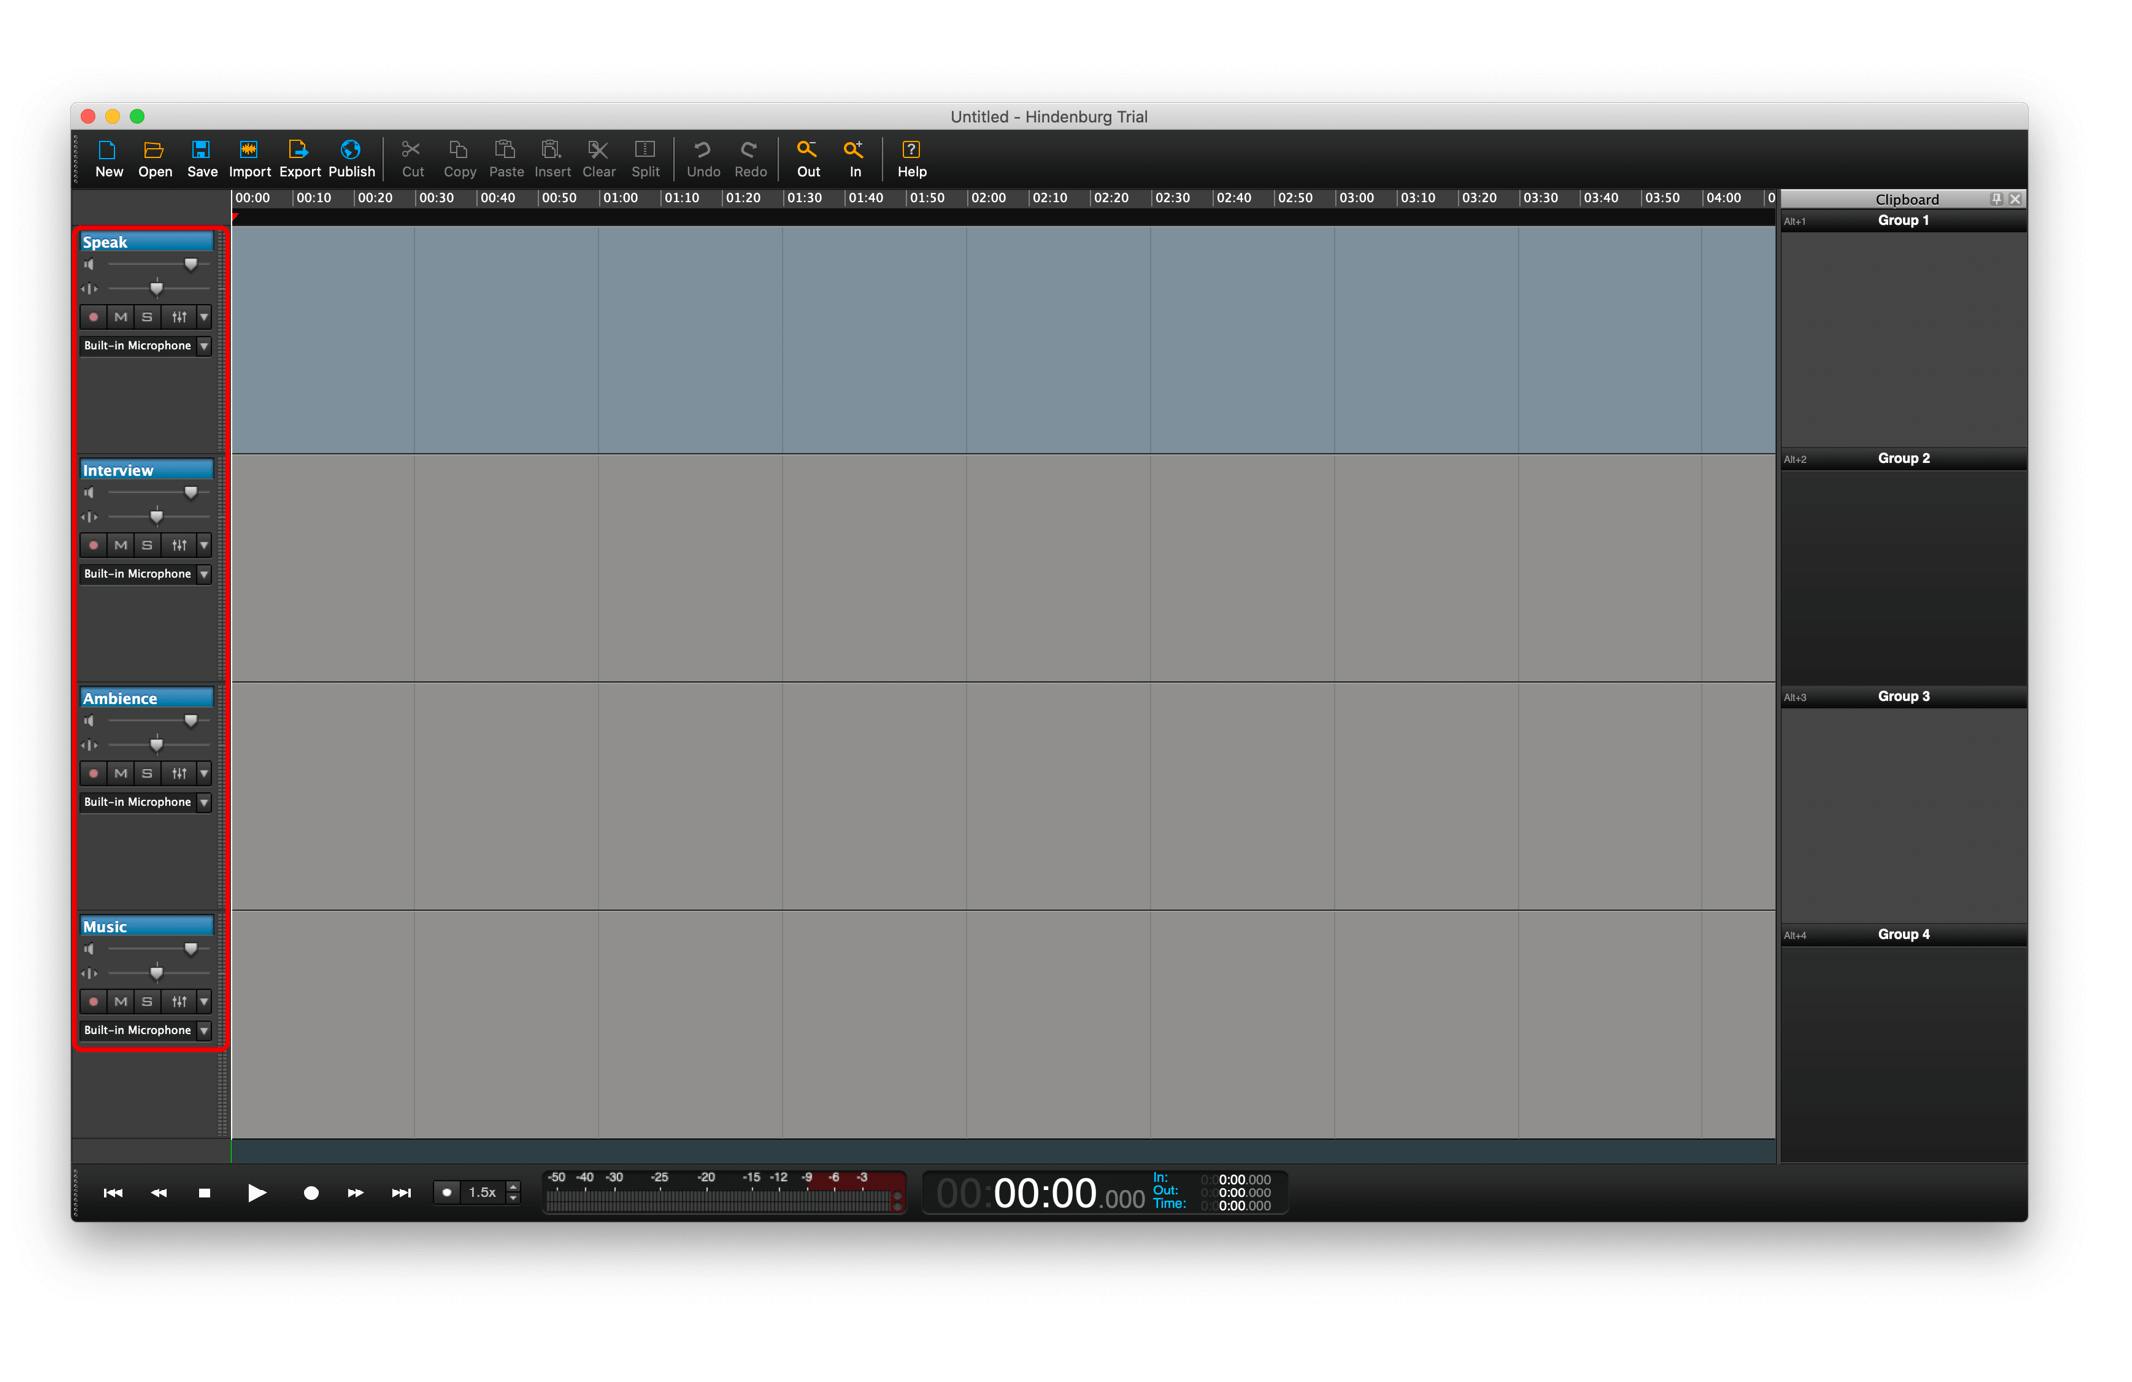
The "M" button lets you mute one track while you listen to the others, and the "S" (solo) button allows you to listen to one track by itself.
To add or delete a track, click the drop-down menu and select Add Track.
Clipboard
The clipboard is docked on the right of the workspace and lets you store audio files you want to use later on — this makes the editing process a lot easier.
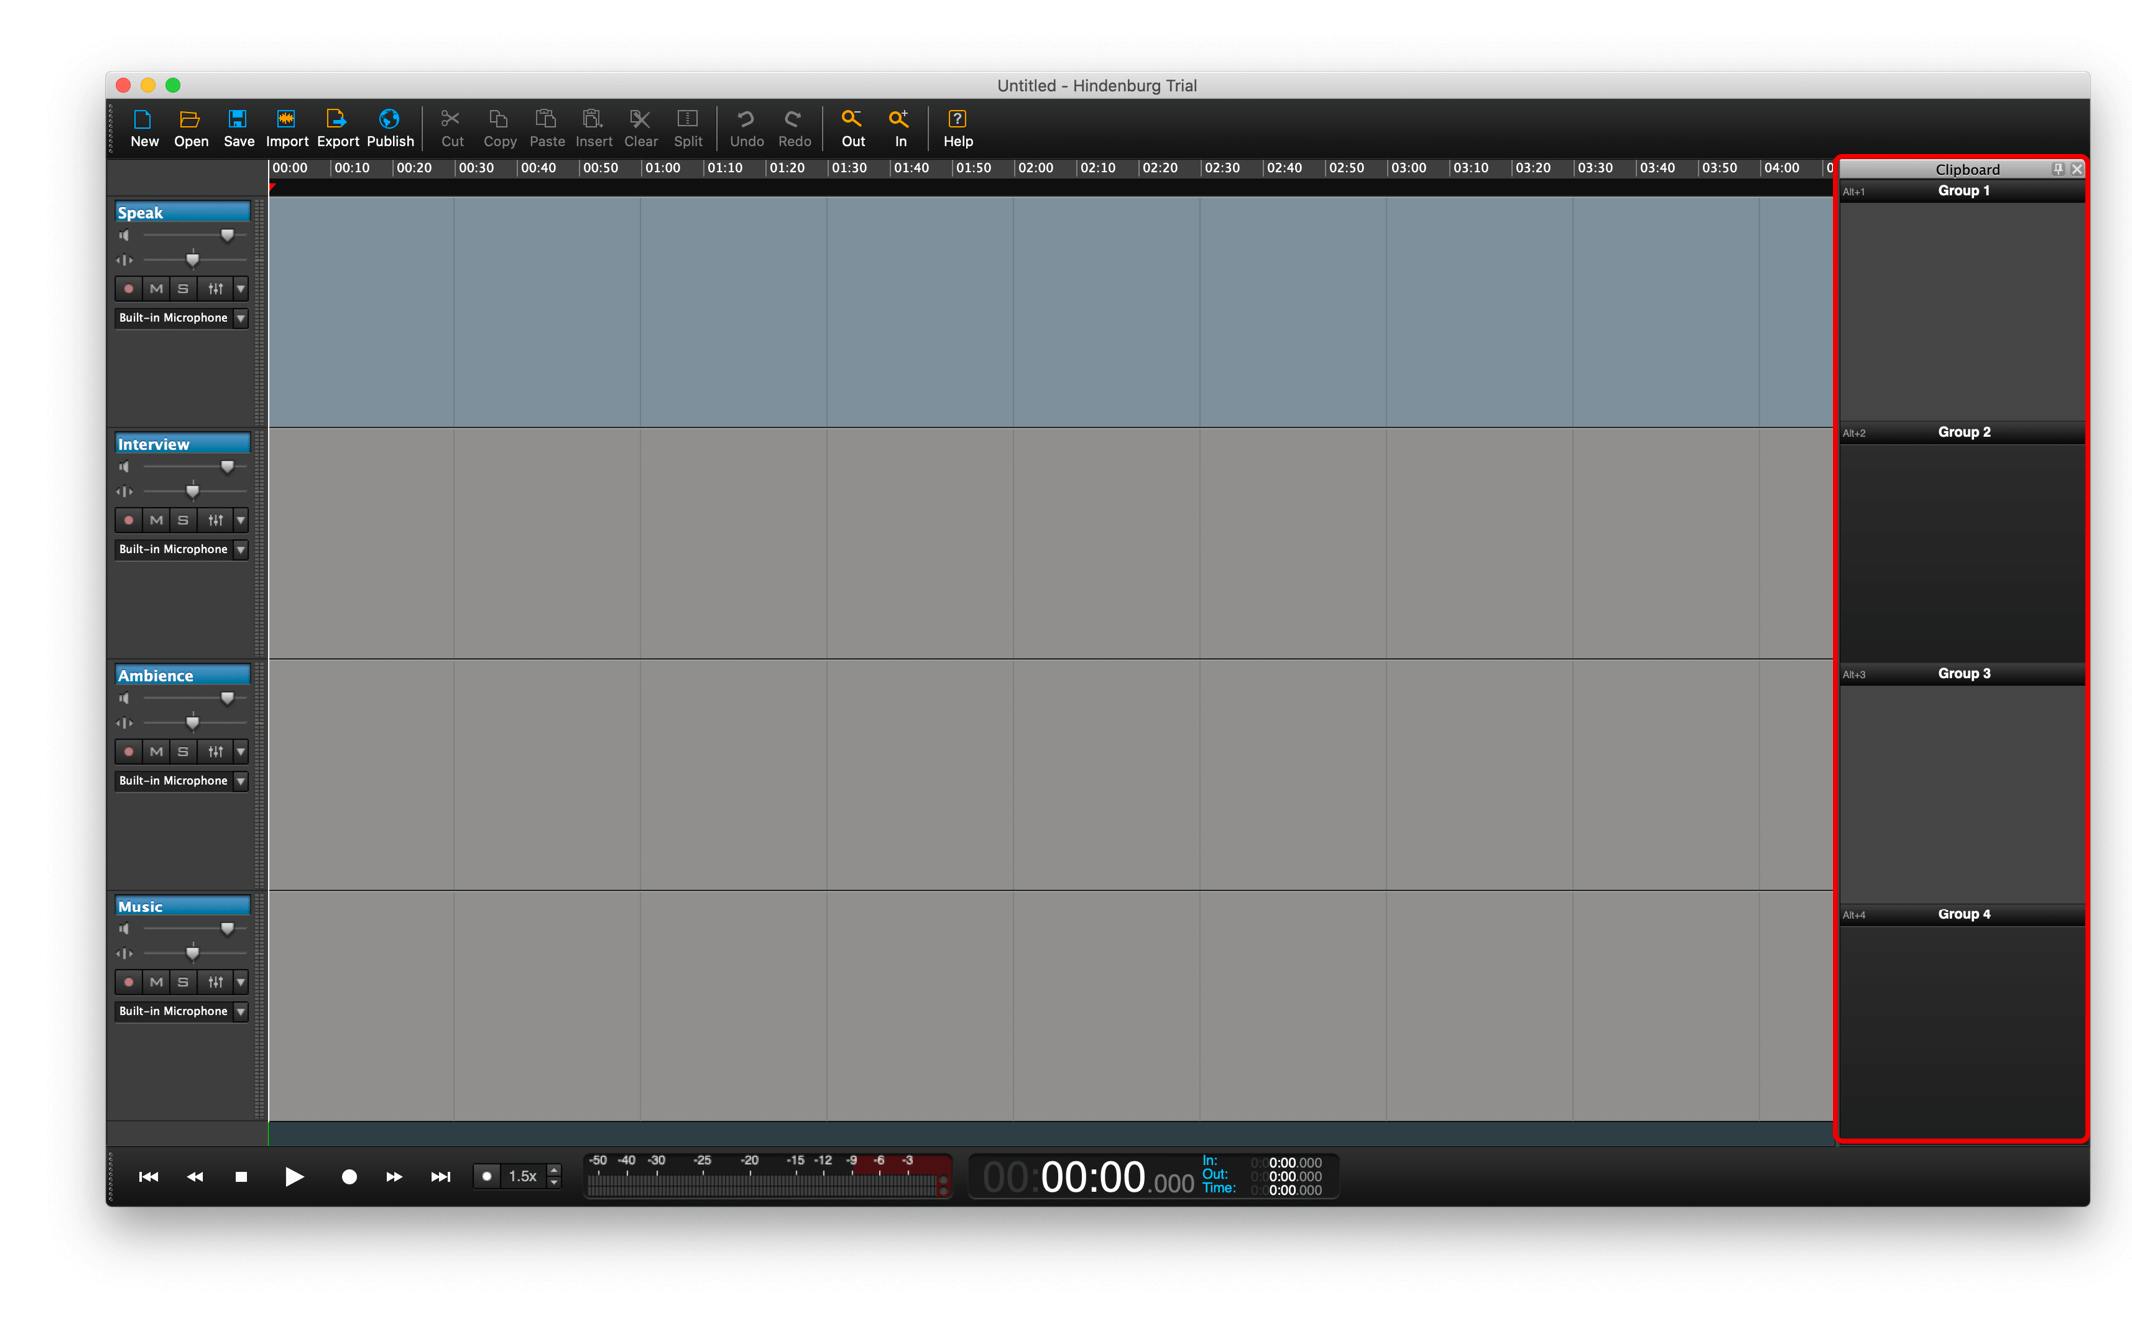
If you import an audio file but only want to use a portion of it, you can select the part you want to use and drag it into your clipboard for easy access later on.
The clipboard is also a great place to store your intro and outro files so you can quickly grab them when it's time to add them to your episode!
You can add as many groups as you want to the clipboard and can Control + click on the title to rename each one.
Playback features
At the bottom left of the screen are the playback features, record button, and the playback speed toggle to slow down or speed up your track.

The Voice Meter gives you a visual of your audio levels to keep you from peaking, and the time box displays how long your recording is down to a thousandth of a second.

Recording in Hindenburg
Before recording within Hindenburg, make sure to identify your microphone and select it as the audio input.
You can record your audio by:
- Running your microphone through a mixer connected to your computer
- Hooking up a USB microphone directly to your computer
Whichever option you use to record, as long as it's plugged into your computer, Hindenburg will automatically find and list it as an input option in the drop-down menu beneath each track.
If you're using an audio interface, you can select the specific microphone you want to record from, which is useful when you're recording with a guest and want to use the multitrack recording feature.
To select a specific microphone attached to your audio interface, select the drop-down menu next to the track you want to record on.
Select Mono > Your mic to tell Hindenburg you only want the audio recorded from that specific microphone.
If someone else is recording with you and you want to record their audio on a separate track, select a new track and click on the same drop-down menu on the second line to choose their input (Mono > Their mic).
Arm your track
Arm your tracks by pressing the small record button next to each track you want to record on.
You can start recording when you see the red record button flashing on the bottom left of the workspace!
Audio leveling magic
When you're finished recording and press Stop, Hindenburg will automatically analyze your audio file and balance the audio to match the latest audio measurement guidelines.
The auto-leveling feature works whether you record into Hindenburg directly or import an audio file.
Pretty nice, right?
Import audio files
If you recorded your audio using a mixer or a field recorder like the Zoom H4n Pro, or even your iPhone, you can easily import your audio files into Hindenburg.
To import an audio file, click Import on the top toolbar and choose the file you want to edit.
To import an audio file into a specific location, drag the playhead (the white, vertical line) to the place you want your next clip to begin.
If you want to add intro music or a voice-over at a specific time in your track, place the playhead at the exact time you want your track to appear and import the file onto the music track.
Basic editing
Before tackling the editing process, take a look at how to use these common editing techniques within Hindenburg.
Moving audio clips
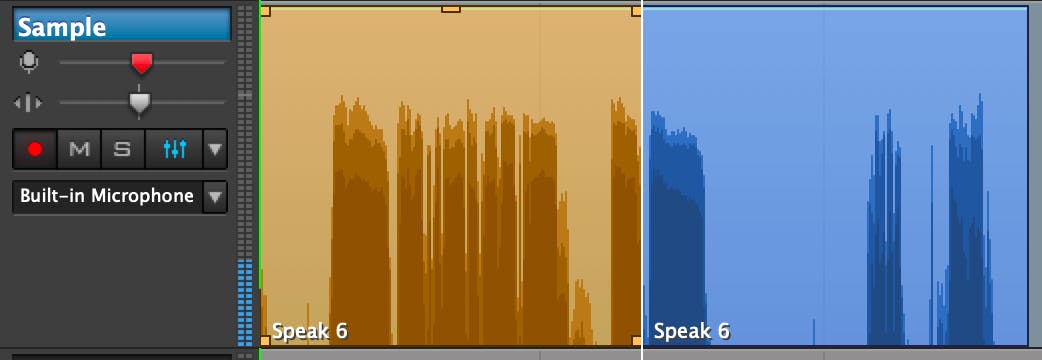
Position your mouse on the top half of the clip you want to move. Then, click and drag your audio file to the left and right, or onto another track.
To highlight a specific section of an audio file, position your mouse on the bottom half of the track until your mouse changes to a cursor.
Once the cursor appears, you can click and drag your mouse to the left or the right to highlight a portion of a file.
With the clip highlighted, any edit you make will apply specifically to this section.
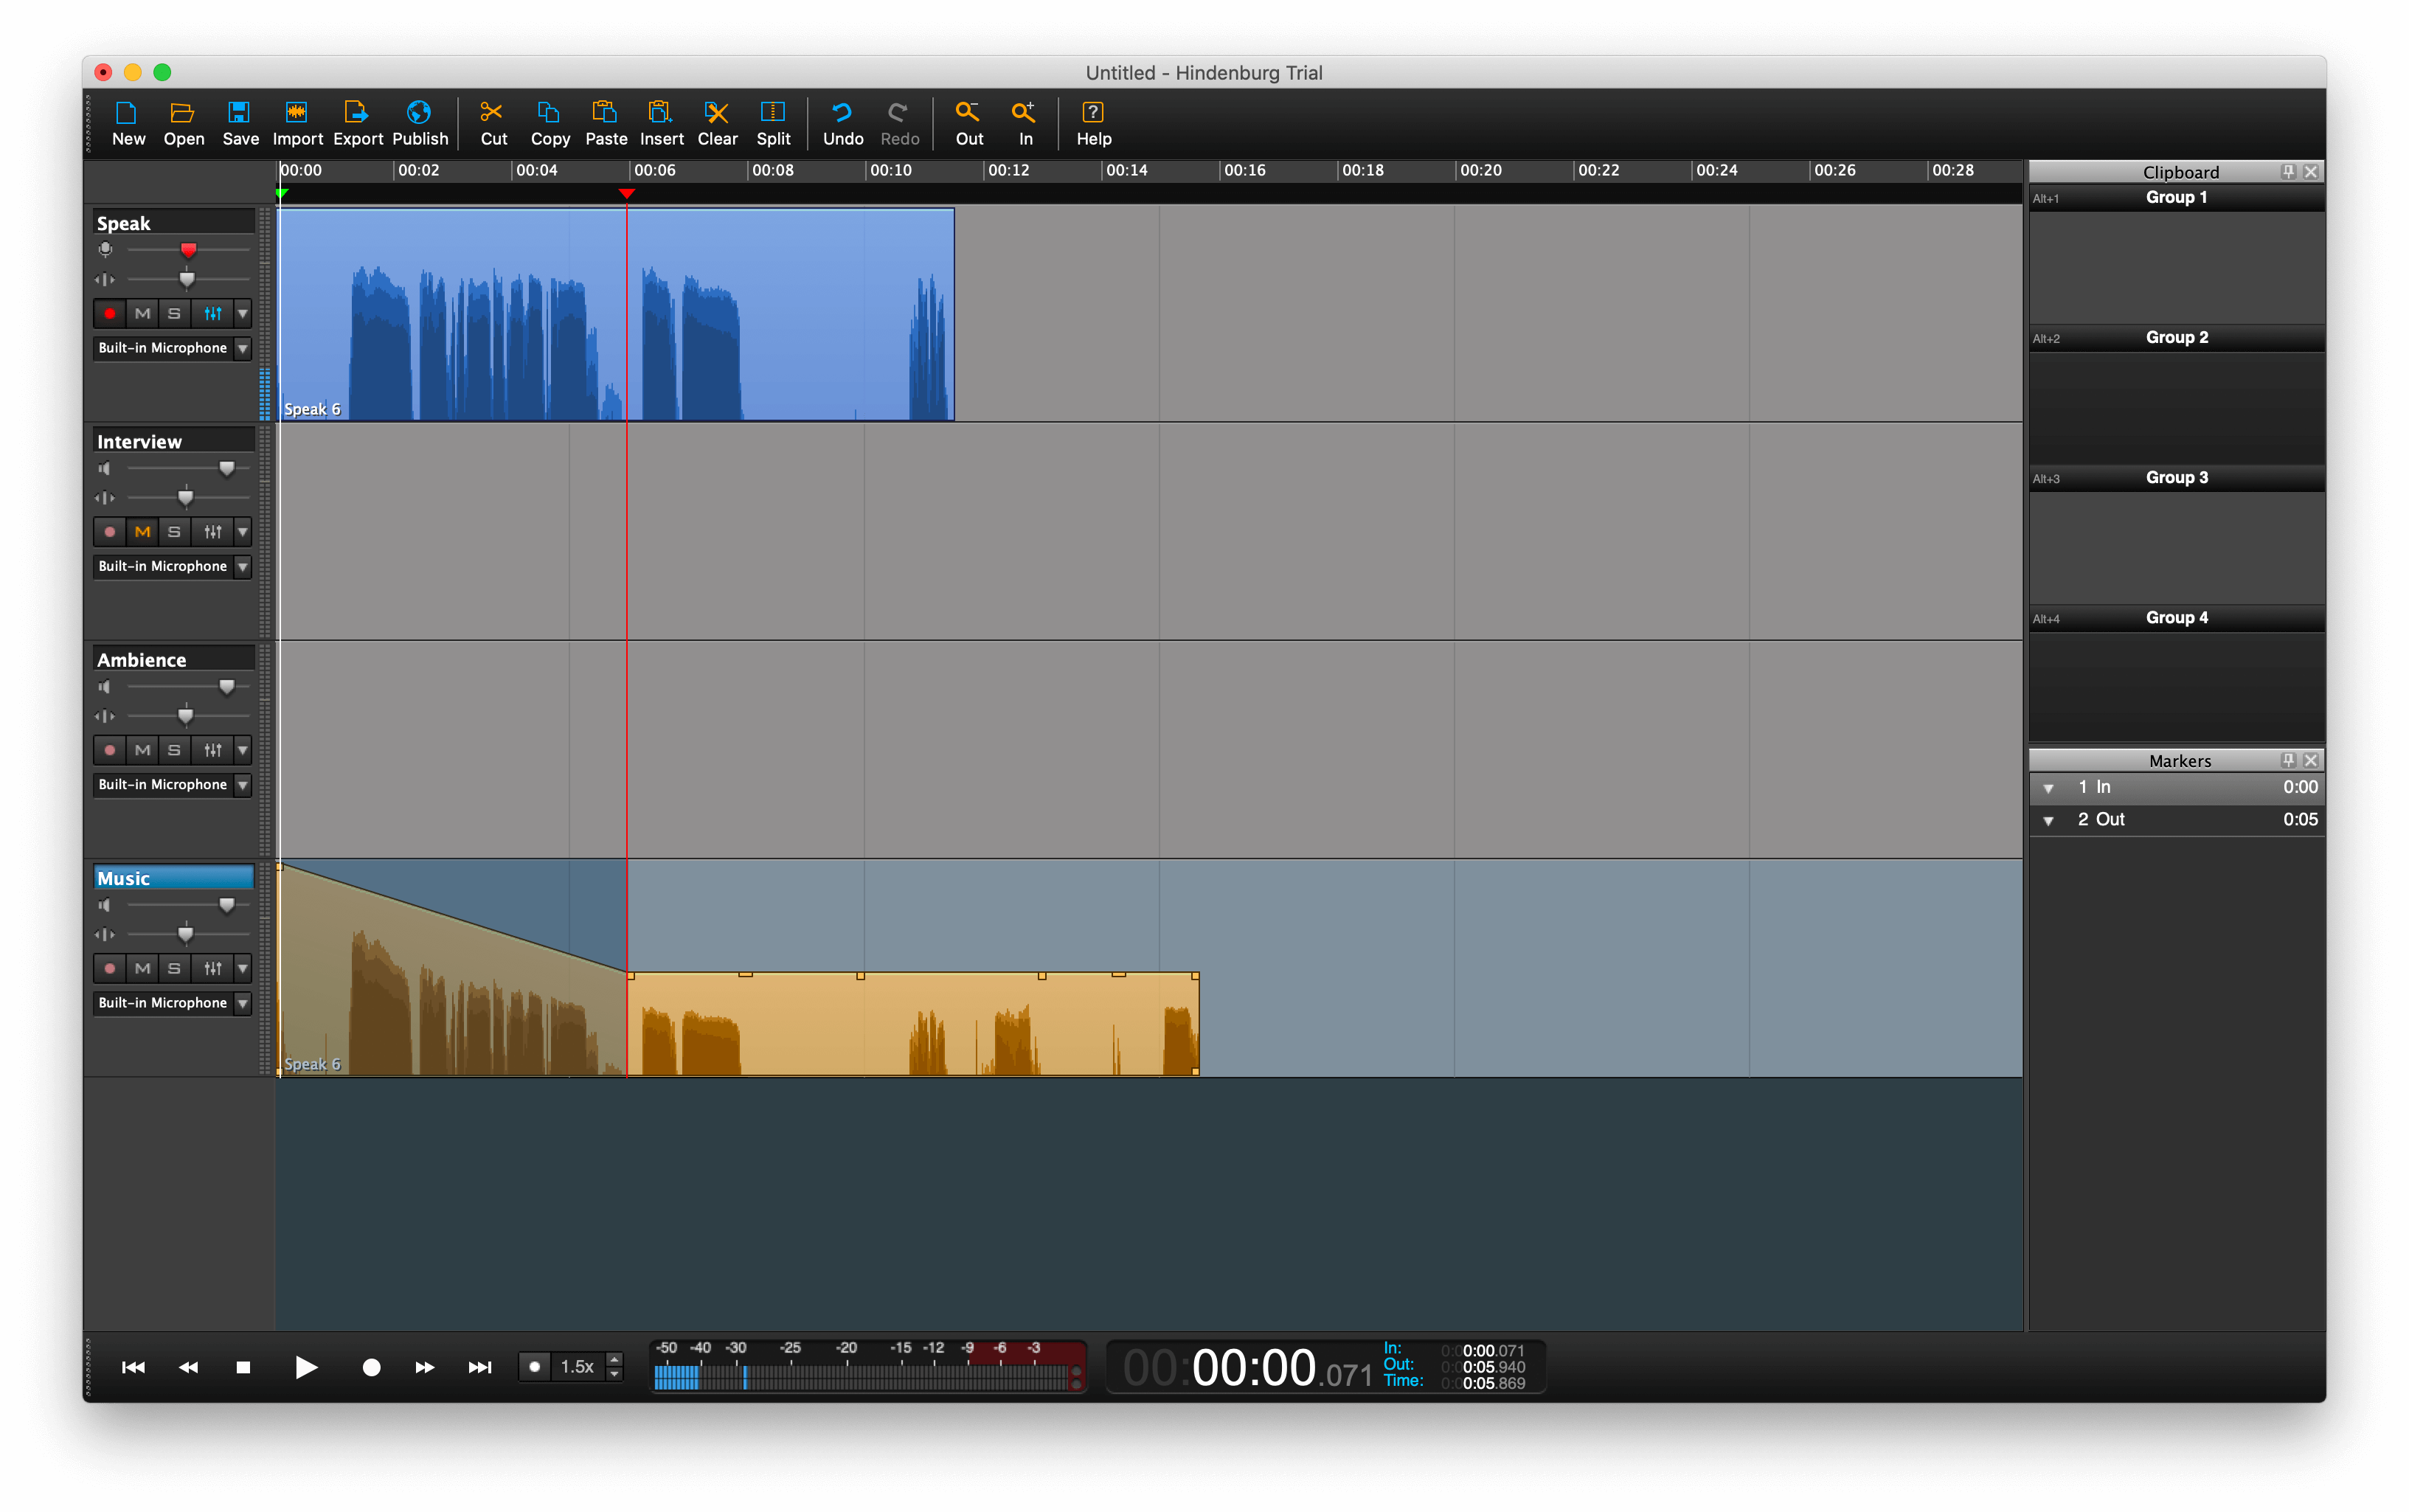
In and out points
You can use In and Out points for a more precise way of highlighting a clip. To make an In point, move the playhead to the point on the timeline you want your highlight to start and press I on your keyboard.
To select an Out point, follow the same steps and press O on your keyboard.
Splitting clips
To break a clip into multiple sections, put the playhead where you want it and press the Split button on the toolbar, or Command B. After splitting a clip, each section can be edited individually.
Cut & Clear
If you want to delete a portion of a clip and leave a space between the two separate files, select the part of the clip you want to delete and press Clear (Delete).

You can use the Cut feature when you have a section of your interview you want to take out but want the audio to shift to the left, so there's a seamless transition.
To cut a portion of a clip, select the part of the file you want to cut and press Command X (Control X if you use a PC).
Volume adjustments & fades
To adjust the volume of your track, use your cursor to drag the top of the clip up or down.
If you have an intro you want to start as full volume and then fade out, select the part of the clip you want to fade, and drag your cursor to the left or right to highlight where you want the fade to happen.
To apply the fade, use your cursor to drag down the highlighted portion of the clip.
To fade into the beginning of a track, take the top left corner of the clip and drag it to the right.

Crossfades
Crossfades help disguise any kind of disruption in your audio by fading the end of one clip into the beginning of another.
To create a crossfade, place two audio clips next to each other. Click on the first track and select the bottom right corner and drag it into the adjacent clip.
Mastering techniques
Now that you know the basic editing techniques within Hindenburg let's look at how to optimize your episode once you finish recording so you can polish the sound quality of your episode.
Effects
Hindenburg comes with five built-in effects and also lets you add your own effects from third-party plug-ins.
To add an effect, select the track you want to add an effect to and click the effects tab.
You can easily toggle any of these effects on and off in the effects box.
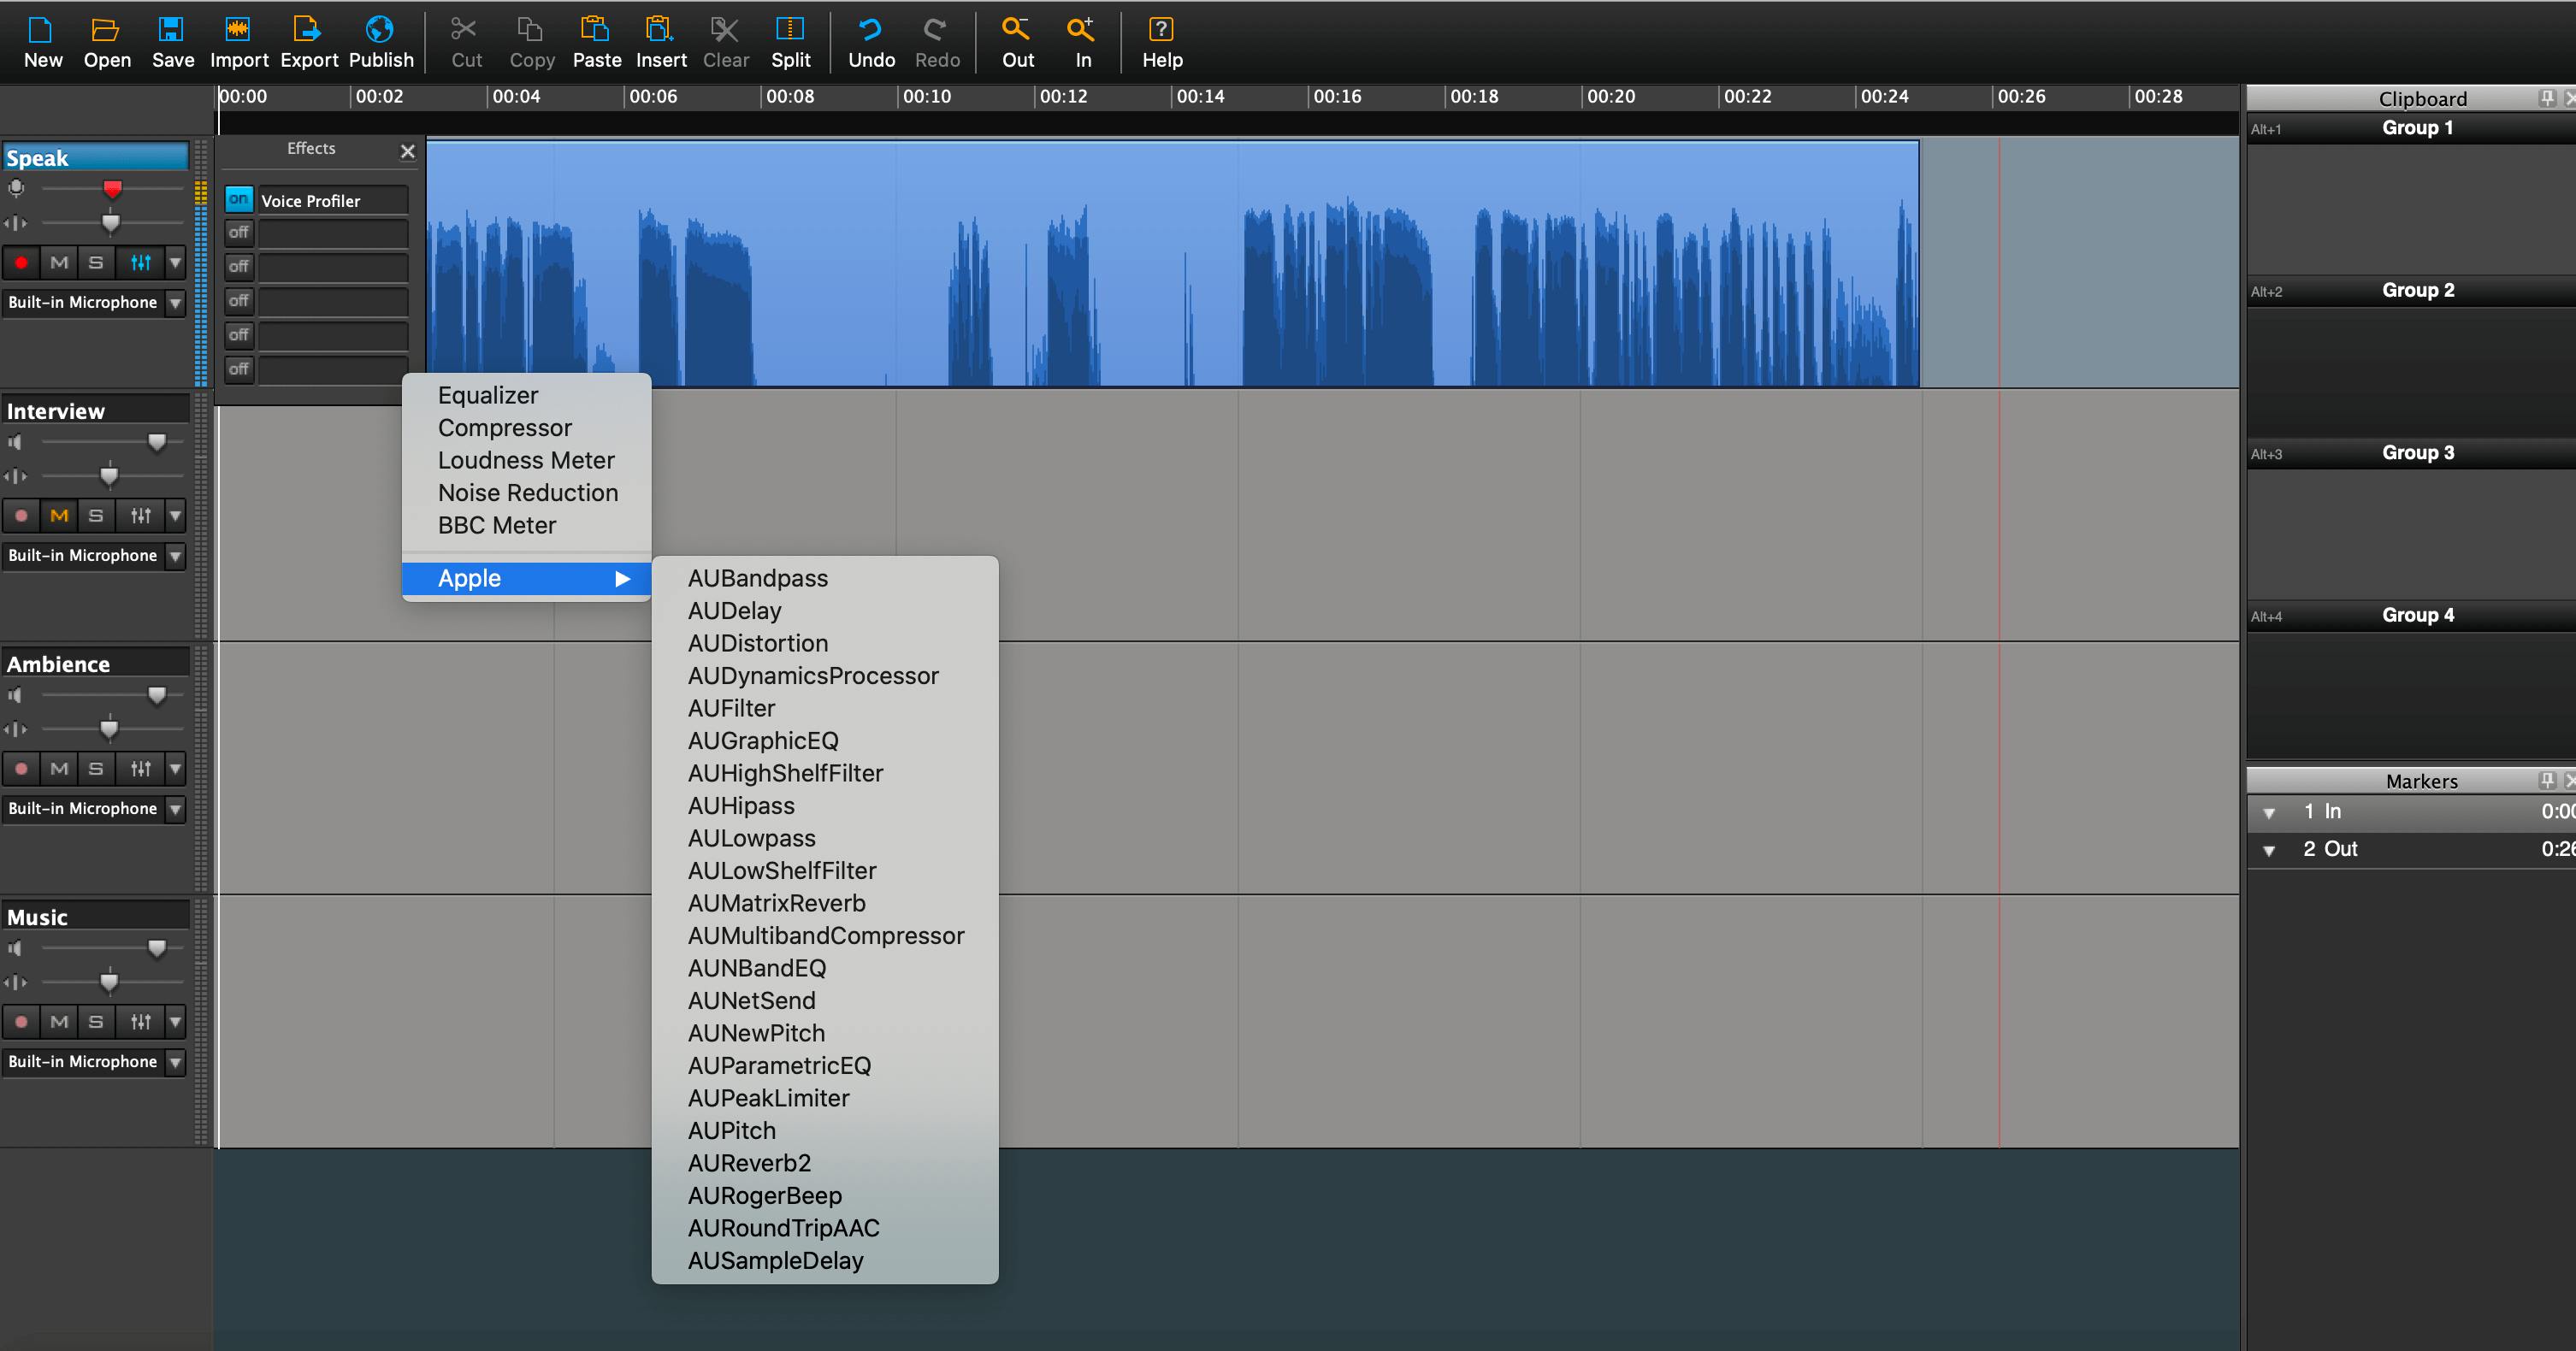
Let's take a look at each of these effects and what they'll do for your sound quality.
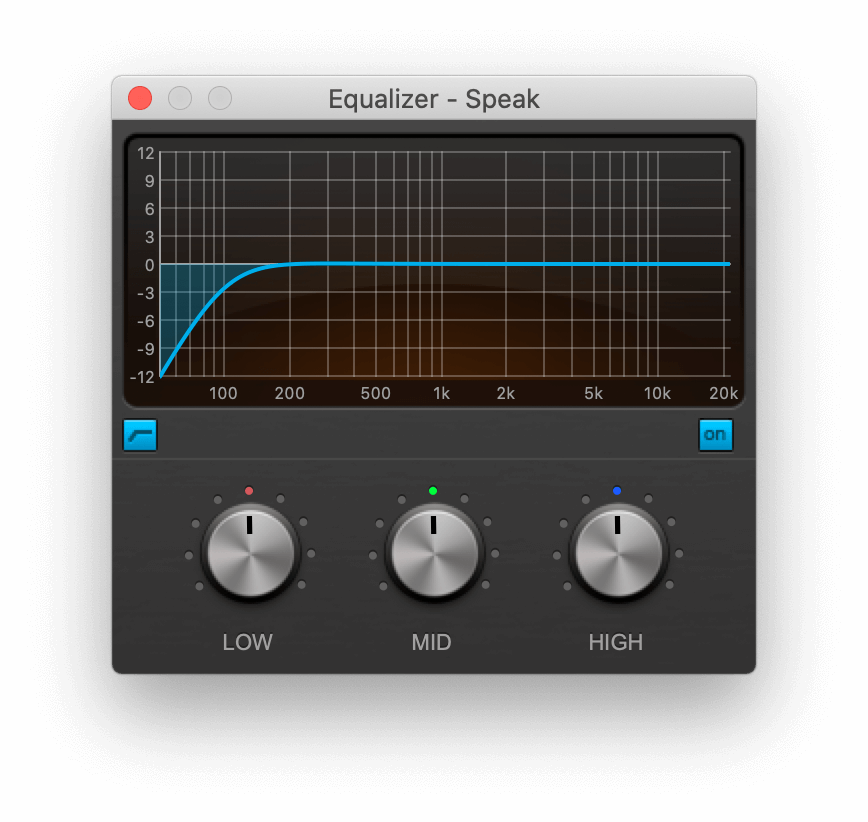
Equalizer
Apply a high-pass filter to your track to get rid of any audio under 100 hertz to make your recording sound clearer and more professional. These are also known as your EQ settings.
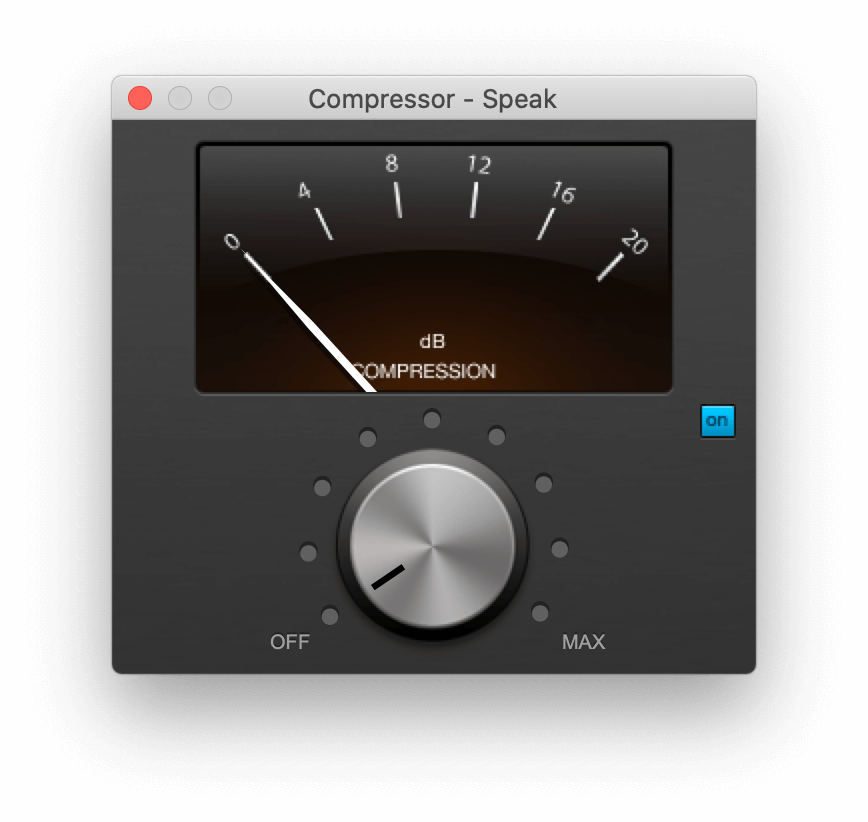
Compressor
Adding compression to your audio makes it sound warmer and less harsh. You can play your track and adjust the compression in real-time to get your levels just right.
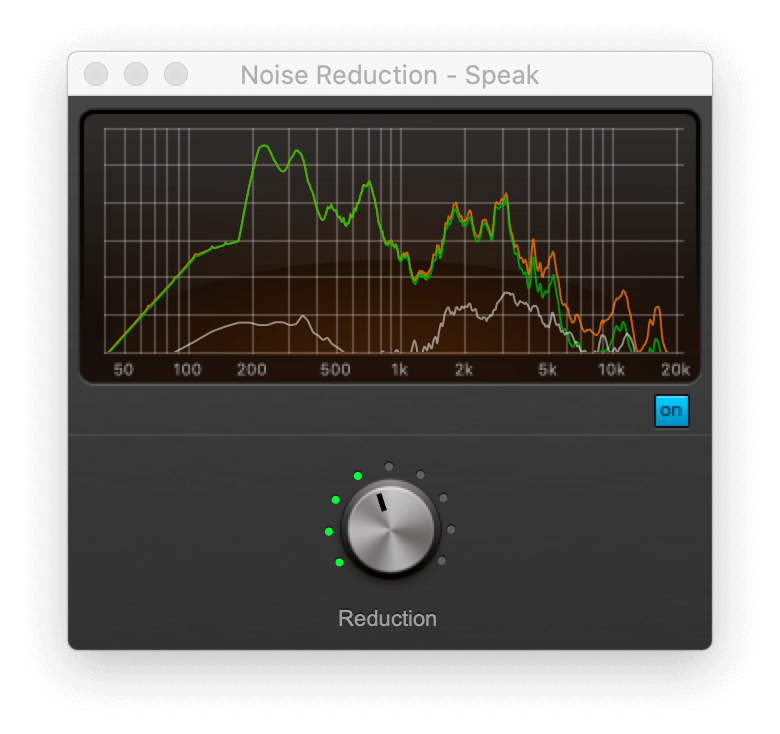
Noise Reduction
Noise reduction comes in handy if you want to get rid of unwanted background noise. Hindenburg can isolate the noise you don't want and reduce it using the noise reduction dial.
Voice Profiler Pro
Hindenburg's Voice Profiler Pro is an automated equalizer that helps create a consistent sound on a voice.
In the standard version of Journalist, Hindenburg will match your voice to an idea EQ balance. Journalist Pro takes it to another level, where you can create a custom template for your voice after you have made adjustments and found your ideal sound.
Applying a profile to a track means you don't have to make individual adjustments to your voice in future episodes. You can edit one episode, save the settings as a profile, and apply them to future tracks— this can save you a lot of time in post-production!
Before applying a profile, Hindenburg first has to learn the audio settings of your track.
Select Learn Profile, so Hindenburg can analyze the track's waveform and make a map of its features. You can apply more edits to the track's profile by adjusting its EQ and compression settings here.
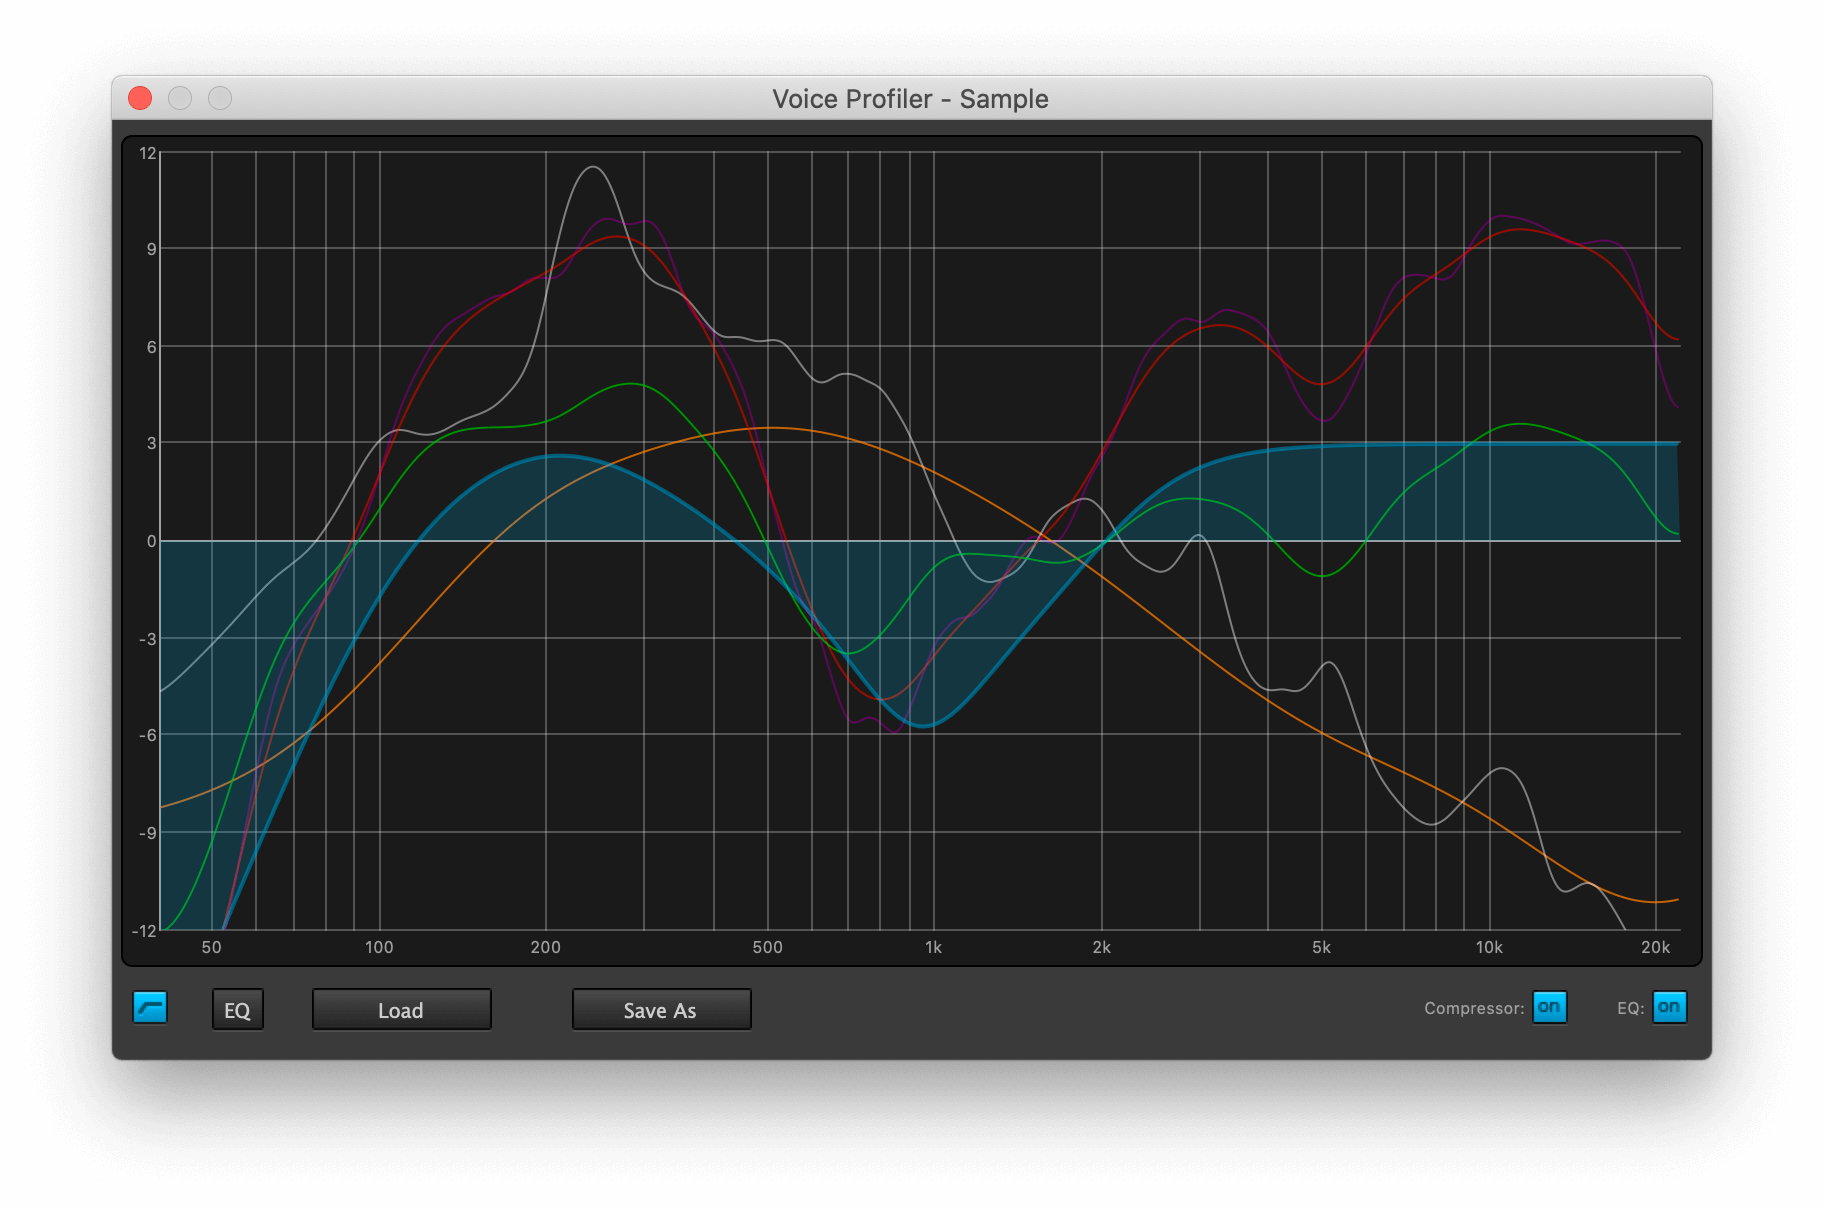
Once you have your audio the way you want it, save the profile so you can automatically edit all your future episodes!
To apply the profile to a track, select the arrow next to the effects button, and select Apply Profile.
Export your project
When you finish all your editing and mixing, select Export on the top toolbar.
We recommend exporting your audio recording as a WAV for lossless audio to reduce audio compression. If you want a smaller file size, you can export as an MP3, but your file will be slightly compressed.
If you select the More Options tab, you can customize more features of your audio file.
Loudness
When you export your track, Hindenburg Pro will detect whether your track is mono or stereo and automatically adjust the loudness level to fit the file type.
If Hindenburg detects your file as mono, it will take the track down 3 decibels to prevent the audio from peaking.
This export feature is fully automated and ensures you'll get the right loudness levels without having to remember specific settings.
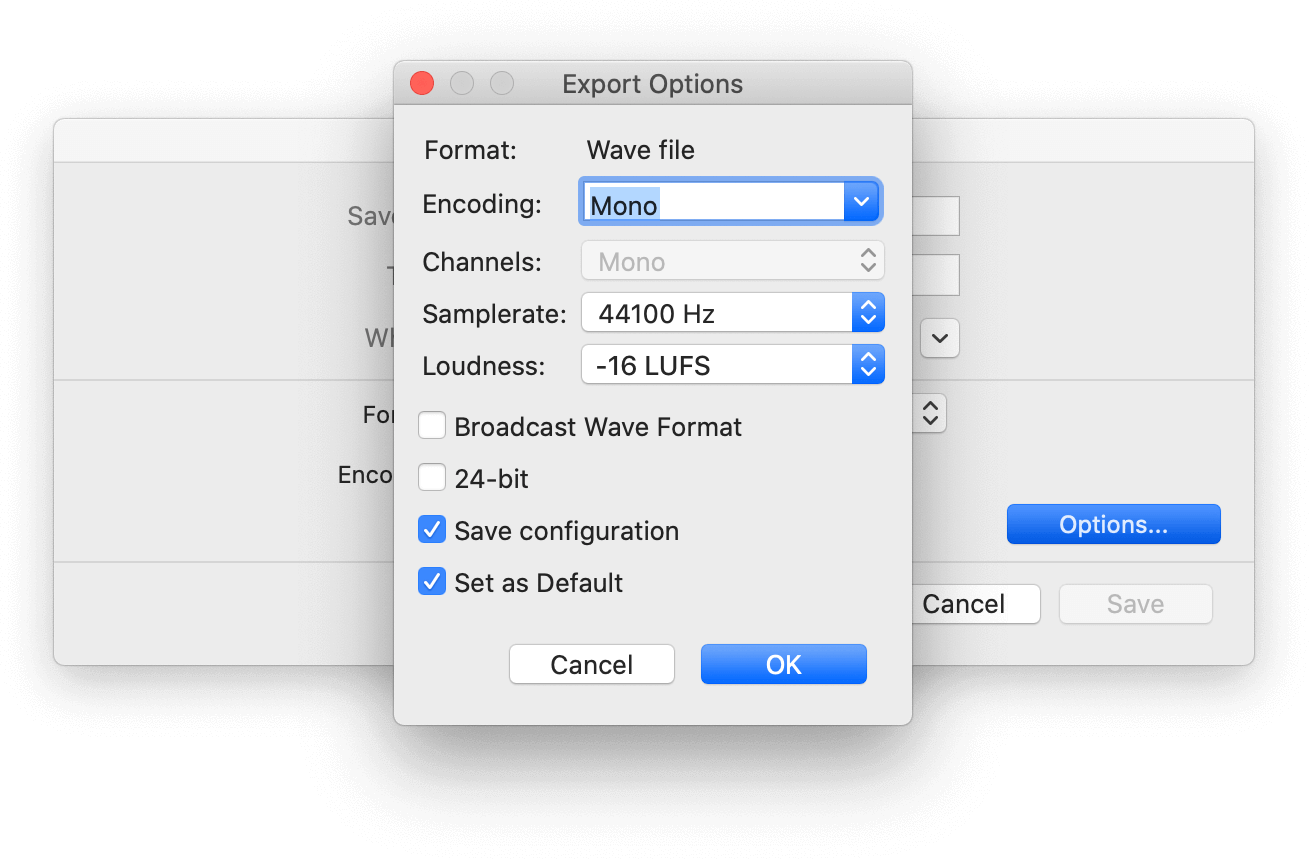
If you know you're going to use this profile on future episodes, go ahead and save the configuration and set it as default!
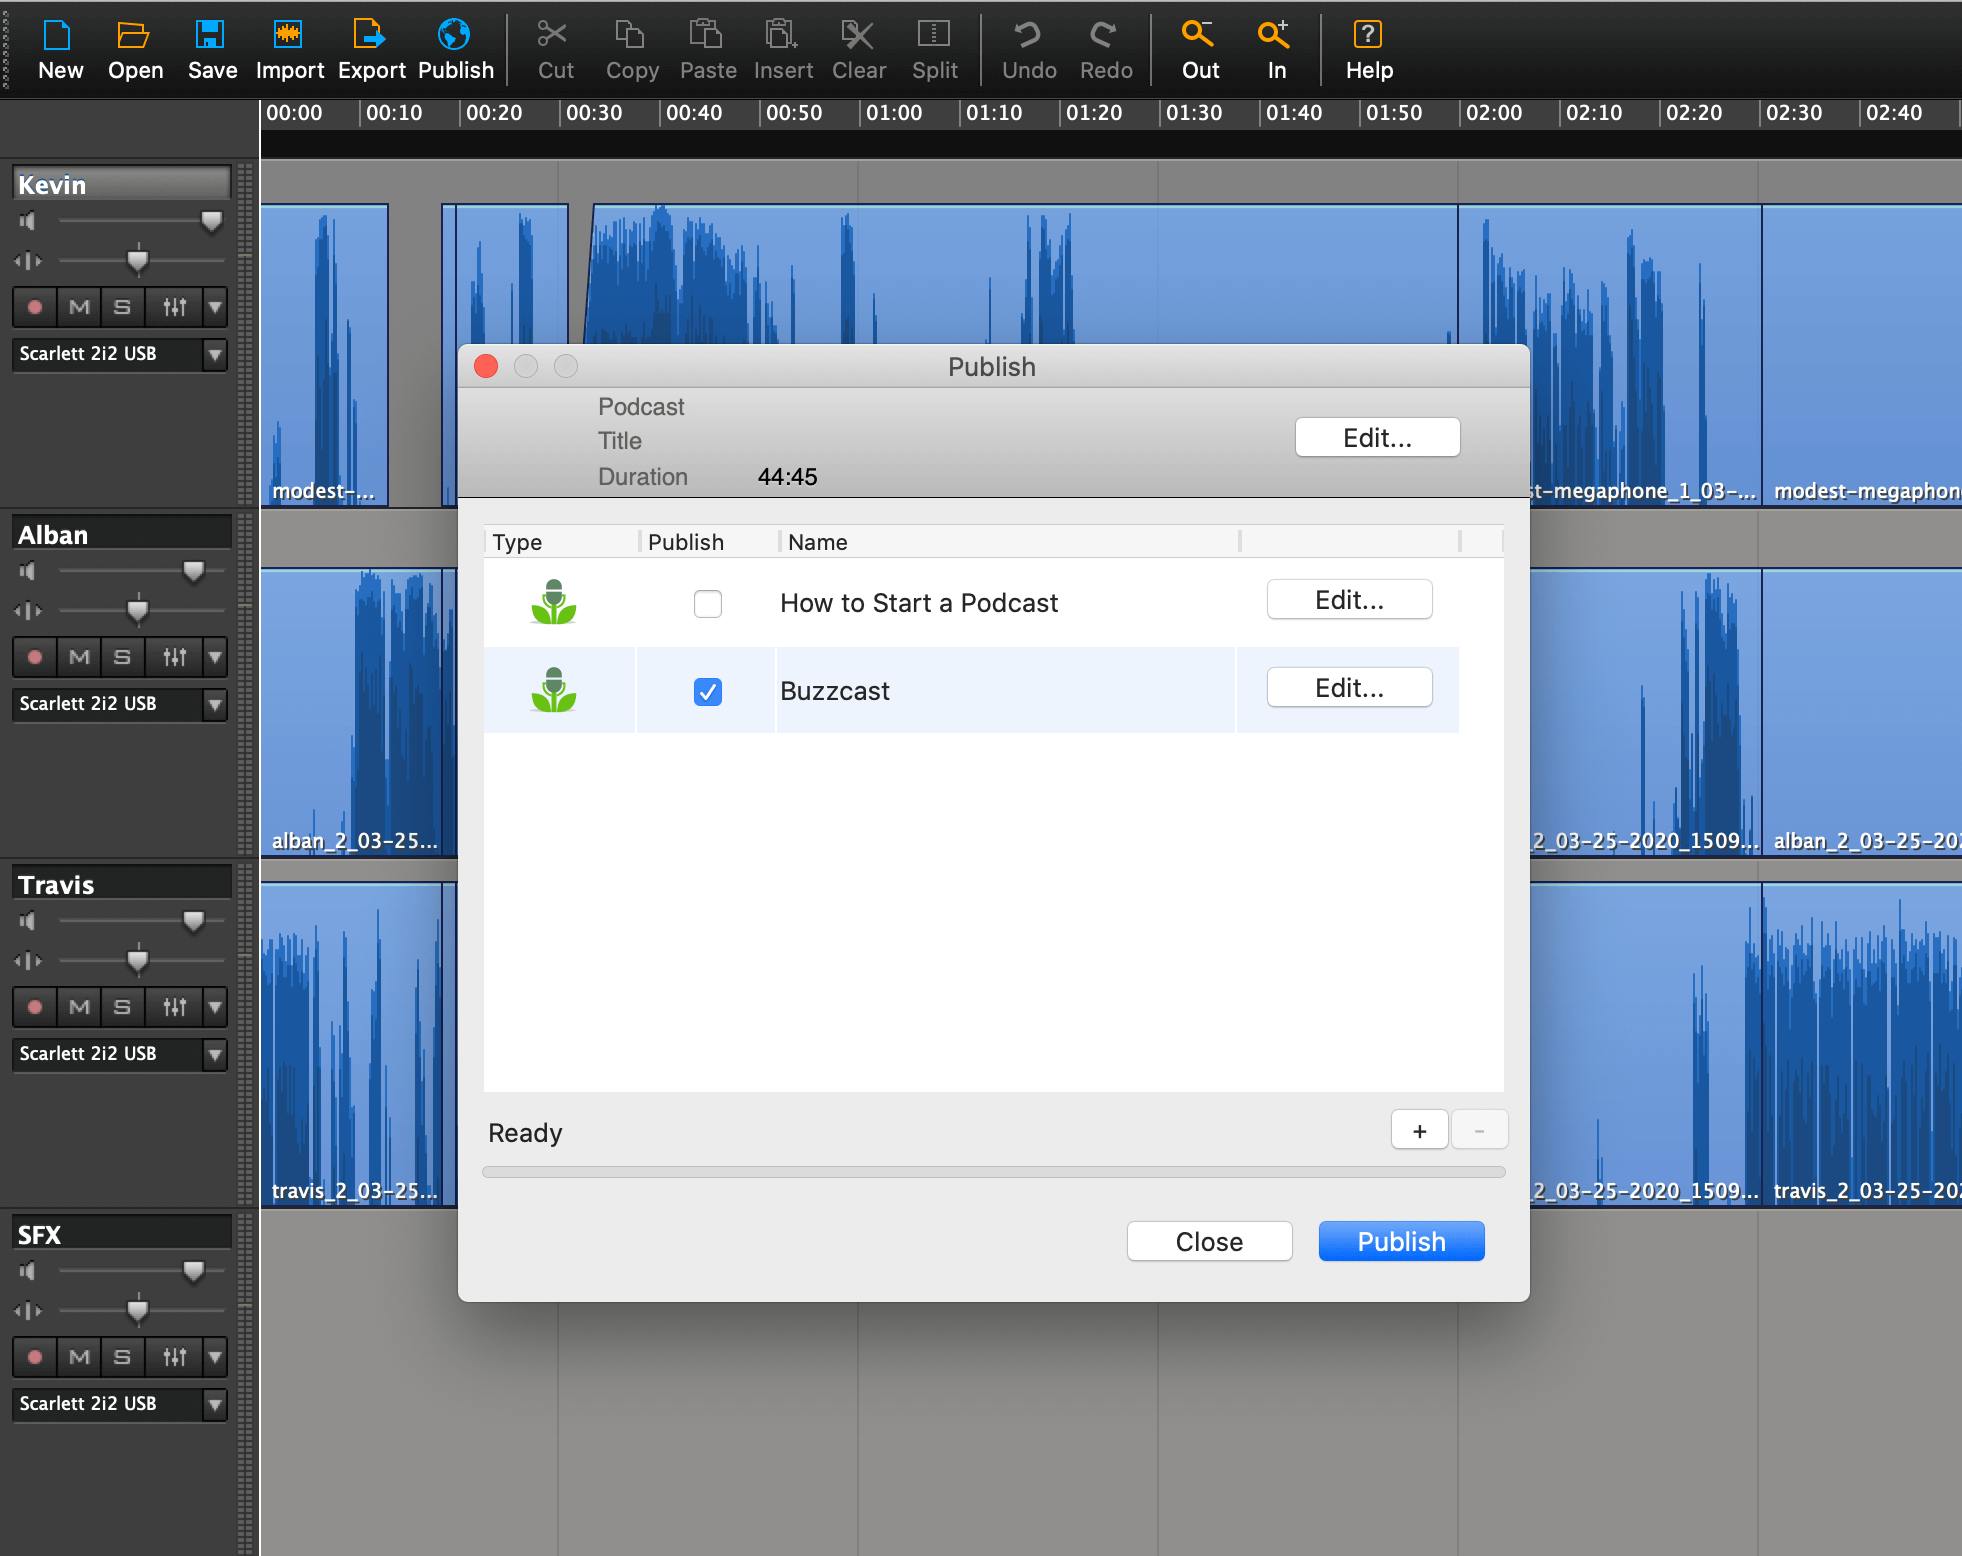
Publish directly to Buzzsprout
Hindenburg also integrates with Buzzsprout, so if you host your podcast with Buzzsprout, there is a faster way to export and upload your podcast episodes. Simply click the Publish button at the top of the toolbar and it will open a window to publish directly to Buzzsprout.
Once you've setup your integration, you can quickly publish new episodes of your podcast in just a few clicks.
Conclusion
If you're looking for a pro-level audio editing software that balances ease of use with excellent audio quality, Hindenburg Journalist is a fantastic software to use for podcast production!