
How to Fade In and Fade Out in Audacity
Fading is a useful tool in a podcaster's arsenal. The effect allows you to create smooth transitions between your audio clips to make a seamless listening experience for your audience.
There are a few ways to use Audacity to create to add a fade effect. This guide breaks down each method so you can choose the one that works best for you.
JUMP TO A SECTION:
Option #1. Linear fades
The easiest way to create a fade within Audacity is to use the classic Fade In or Fade Out effect.
These basic fades are also called Linear fades. They apply constant speed and amplification throughout the selected portion of audio.
In these fades, the amplitude of the audio goes from zero to full volume, or full volume back down to zero.
To apply this effect, grab your Selection tool, which looks like a cursor. Select the desired portion of the audio file, and go to Effect > Fade Out.

Adding this effect creates a Linear Fade starting at zero and will amplify the track to full volume over the course of one second.
You can make your audio selection longer if you want the fade to come in more gradually, or select a smaller section to make the duration of the fade shorter.
Apply fade out to individual clips
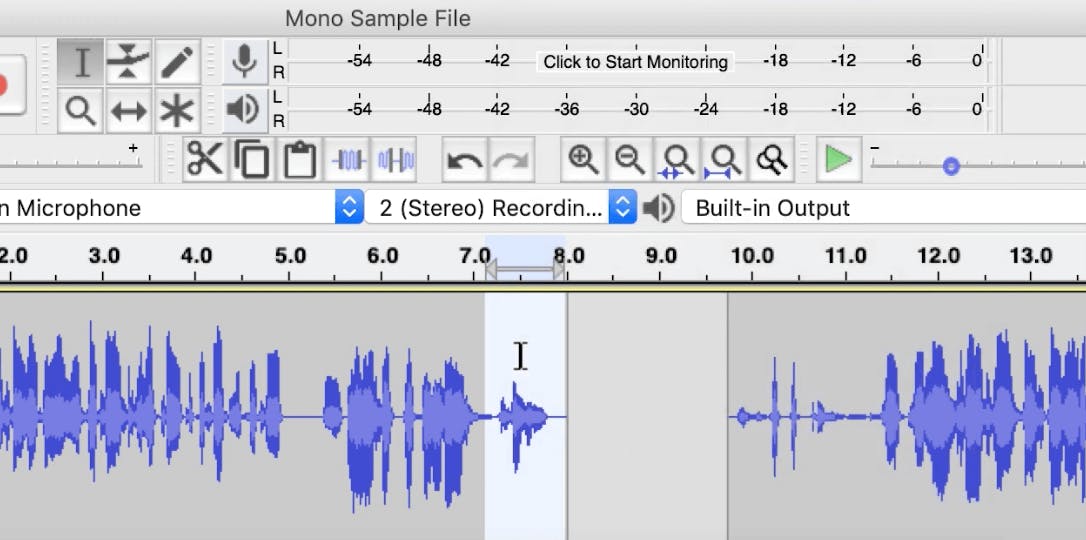
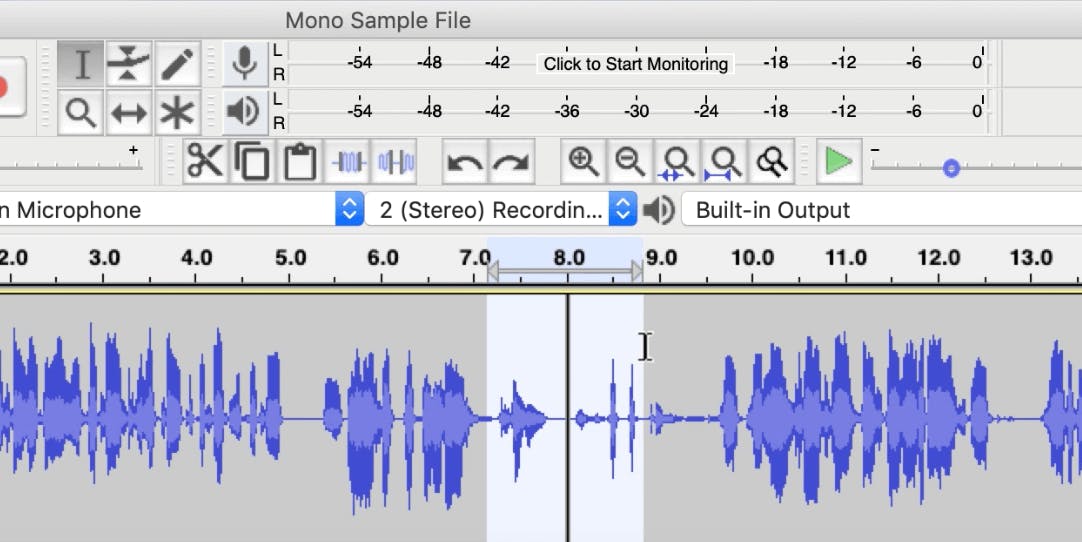
Press Cmd + I (or Ctrl+ I) to split a track into multiple sections so you can apply a fade to an individual segment of audio.
In this example, we split the clip at eight seconds and moved the second portion over with the Time Shift tool.
To apply a fade-out to the first clip, highlight the section of audio you want to fade, and go to Effect > Fade Out.
Option #2. Studio Fade Out
The Studio Fade Out is a less abrupt version of the classic fade and follows an s-shaped curve instead of a line.
This type of fade is used mostly in musical tracks. While some creators think the effect is less jarring and more artistic, others can't tell much of a difference.
To apply the effect, select your portion of audio, go to the Effect menu, scroll down to the bottom, and click Studio Fade Out.
Option #3. Crossfade
A crossfade is an effect applied to two separate clips that make one section of audio fade out while another fades in.
Audacity merges the two clips so they overlap, which can help create smooth transitions. Let's break down the two ways to apply crossfades within Audacity.
Crossfade Clips
To apply a crossfade across two clips on the same track, make sure your two clips are next to each other using the Time Shift Tool.
Use the Selection tool to select the area you want to crossfade, then click Effect > Crossfade Clips to merge the selected audio.
Crossfade Tracks
When creating a podcast episode, you'll likely work with multiple clips across at least two different tracks.
To apply a crossfade between two clips on separate tracks, take your Selection tool and arrange the clips, so they line up.
Use the cursor to choose where you want the fade to start, drag it across the tracks you want to Crossfade, and go to Effect > Crossfade Tracks.
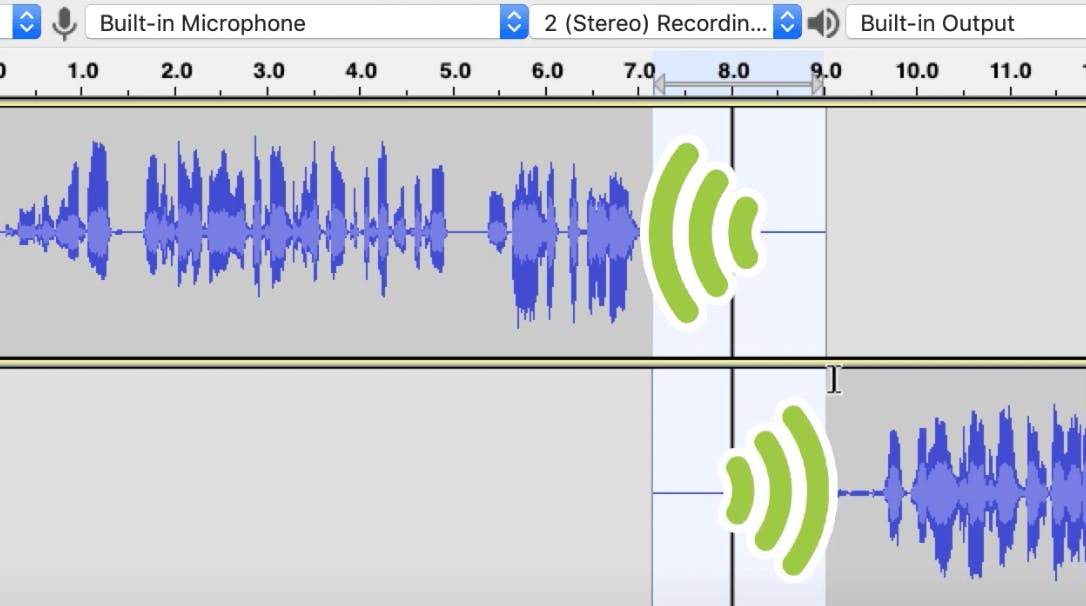
The Crossfade Tracks Menu will pop up with options to create a Custom Curve or adjust the fade direction. Unless you're a digital audio expert, we recommend leaving the default settings as they are.
Click Ok to apply the crossfading effect. Upon playback, you'll hear your first track get softer at the end and the second one gets louder at the beginning.
Option #4. Use the Envelope tool
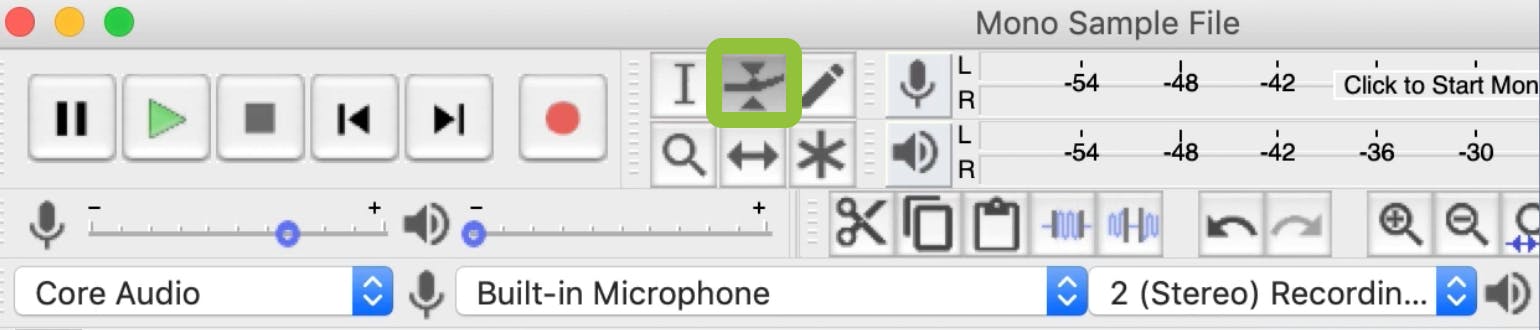
The Envelope tool is especially helpful if you work with multiple tracks, or just want optimal control over your fades.
This tool allows you to manually adjust the volume level at any point along the track to create precise and fully customized fade shapes.
Click the toolset icon at the top of the toolbar to activate the Envelope tool.
You'll see dark grey bars appear above and below the waveforms on the Timeline. These represent the volume of each track.
After you select the Envelope tool, click on the grey line. A white box should appear.
You can click on this white box to adjust the volume level at that specific time point, and create new ones across the Timeline wherever you want.
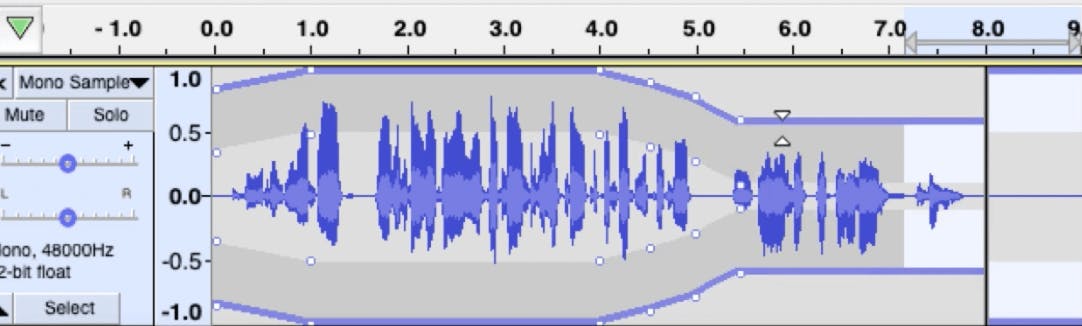
Now, you have full, second-by-second control of your track's volume level.
For instance, in this clip, we made it louder for the first second. Then, we dipped the volume lower at four seconds.
This feature is especially convenient if you're editing several types of clips strung together like an intro, music segues, narrated portions, and interviews.
More Audacity tutorials
Audacity is excellent audio editing software for Mac, Linux, and Windows, and is widely used by podcasters of all skill levels. Check out these tutorials for more tips and tricks for using the tool!

Alban Brooke
Alban Brooke is the Head of Marketing at Buzzsprout and the co-host of Buzzcast. Have any questions about this guide? Reach out on Twitter.