
Alitu Review & Walkthrough
There's a lot of moving parts to podcast creation: recording your episode, optimizing the audio quality, making edits, applying transitions, inserting ads, arranging interviews, etc.
And for some podcasters, traditional editing software is time-consuming and a hurdle to producing consistent, quality episodes.
Alitu was created by podcasters, for podcasters to help automate the technical side of editing so you can focus on the nuts and bolts of crafting an episode.
This all-in-one, web-based tool includes all the features needed to optimize your audio, apply edits, and publish directly to your podcast host.

As podcasters themselves, Alitu's creators understand which editing features creators need (and which ones they don't) to efficiently craft an episode, making it an excellent option for software minimalists, or podcasters just getting started.
Let's take a look at the tool's layout, editing features, and some of its basic functions!
Alitu walkthrough and workspace
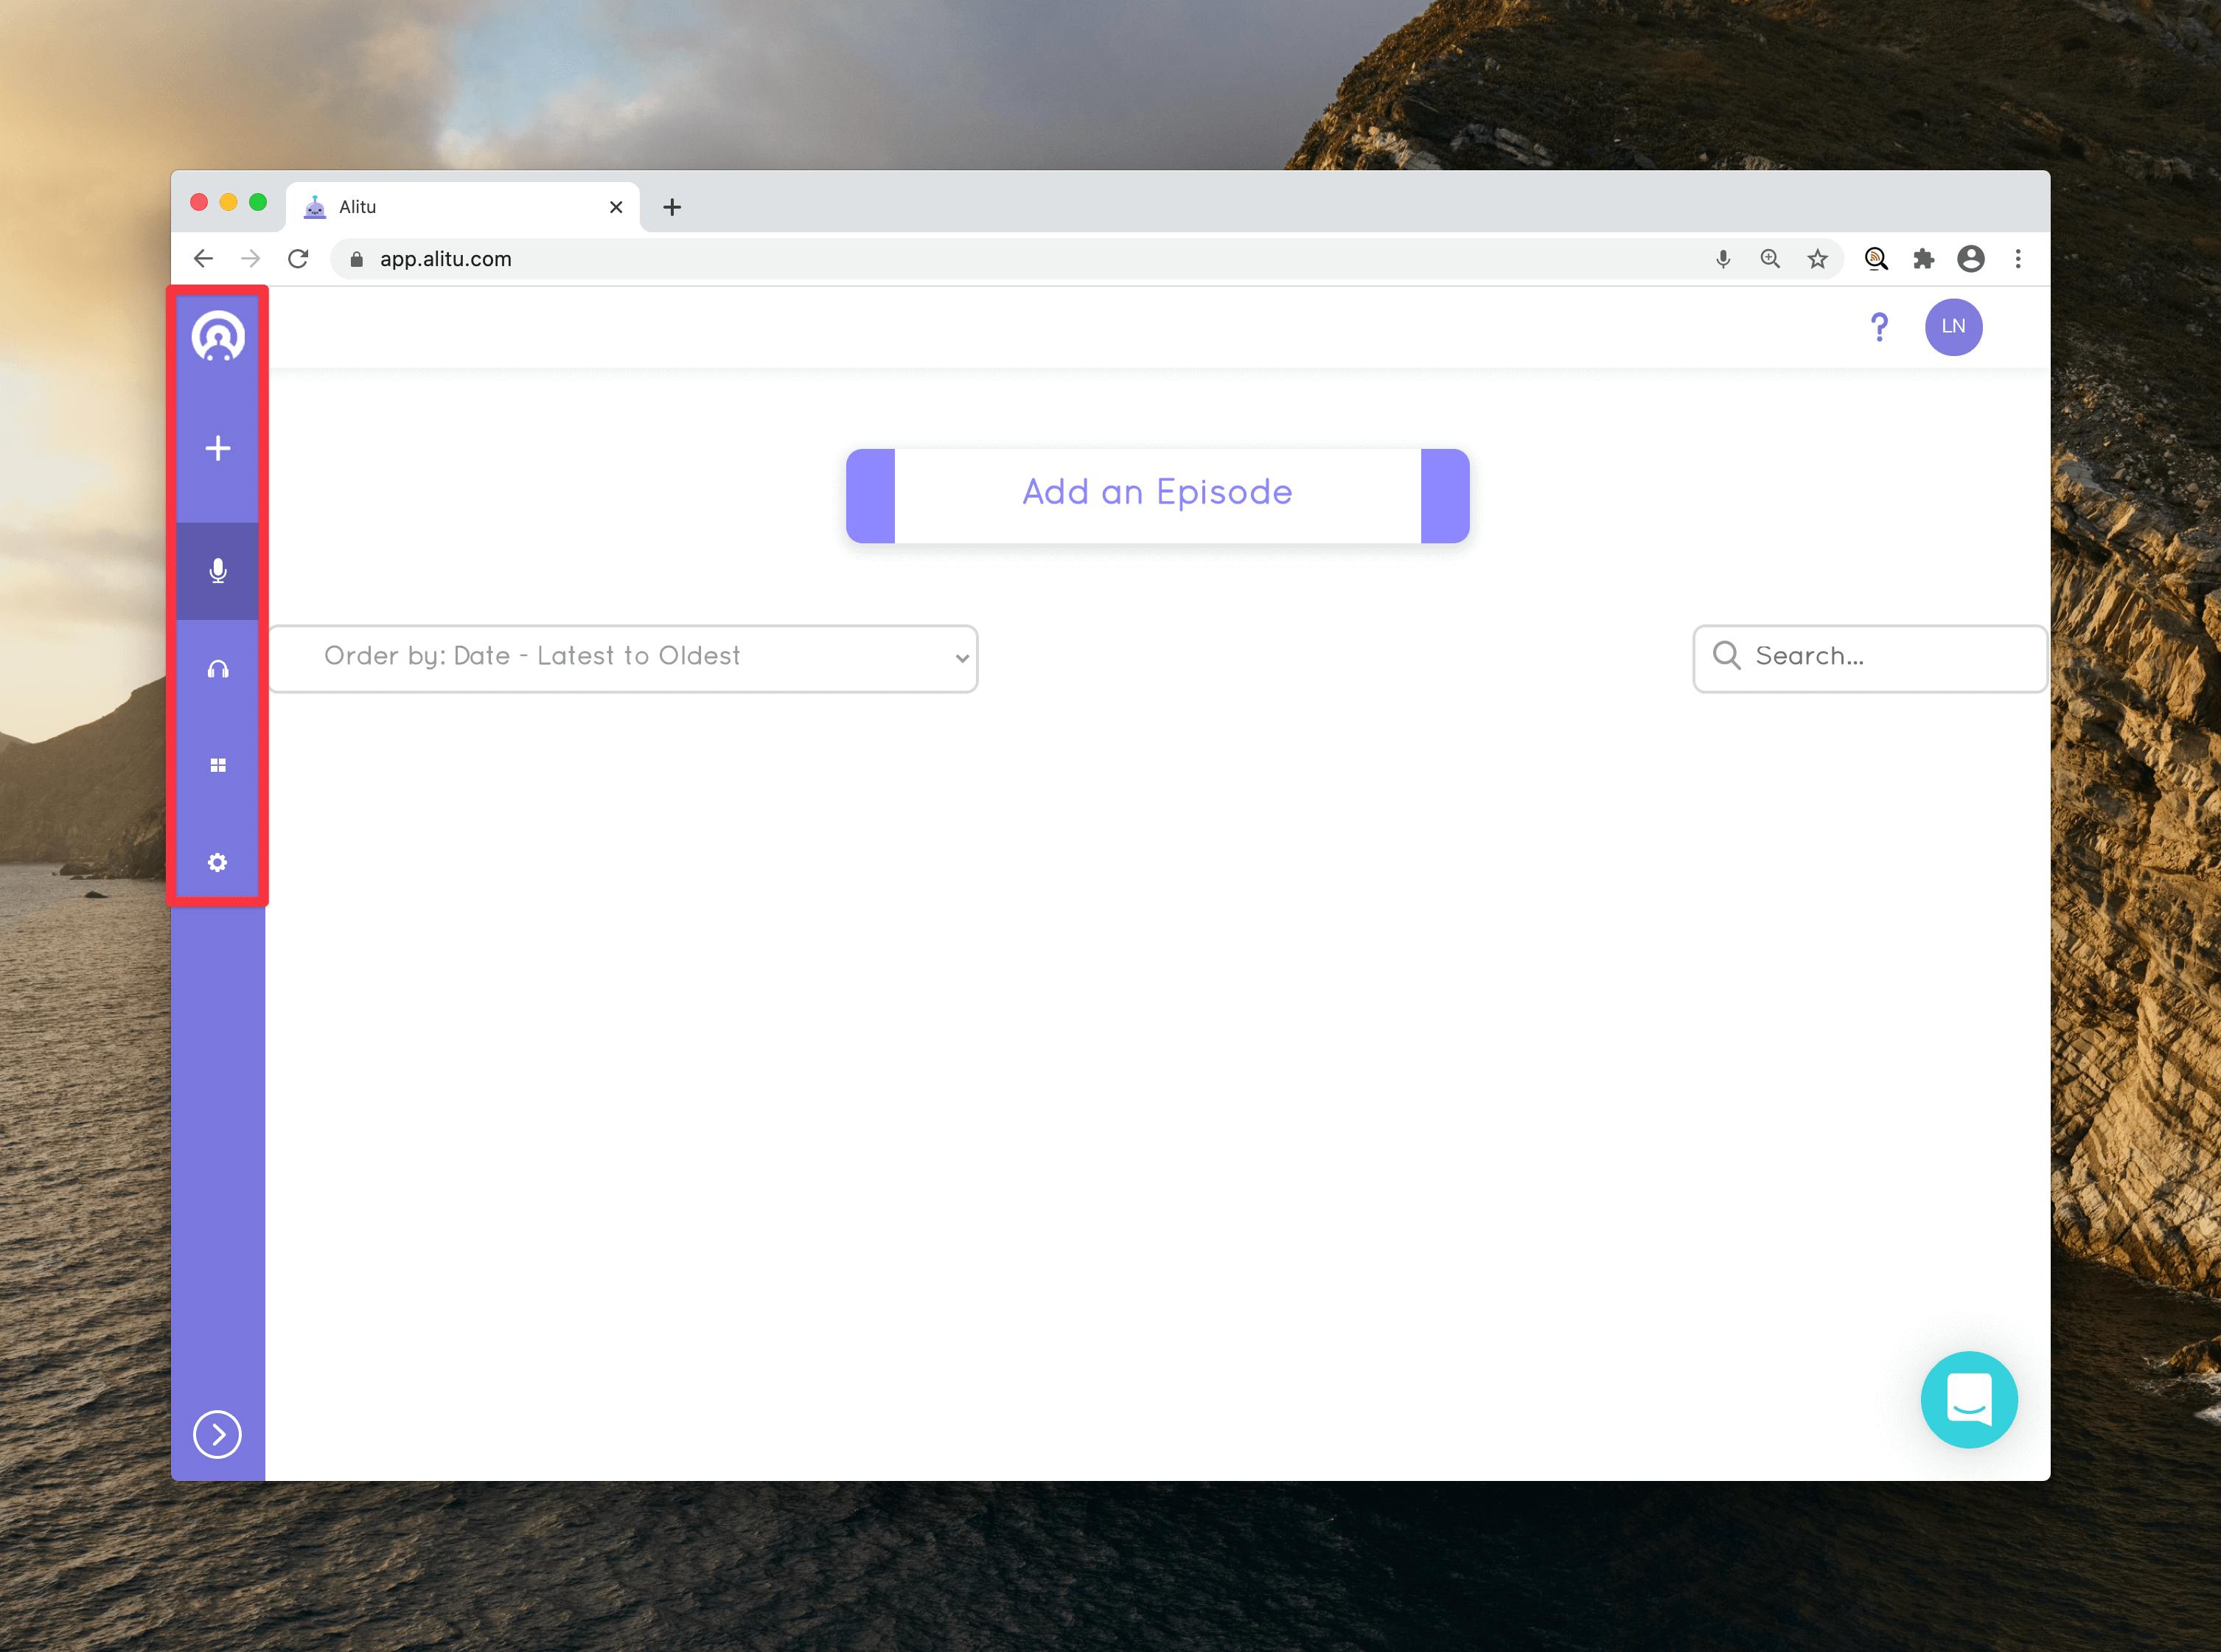
Alitu's interface is about as intuitive as it gets, and it doesn't take long to orient yourself with the layout.
The program opens up on the tool's home screen where you can add new episodes, edit the details of each one, and view past content.
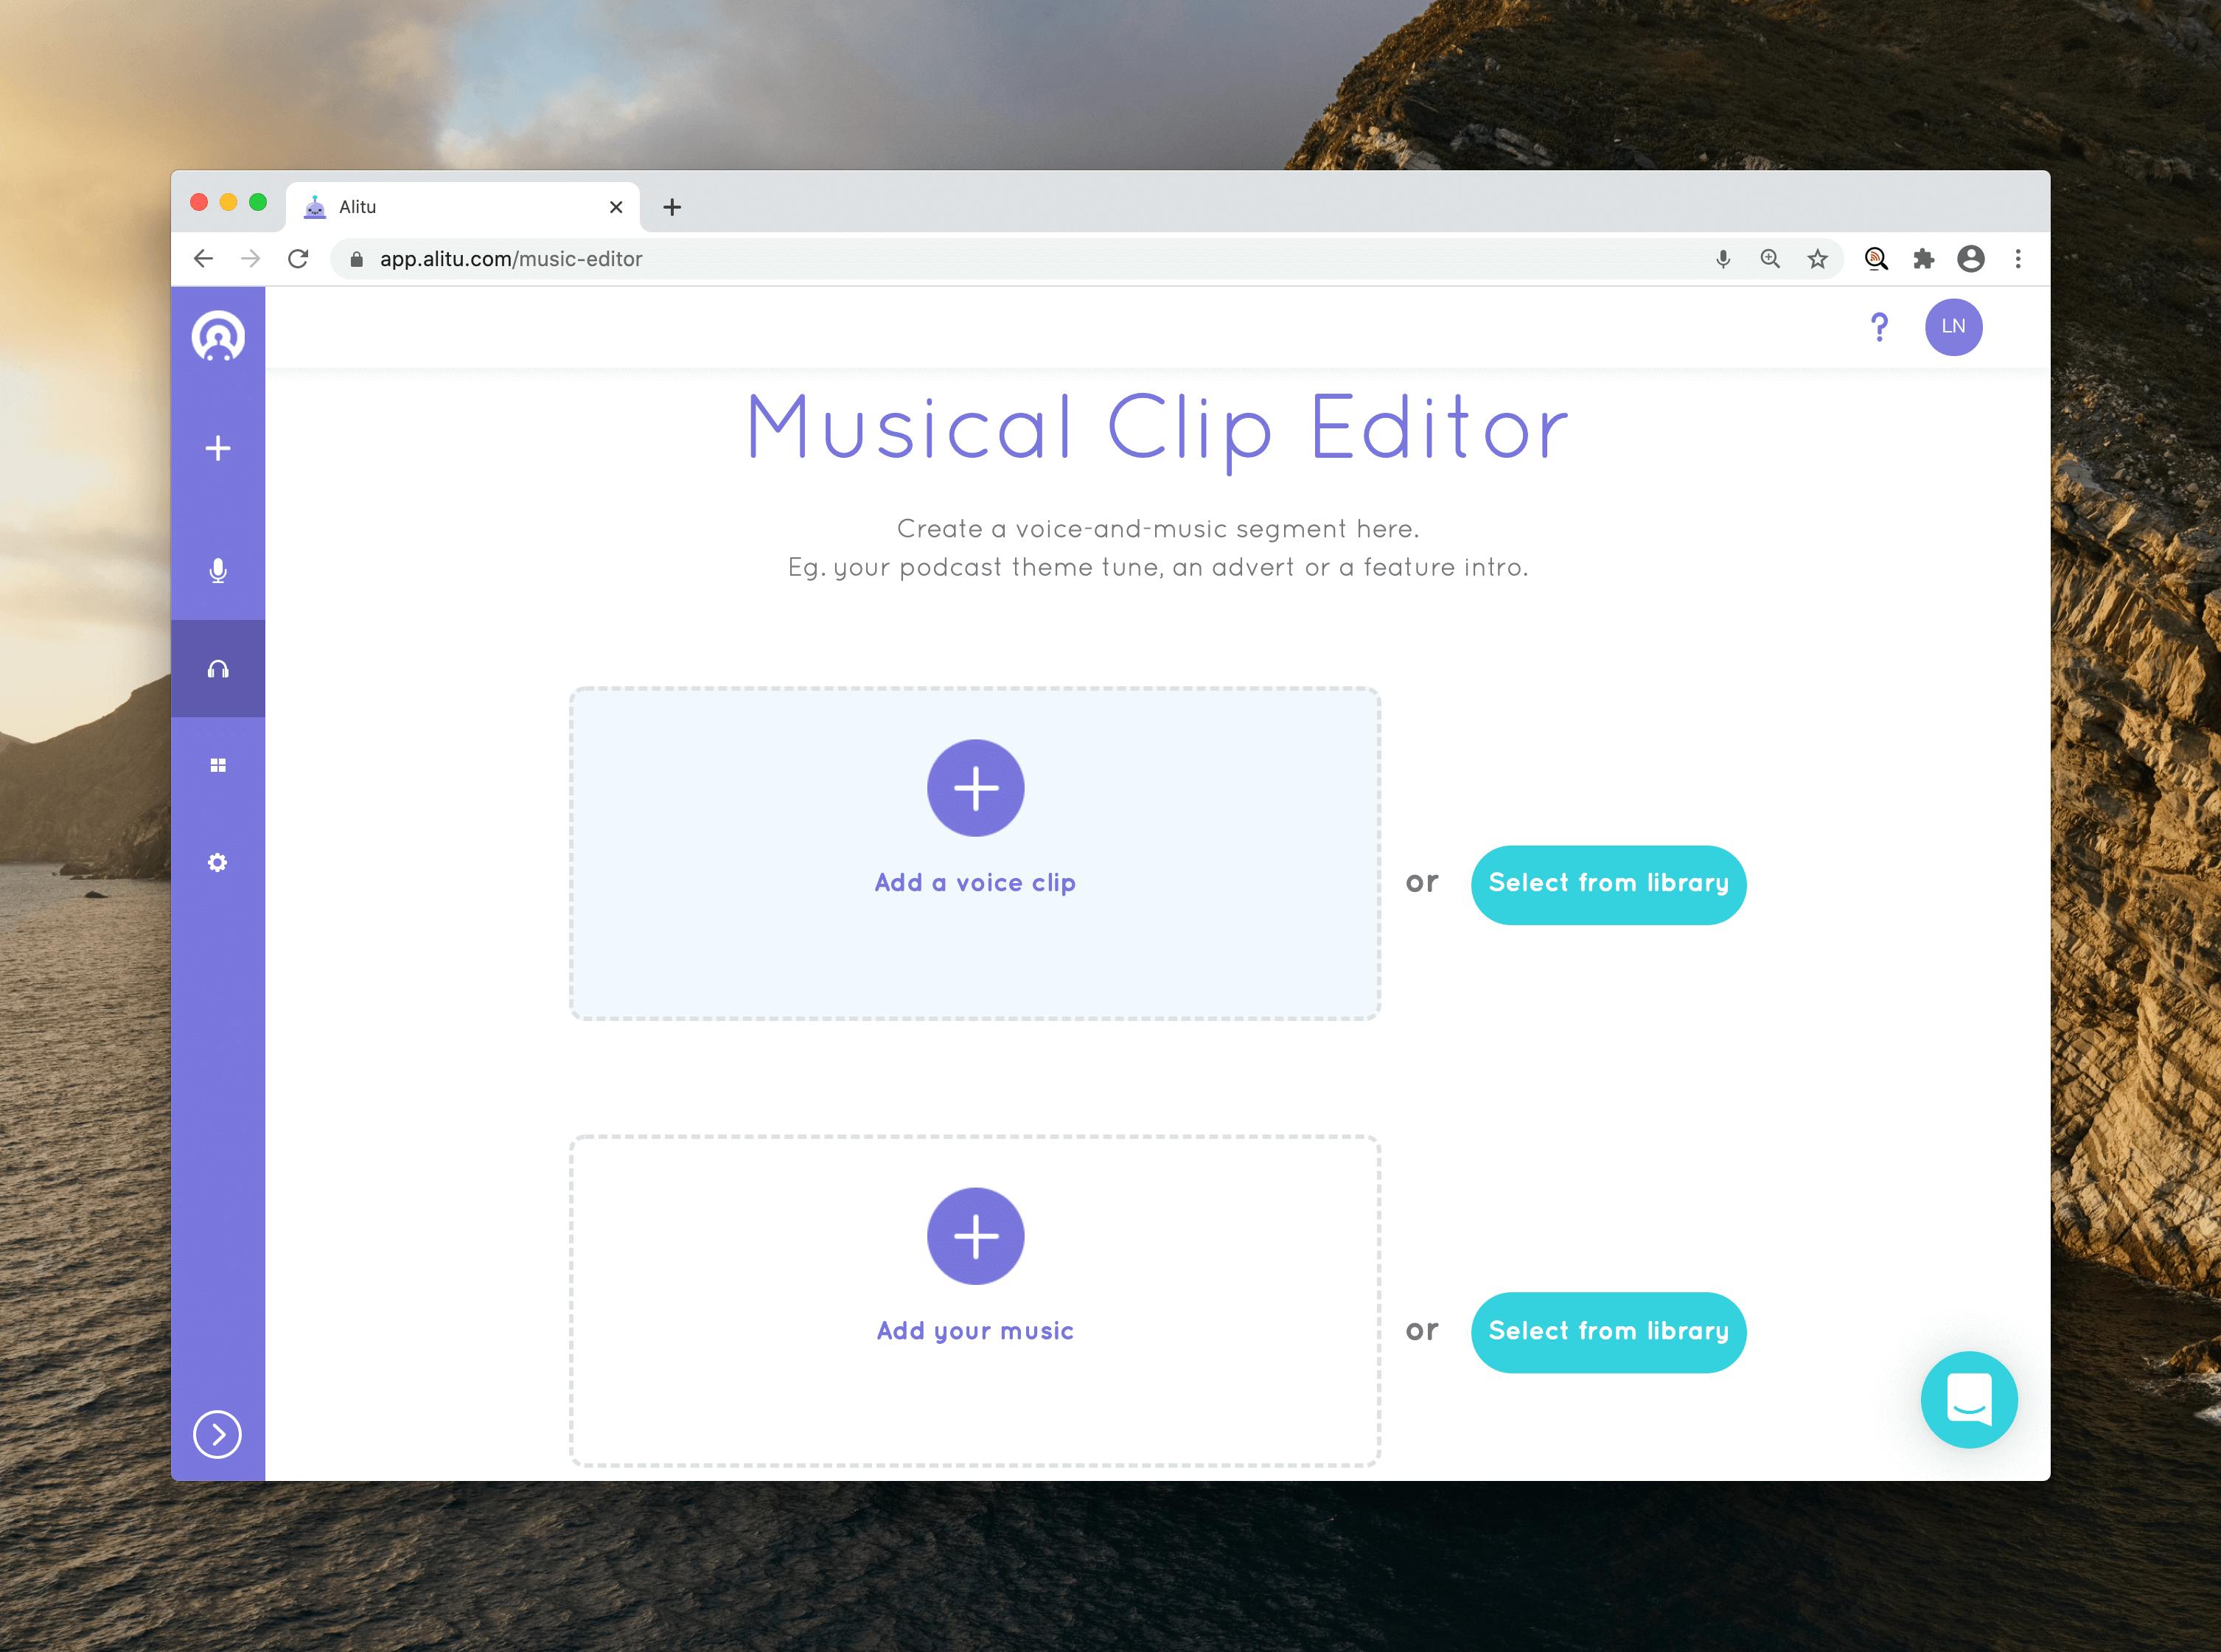
From here, you can access the tool's Musical Clip Editor, where you can record intros and voiceovers using royalty-free music from the Alitu Music Library.
The Episode Builder lays out your tracks in a convenient, highly visual format and lets you add tracks and apply transitions with the click of a button.
Whether you record a clip directly into Alitu or upload a prerecorded file, the tool automatically polishes the tracks with dynamic volume leveling and auto-corrections.
Each feature within the tool serves a distinct and useful purpose and works together to create a user interface with all the tools needed to create a polished episode.
Pros of Alitu
✅ Clean, intuitive workspace
✅ Automated audio leveling
✅ Free theme music and effects
✅ Podcast host integration
✅ Tutorials and support services
Cons of Alitu
🆇 Only set up for one input
🆇 Limited editing tools compared to a DAW
As you can tell, Alitu is a simple program, best suited for uncomplicated edits without a ton of creative production — but a lot of solo podcasters find this tool is all they need.
Now that you're familiar with Alitu's interface, let's breakdown how to record, edit, and publish your own podcast with the tool — step by step.
First stage: Recording & processing
Before you start recording, select Add New Episode on your home screen and enter your new episode's ID3 tags (episode title, number, author, etc.).
Once you select Save Details, you can upload prerecorded files, or record a new audio file directly into Alitu; just press Record, choose your input and begin your podcast recording.

Note: Alitu's in-browser recording setup works best for creating short clips, like an ad or an intro. We don't suggest using this built-in recorder as your primary podcast recording tool since it's dependent on the internet (and nothing going awry with your browser).
Most podcasters prefer to record episodes with software like GarageBand or Audacity, save the file as a WAV, and upload the track to Alitu for production afterward.
If you want to record an episode with a remote cohost or guest, you can record a double-ender with tools like Zencastr or Squadcast. You can also record a Zoom call from your phone or laptop, download the WAV file, and upload it to Alitu for edits.
If you upload two separate files from a double-ender tool, Alitu will optimize the audio files separately and merge them automatically. If you upload a split stereo audio file (one voice on the left channel and one on the right), the tool corrects the audio separately and merges them to mono.
Once you record or upload your tracks, use the drop-down menu to choose the kind of file it is (music, voice, teaser, advertisement, or transition) and select Upload.
Unless you tell it otherwise, Alitu automatically cleans up your audio levels, including noise reduction, loudness, hum, and background noise correction.
Once you've recorded your tracks, you're ready to start podcast production within the Episode Builder.
Stage two: Building the episode
Alitu's clean workspace and straightforward tools make the audio-editing process pretty close to fool-proof.
You can upload your episode's audio files from your library and drag and drop the clips to arrange them within the workspace.
Select the plus sign to insert a new track to your episode; this uncomplicated track insertion feature makes it easy to add advertisements and additional segments to your content.
Apply a fade between files by pressing the arrow icon; the tool automatically adds the fades and creates a smooth transition between clips.
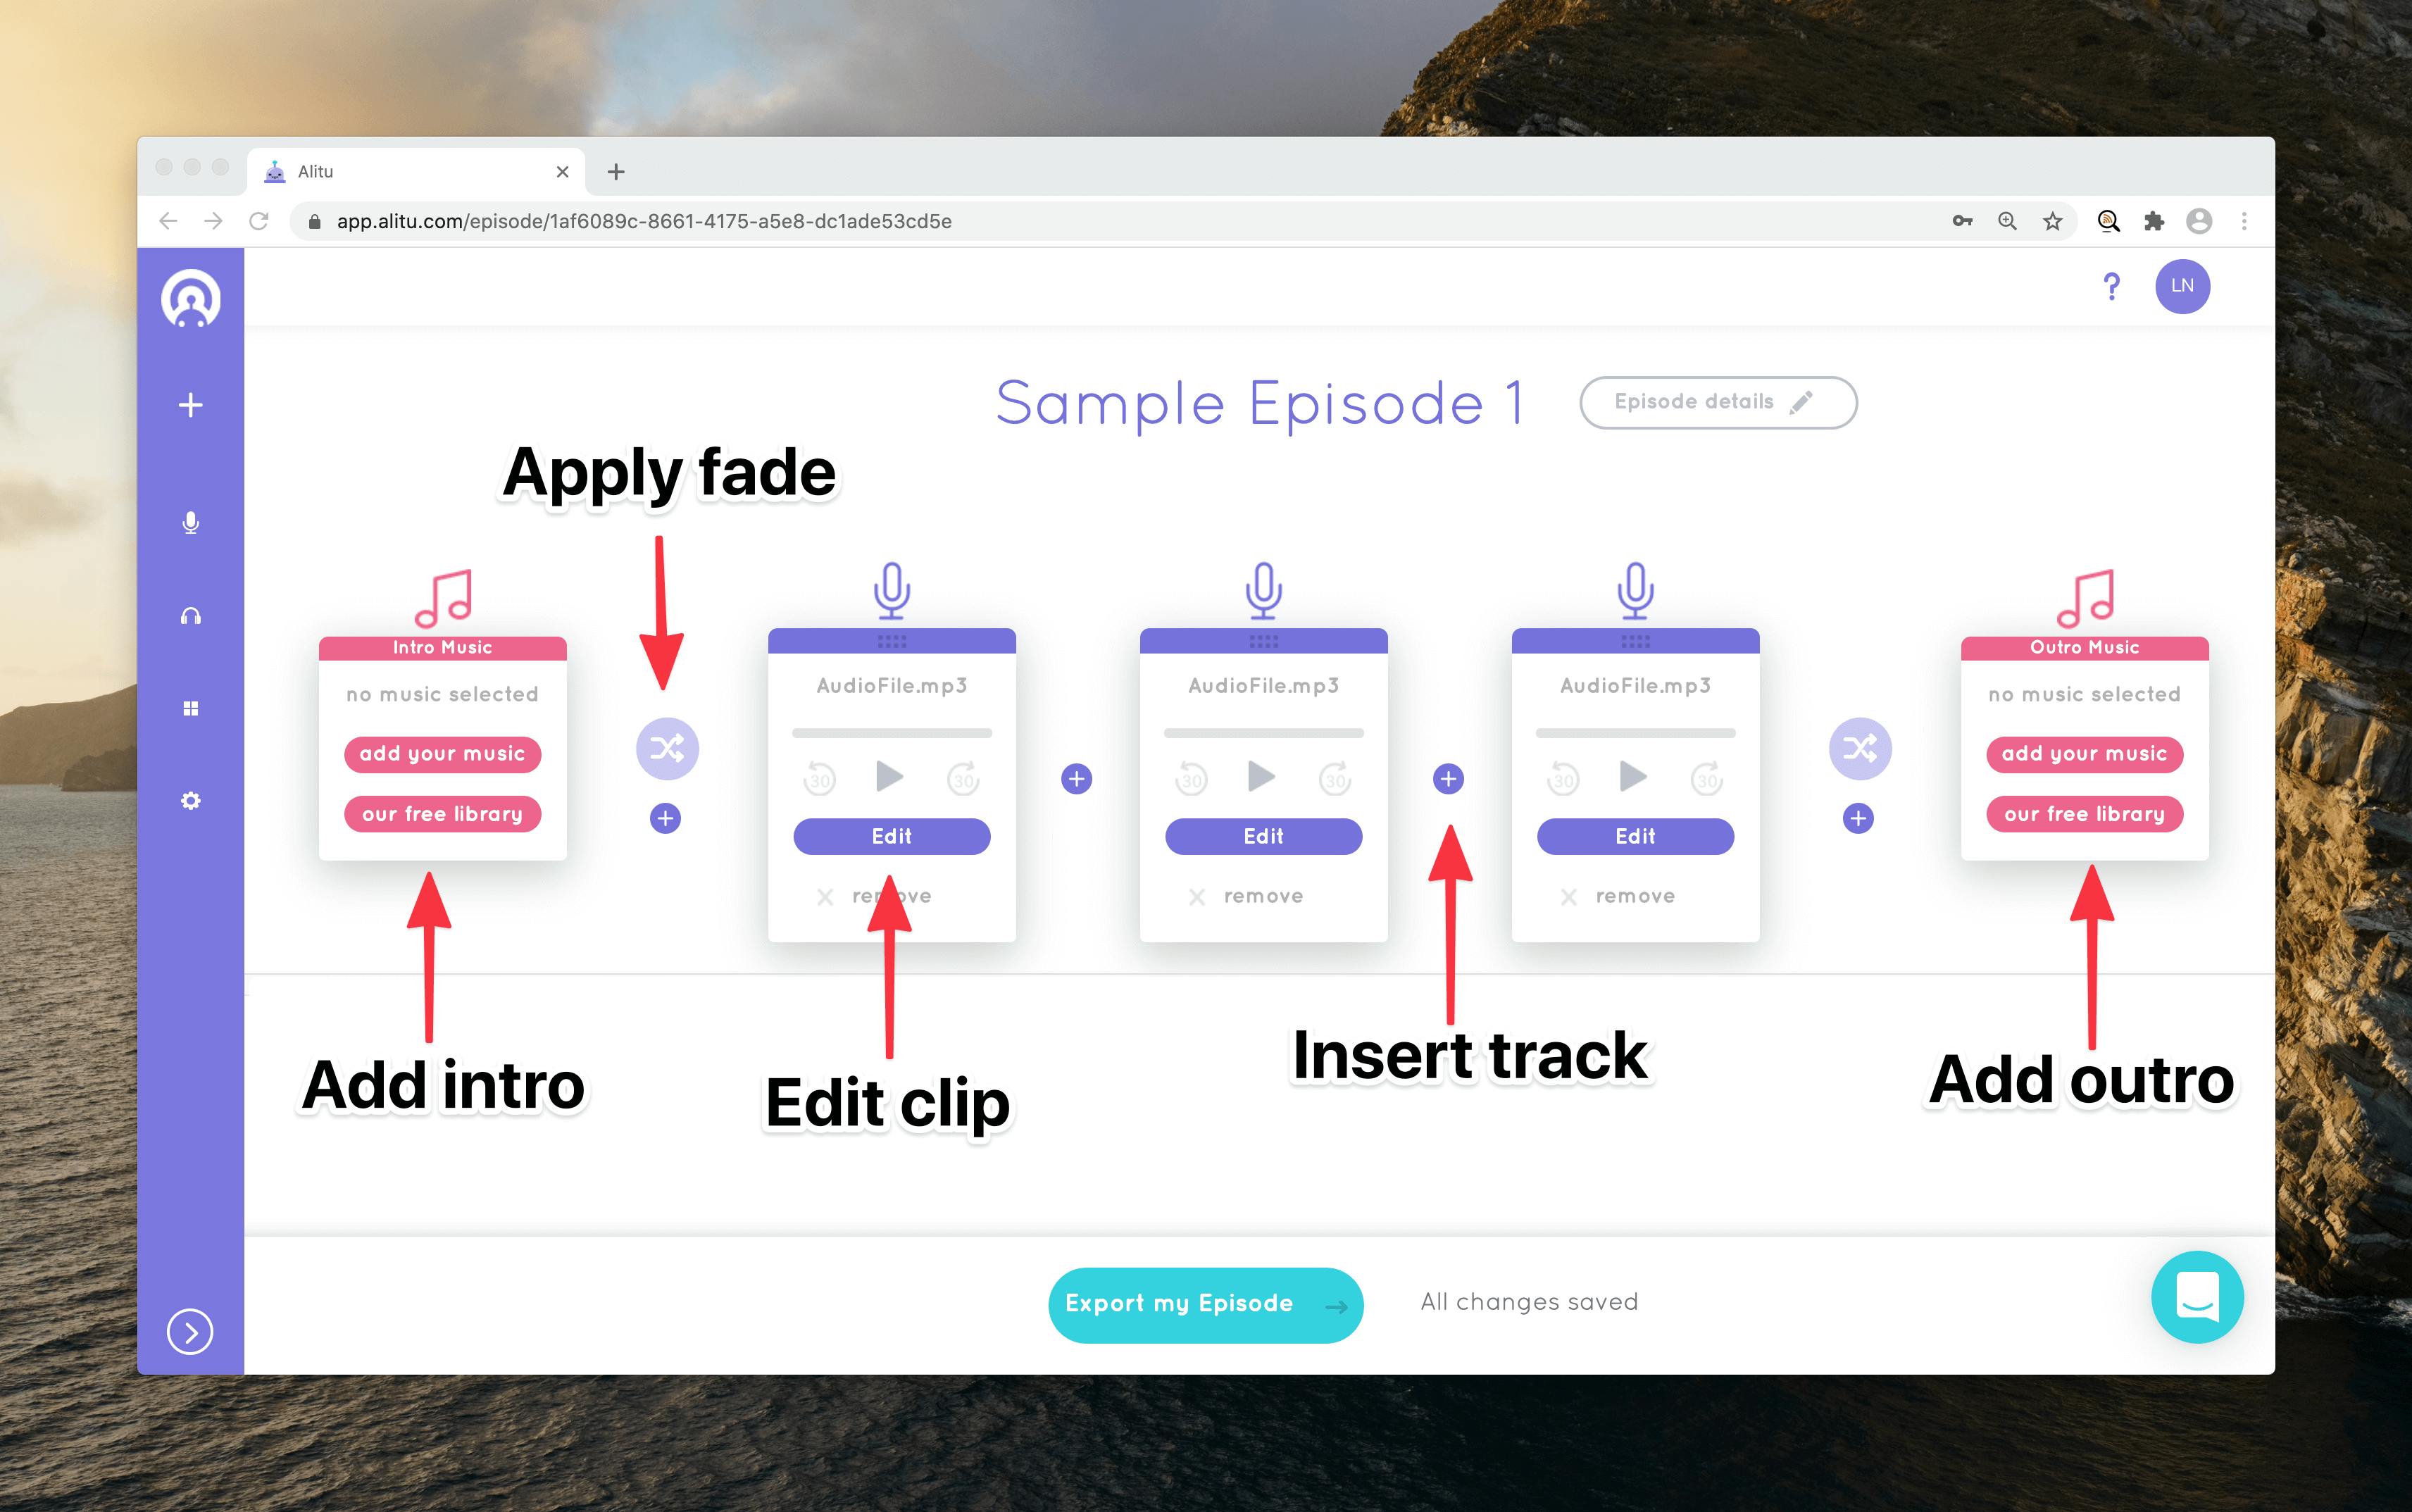
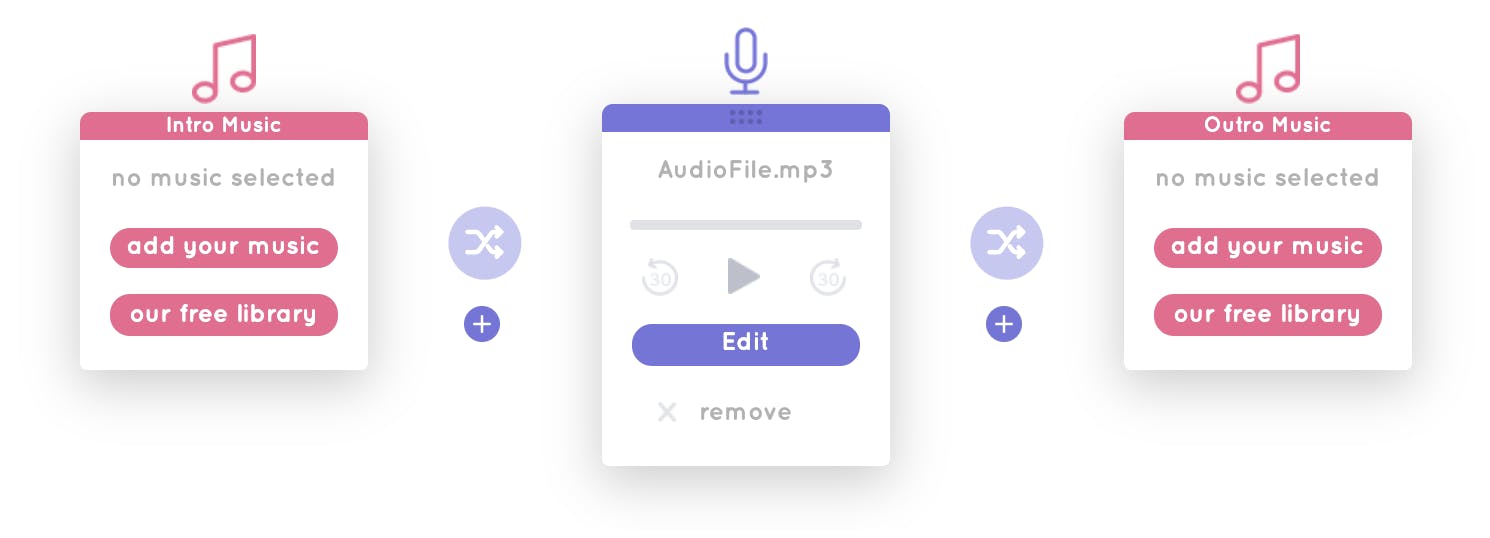
When you upload a track to an episode, Alitu automatically inserts an empty intro and outro segment, so all you have to do is select the theme music you want to bookend your voice tracks and record a voiceover to lay on top.
To create voiceover ads, segments, or intros with background music, choose a track from Alitu's Music Library and compose your clip using the Music Clip Editor.

Upload your theme music and voice recording, trim clips if needed, and save the file to your library.
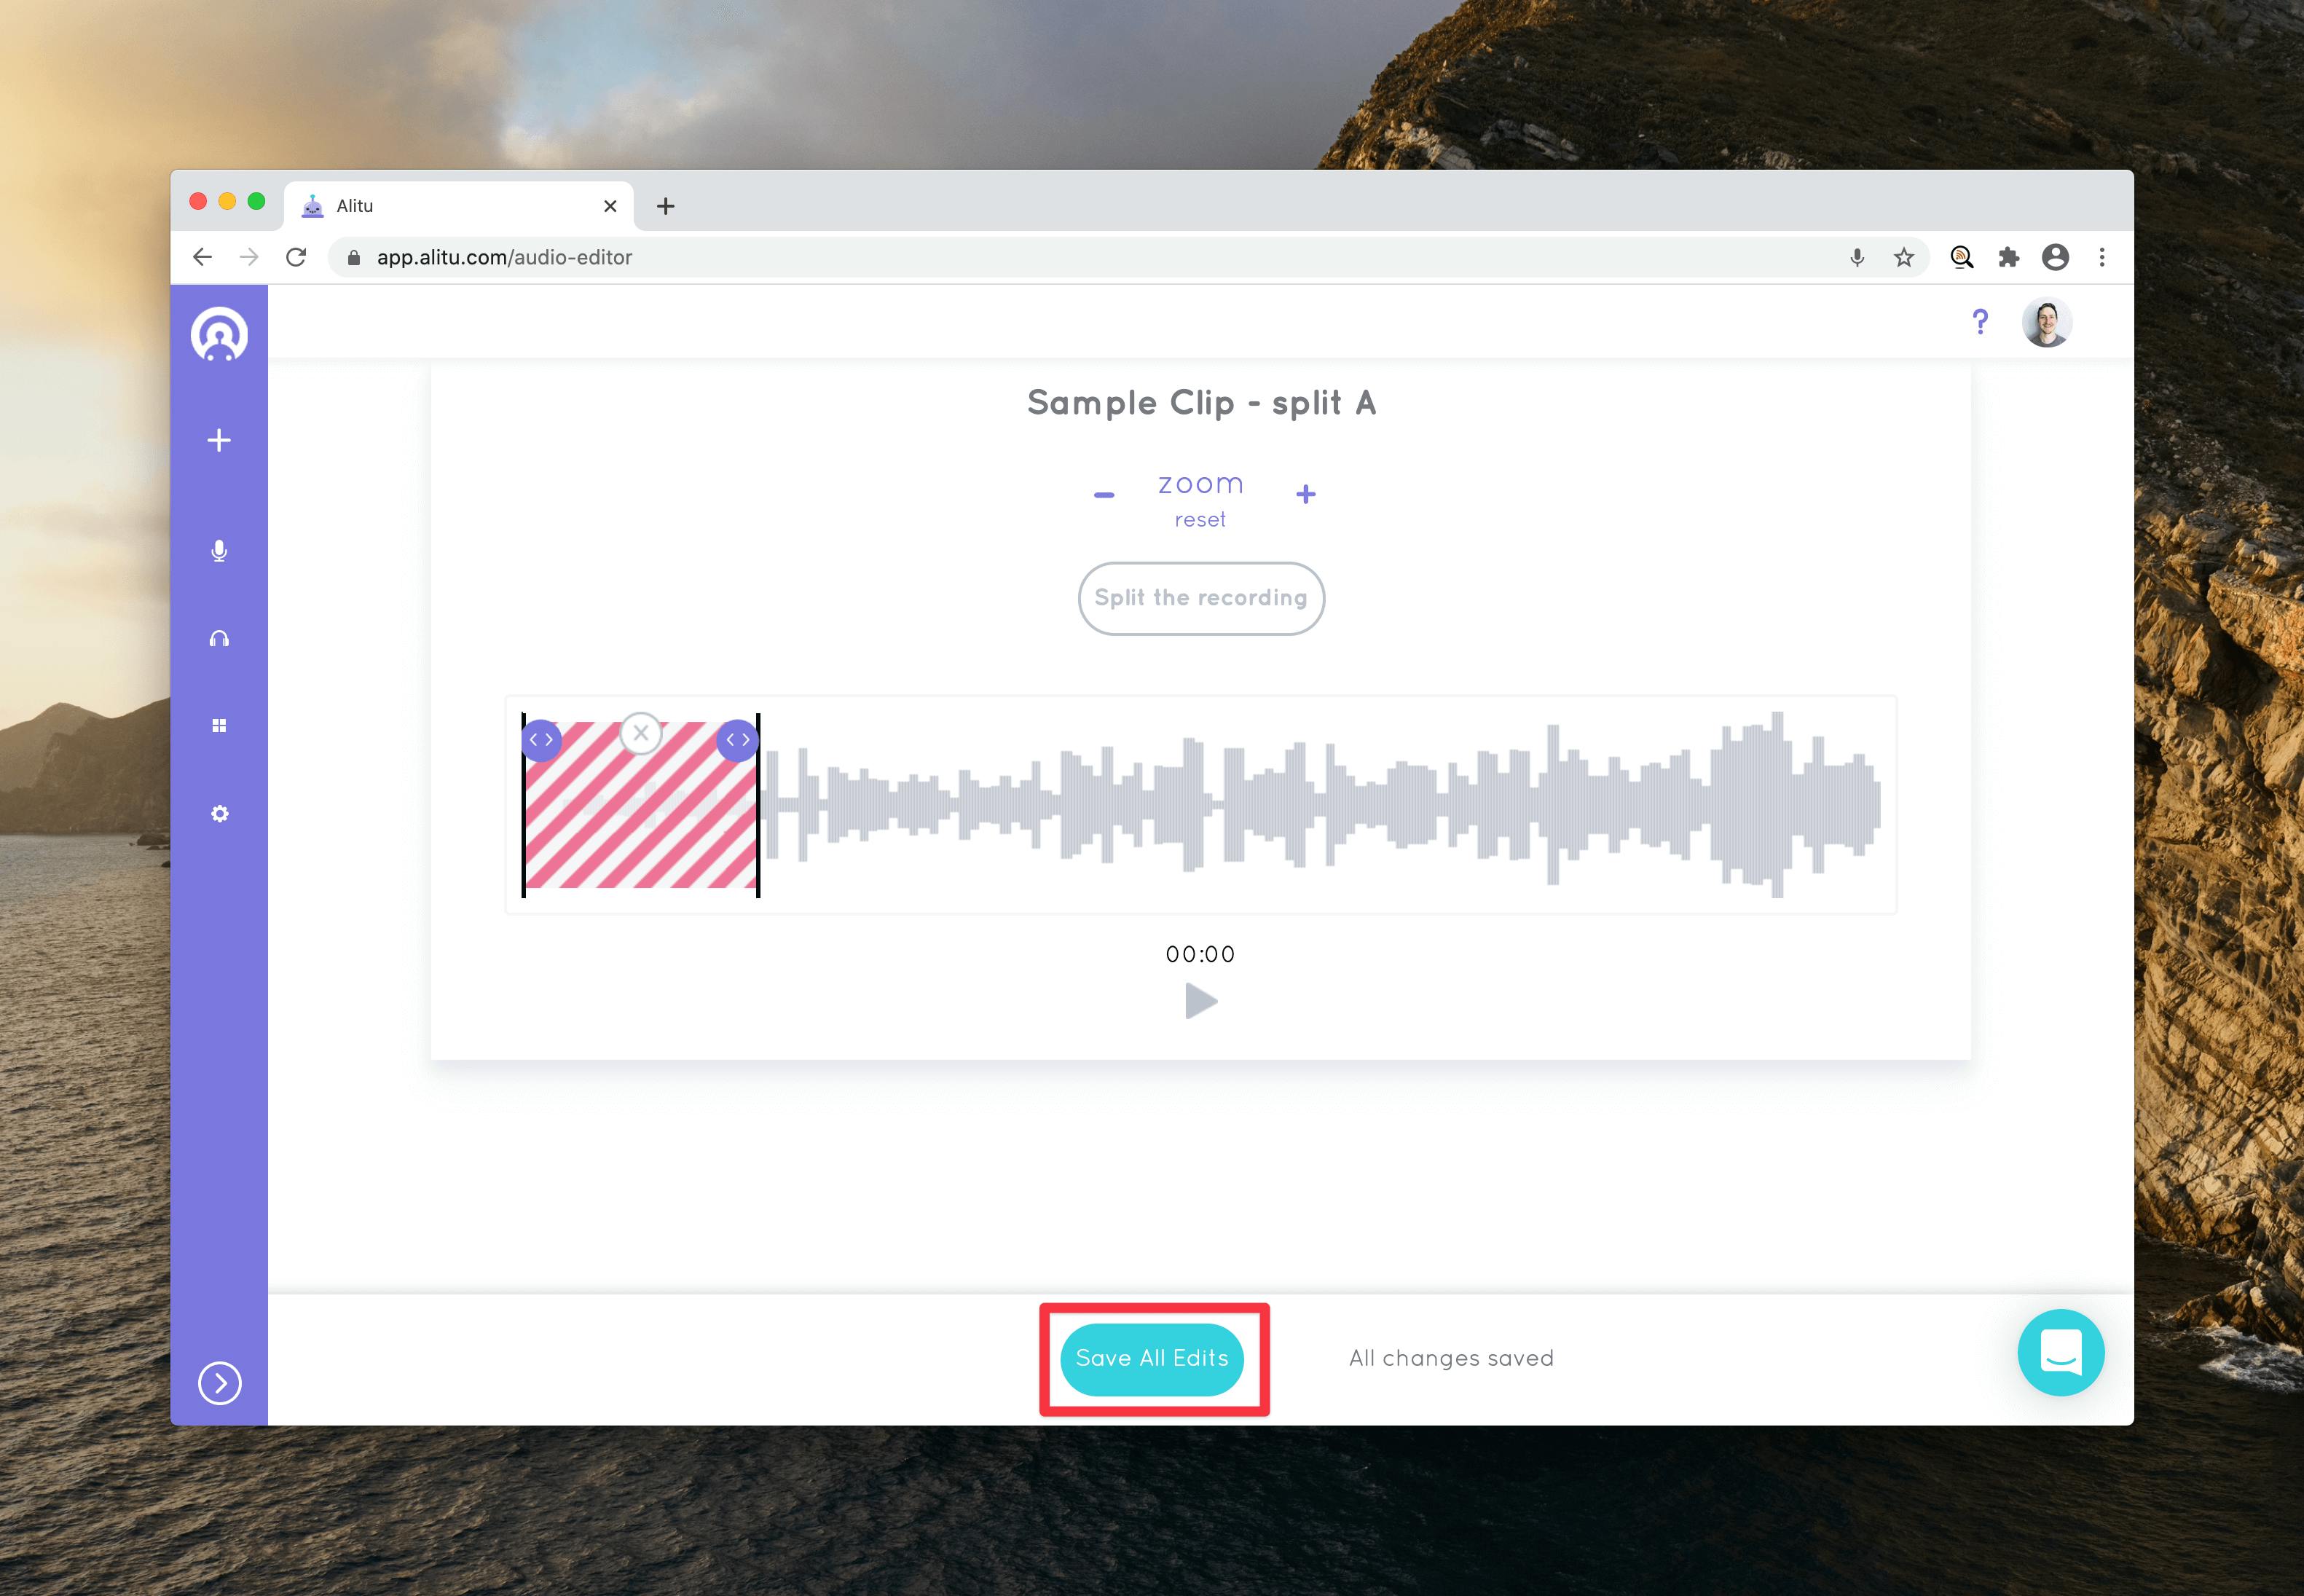
Select Edit on a clip to open the audio editor for that individual track; you can split a clip by dragging your cursor to highlight the unwanted portion and select Split Clip.
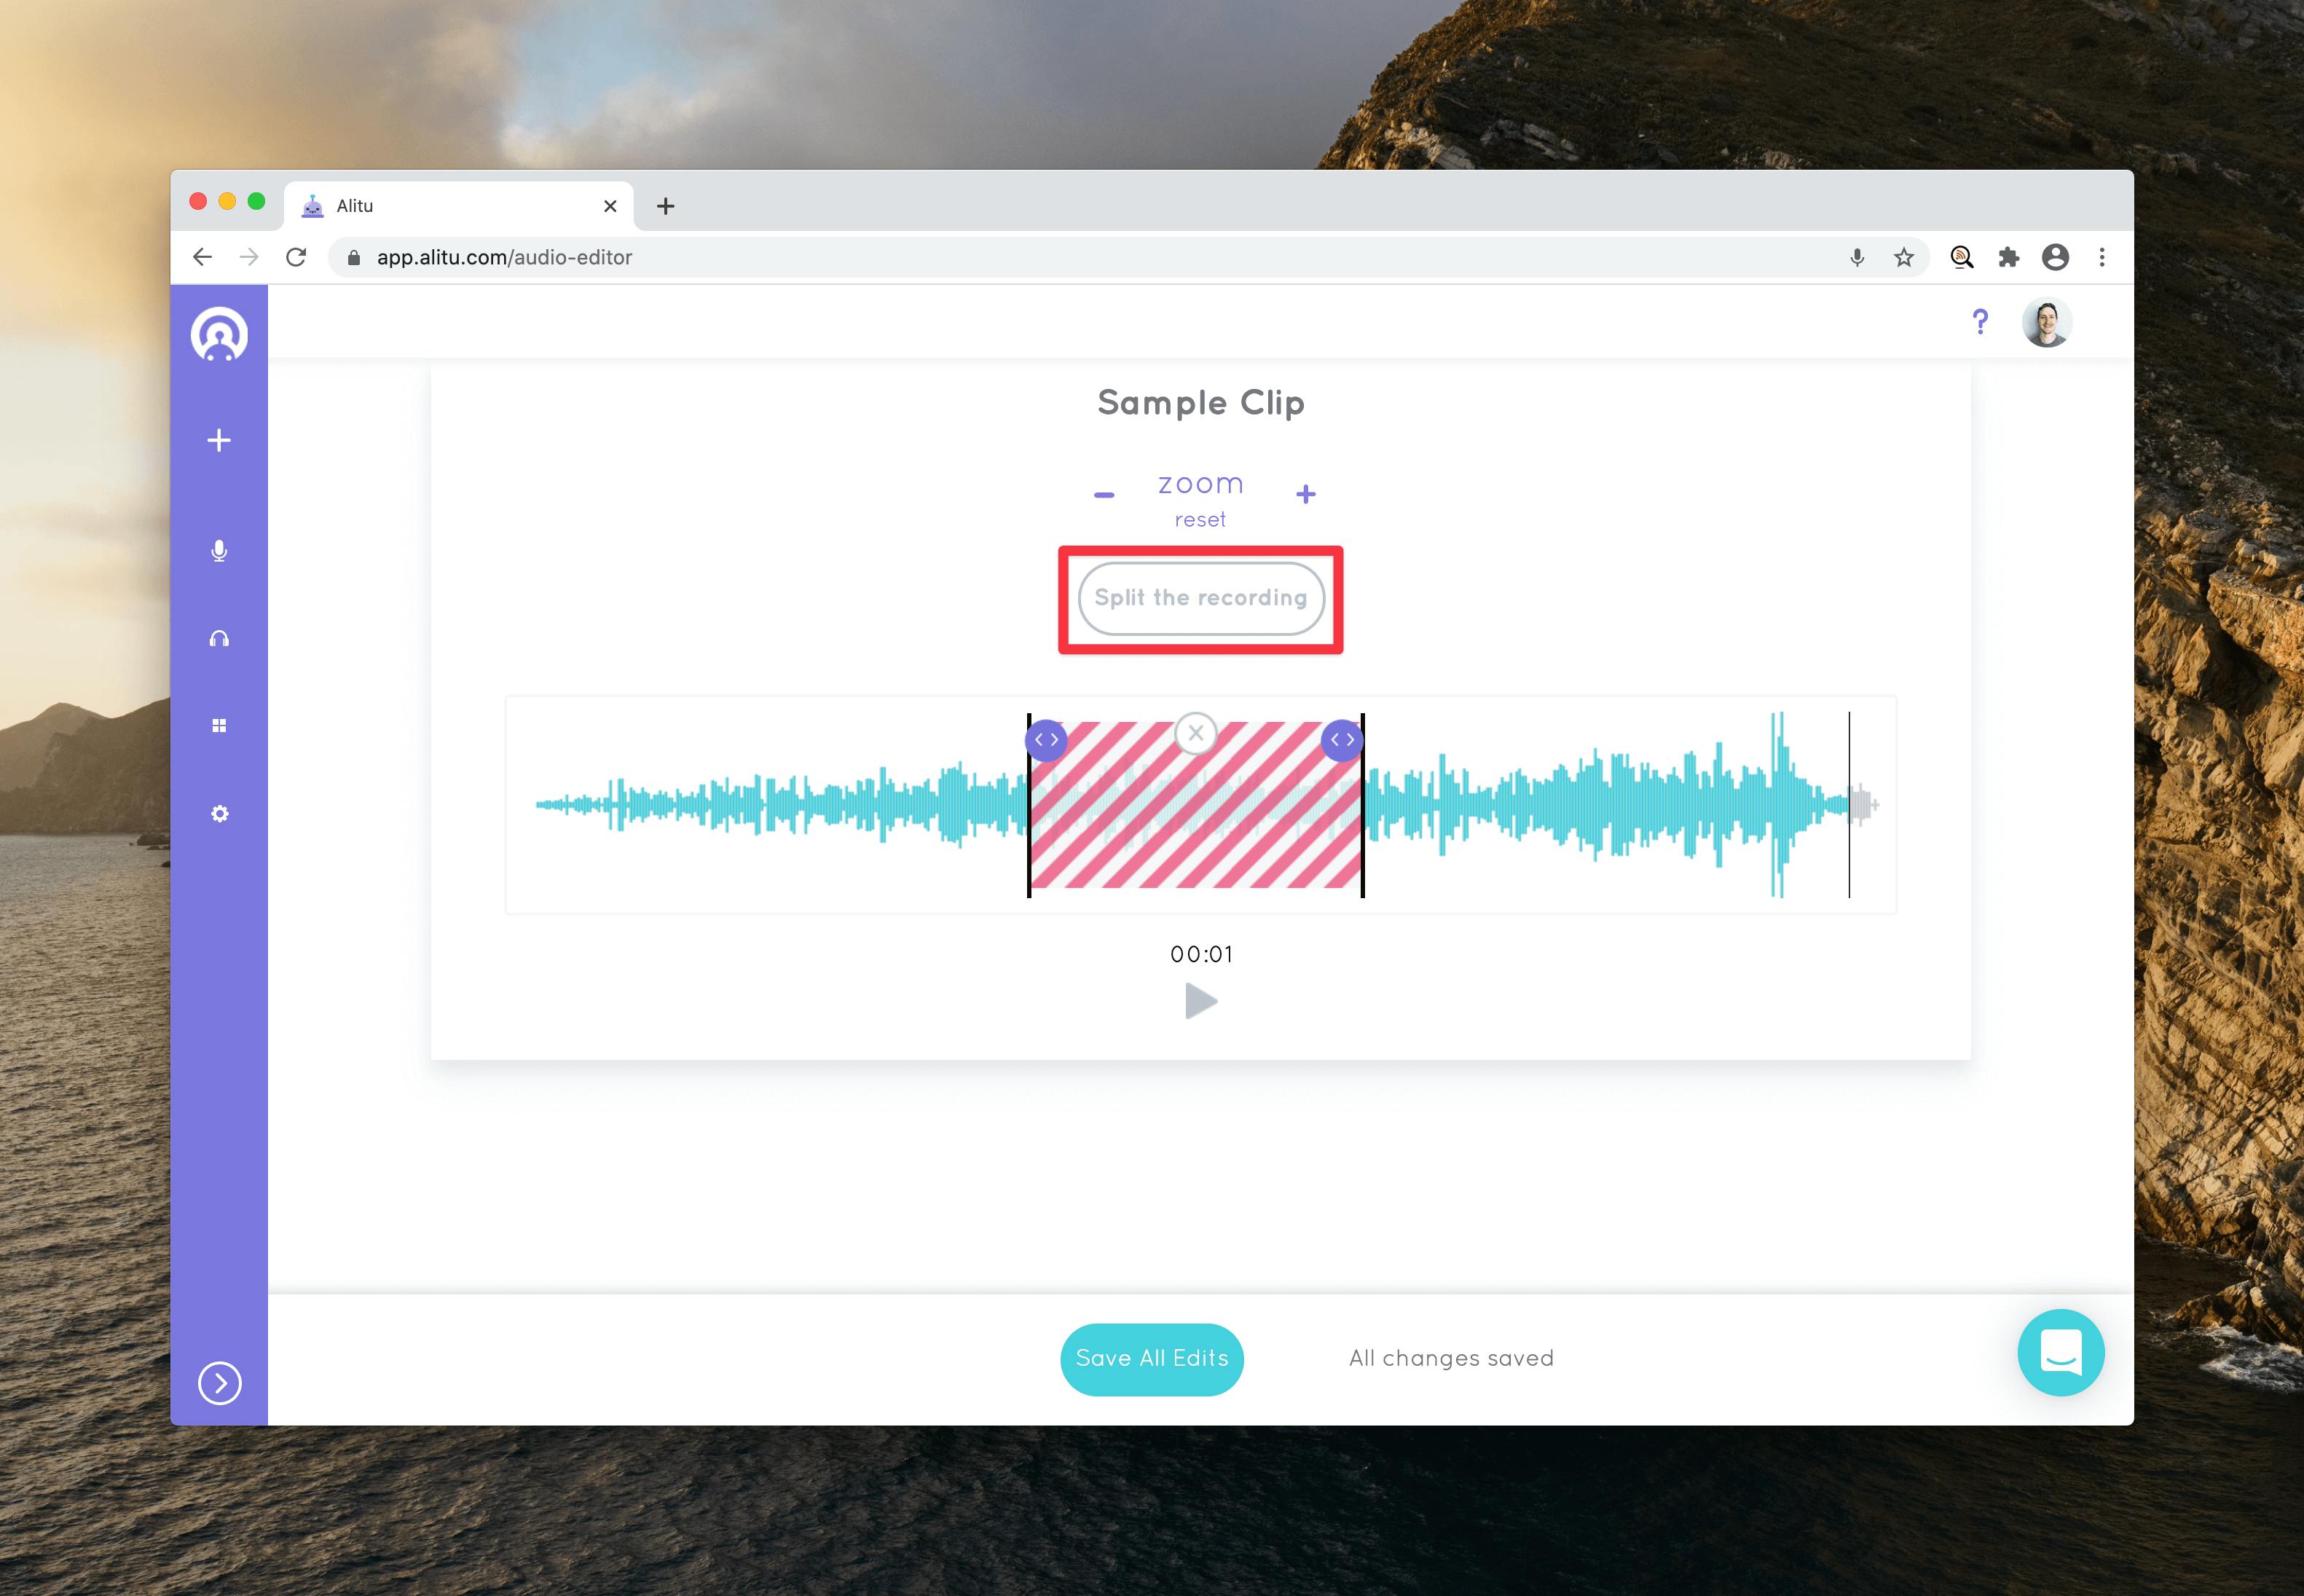
To trim a track or take out a mistake from your audio, highlight the portion of audio you want to delete and Save All Edits to apply the changes.
When you finish editing your podcast audio, select Export within the Episode Builder and wait for Alitu to process your content — this can take up to 15 minutes depending on the length of your audio files.
Once your episode finishes processing, it's time to publish your final recording.
Third stage: Publishing your complete podcast episode
You can find your fully processed podcast episode on your home screen. Select Preview and Publish to review the finished product and make any final adjustments to your file.
Alitu lets you download the finished file as an MP3 or publish directly to one of their six, integrated podcast hosting platforms:
- Buzzsprout
- Blubrry
- Libsyn
- Spreaker
- Podbean
- Captivate

You can also download a video (MP4) waveform of your episode to upload to social media as a piece of visual content for your followers.

Select Set Up Podcast Hosting for directions on linking your hosting service with Alitu to make future publishing more streamlined.
Buzzsprout integration
To publish your episode to Buzzsprout, log in to your account and select My Profile > API to grab your API credentials.
Copy your API Token and Podcast ID, and paste it into Alitu's required fields so the tool can integrate with your Buzzsprout account.
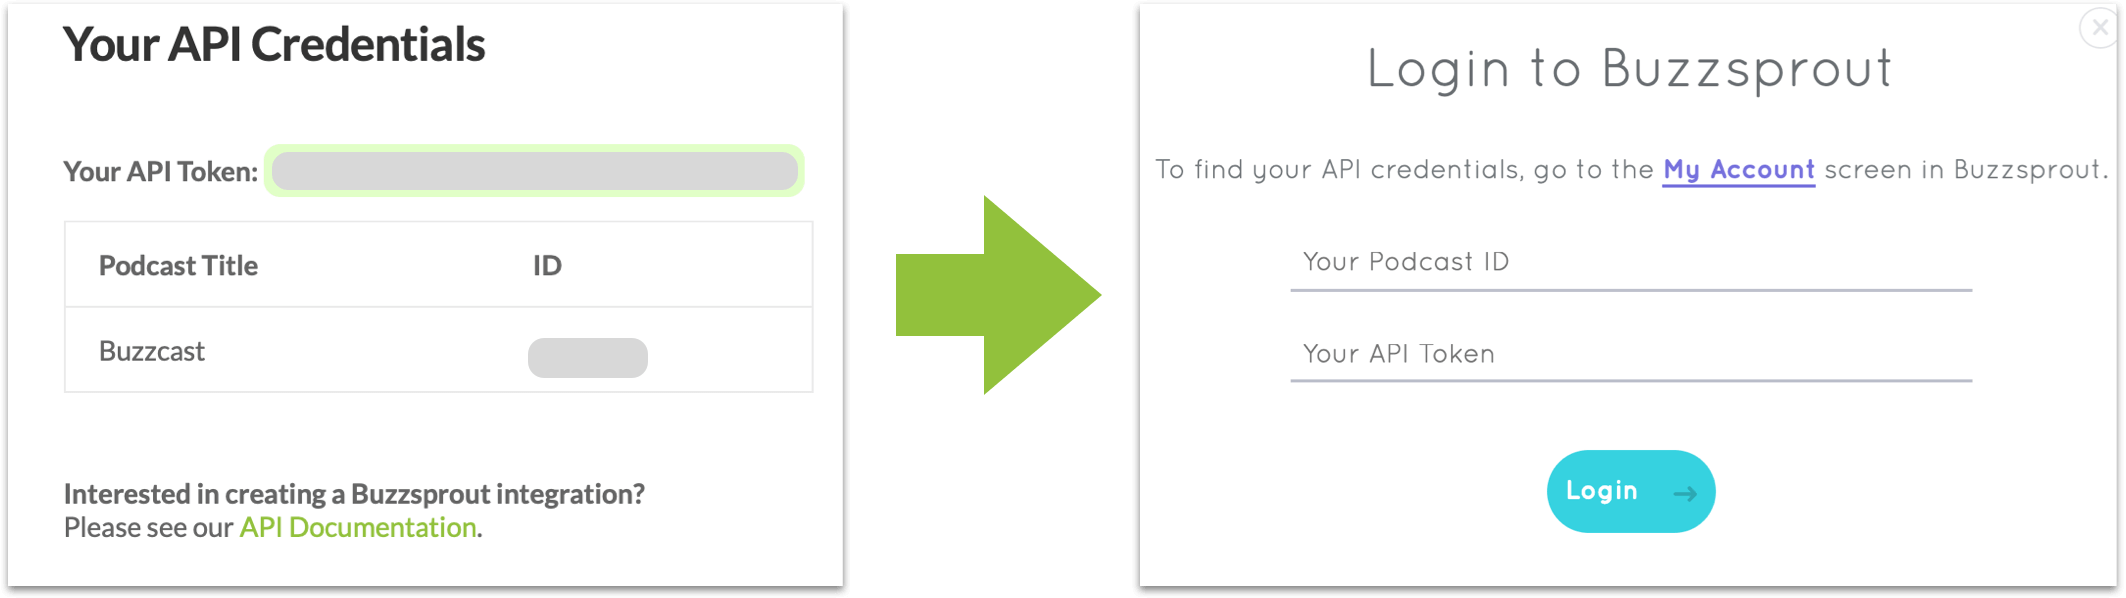
That's it! Now Alitu can send your episodes directly to Buzzsprout, and they'll automatically appear in your account when you publish future content.
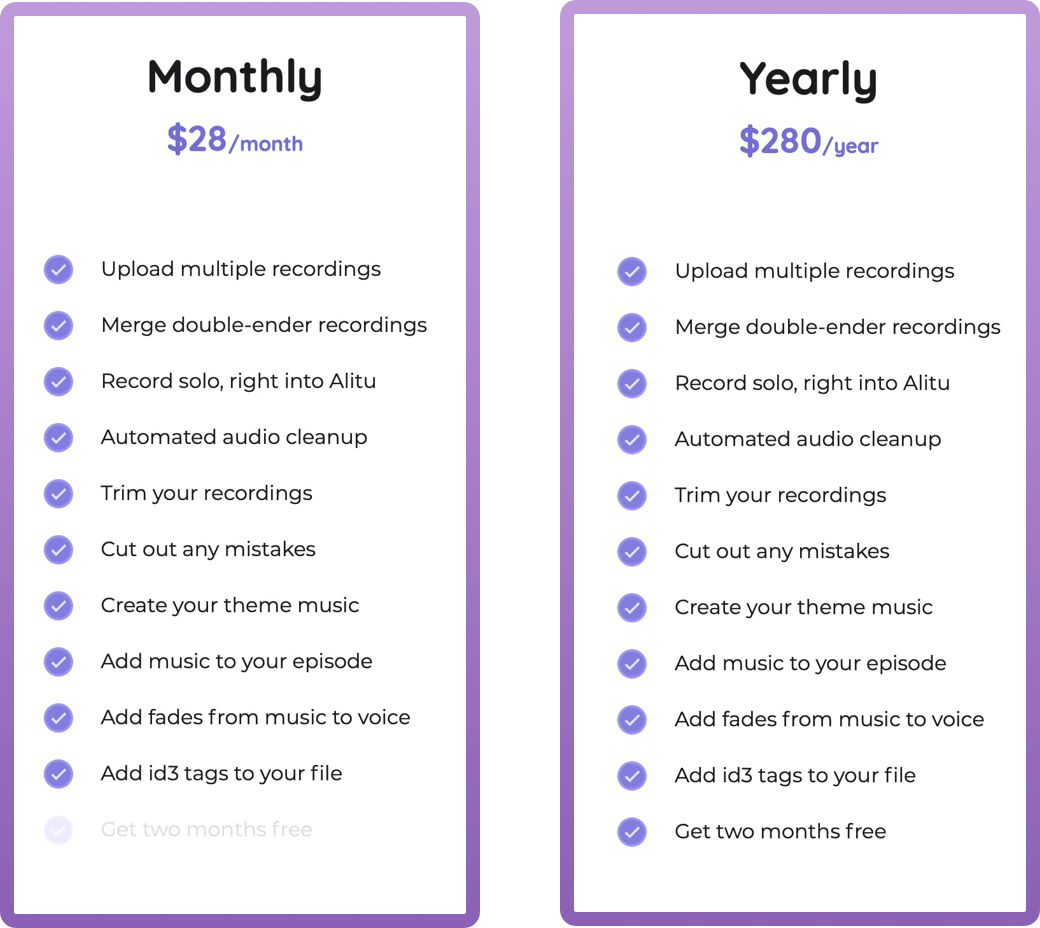
Pricing and plans
In keeping with the simplicity of the tool, Alitu offers one universal plan with monthly or yearly payment; the annual plan gets you two months of the service for free, but all the features are the same.
Sign up for a free, seven-day trial of Alitu to experiment with the tool and see what you think!
Conclusion
Alitu takes care of the technical side of audio editing so you can focus on the basic building blocks of your episode's composition and structure.
So, if you're a solo podcaster looking to spend more time on your show's content and less time editing it, Alitu could be a welcome addition to your workflow.
Check out Alitu creator Colin Gray's YouTube channel for a full guide to recording and editing with the tool!