How to Use the Compressor in Audacity
Compression is a useful tool to reduce the dynamic range in your audio files so the overall volume level is even throughout the episode.
Without compression, parts of the audio might be blaring loud intro followed by low volume listeners can barely hear.
In this tutorial, you'll learn how to apply the compression effect to your Audacity files, so the audio sounds even and easy on your listener's ears.
JUMP TO A SECTION:
When should you use audio compression?
Nearly all audio recordings have portions with vocals that are either too quiet or far too loud. Sometimes podcasters record a voiceover that is much louder compared to their interview track, or outro, for instance.
Adding compression in this scenario will make the volume of the voice-over stay within the dynamic range of other clips within the episode. Now that you have an idea of when to use the effect, let's look at how to apply it.
Applying the Audacity Compressor effect
To apply compression to your clips, first select the audio where you want to apply the effect.
You can press the Select button on the left of the track to select a portion of the waveform or use the keyboard shortcut Cmd + A to select all the audio tracks.
From there, go up to the Effects menu > Compressor.
Here, Audacity gives you several levers you can pull to hone your compression. We'll break down each of these options.
The line graph
When you open the Compression window, you'll see a blue line graph depicting the dynamic range compression effect.
The graph line only changes as you adjust the Threshold and Ratio. It won't reflect the changes you make with any of the other levers.
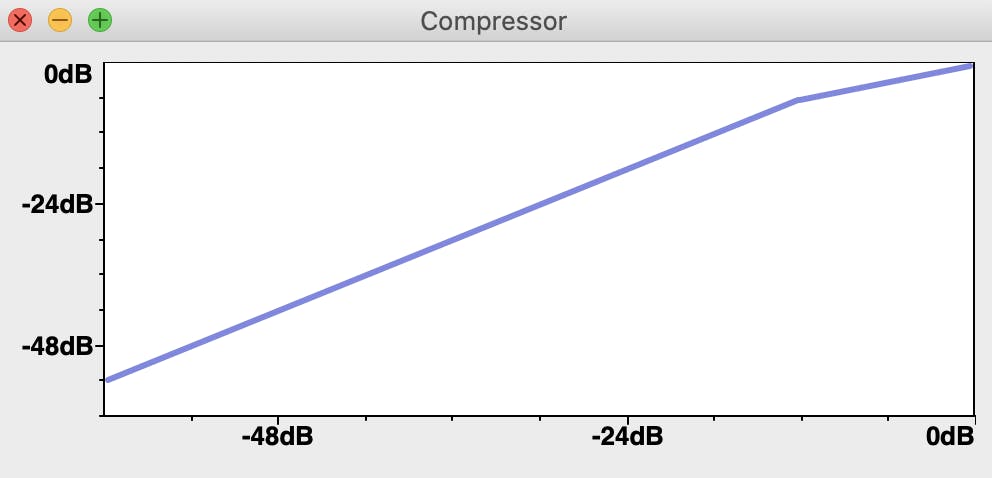
The horizontal axis at the bottom shows the input dB level, and the left vertical axis shows the output dB level.
Compressor settings
Adding the Compressor effect requires some tweaking to get just right. Having an understanding of these settings can help.
Threshold
The Threshold is where you want Audacity to apply compression. Compression happens to the loudest parts of our audio.
Selecting -12 dB means any parts of your audio that are louder than -12 will get compressed. We suggest leaving the Threshold at -12 dB.
Noise Floor
Adjusting the Noise Floor lets Audacity tell the difference between when you're speaking and when there are gaps in your words or silent parts of your audio.
This setting prevents Audacity from taking the wrong portions of audio and boosting it by accident.
Ratio
The Ratio determines how much you want Audacity to compress your audio.
Be conservation here. Setting the ratio too high will make the audio sound over-compressed and monotone.
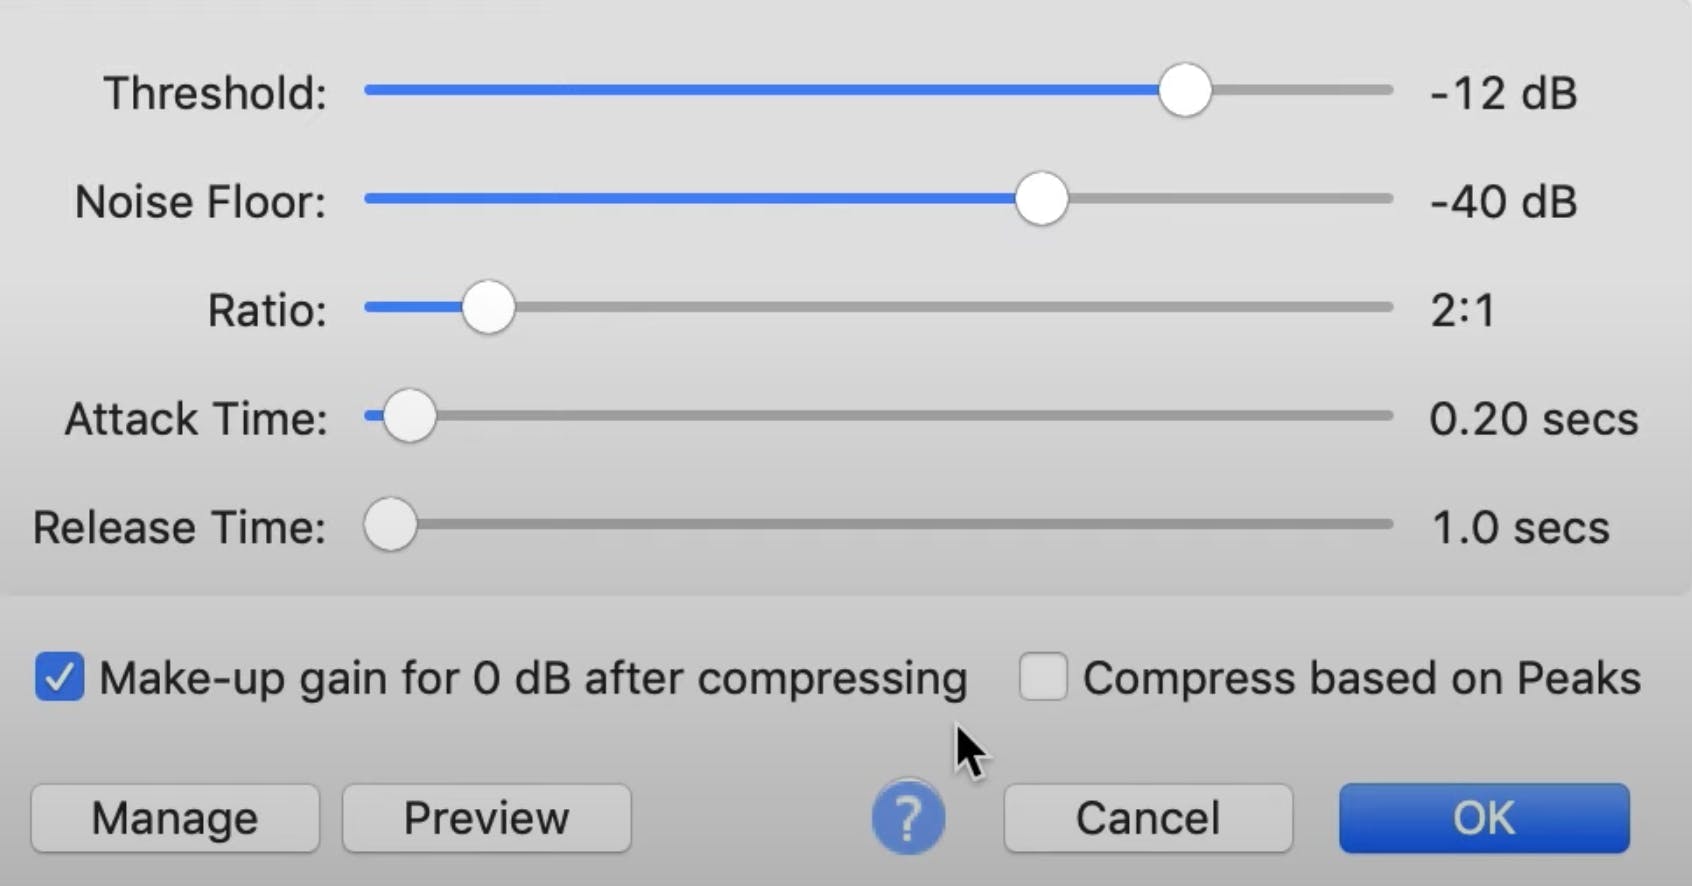
Attack Time and Release Time
Attack and release time are similar but serve very different purposes.
The Attack Time refers to how quickly you want Audacity to respond to changes in volume.
The Release Time tells Audacity how long you want it to compress the audio.
Attack Time tells Audacity to start applying compression, and Release Time tells it to stop.
Other Compressor settings
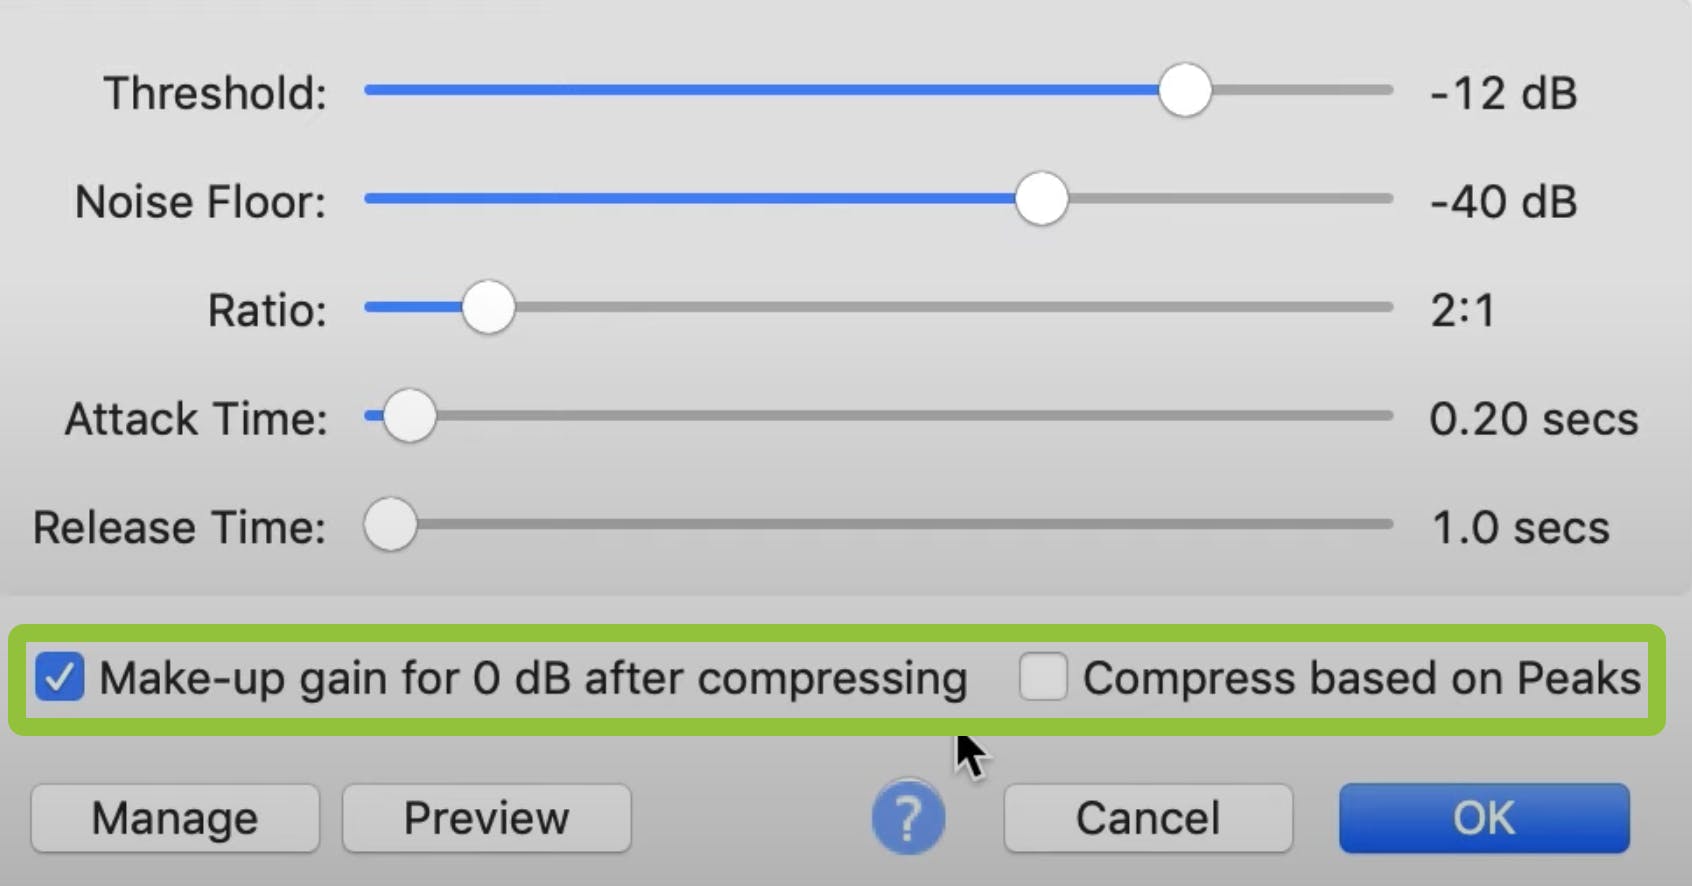
- Make-up gain for 0 dB after compressing. Selecting this box means Audacity will amplify your audio. This amplitude brings the softer parts back up so it's at a listenable, editable level of 0 decibels.
- Compress based on peaks. Here, Audacity looks at the peaks in your audio and uses that value to compress, versus your Threshold floor setting. We suggest leaving this box unchecked.
- Limiter effect. This setting tells Audacity that anything louder than this particular decimal level is not allowed. We don't suggest bothering with this unless you're having issues with clipping (audio distortion).
How to avoid over-compressing
Compression should make your audio sound more even and professional.
But if your final product sounds distorted, too loud, and harsh, you might have overdone the effect. If portions of the audio are too quiet, you might not have added enough of the effect.
It can help to save your original audio file so you can compare it to the final product. Like editing a photo or video, hearing the raw original can help you discern the final product's quality.
Alternative compressor: If you want to try your hand at a different kind of Compressor, Chris's Dynamic Compressor is a free compressor plug-in that helps to even out abrupt changes. You can download the Compressor and watch this tutorial to learn how to use the tool.
Preview your settings
To preview your audio, click the Preview button to listen to six seconds of playback. If you're happy with the amount of compression, click OK.
Now, Audacity will analyze your file and apply your compression settings. It will apply gain reduction to loud parts and amplification to others to even out the overall volume level and give you a well-rounded file!
More Audacity tutorials
Compression is an important effect for podcasters to know how to use, and adding the effect is an easy way to make your episodes sound more professional.
Audacity is an excellent audio editing tool widely used by beginner and seasoned podcasters. These guides can help you get more comfortable using the tool!

Alban Brooke
Alban Brooke is the Head of Marketing at Buzzsprout and the co-host of Buzzcast. Have any questions about this guide? Reach out on Twitter.